Equipment
Building a home hitting net and simulator
Golf and winter don’t get along very well, which is why so many golfers head indoors to practice facilities that offer year-round climate-controlled environments. The problem for many is these facilities can be busy and often require booking well in advance, which doesn’t work well for those seeking last-minute “driving range” flexibility.
So what is a diehard golfer to do? Build your own home hitting bay/simulator of course, and in my case build it on a budget to offer fun and flexibility all winter long.
Finding the right space

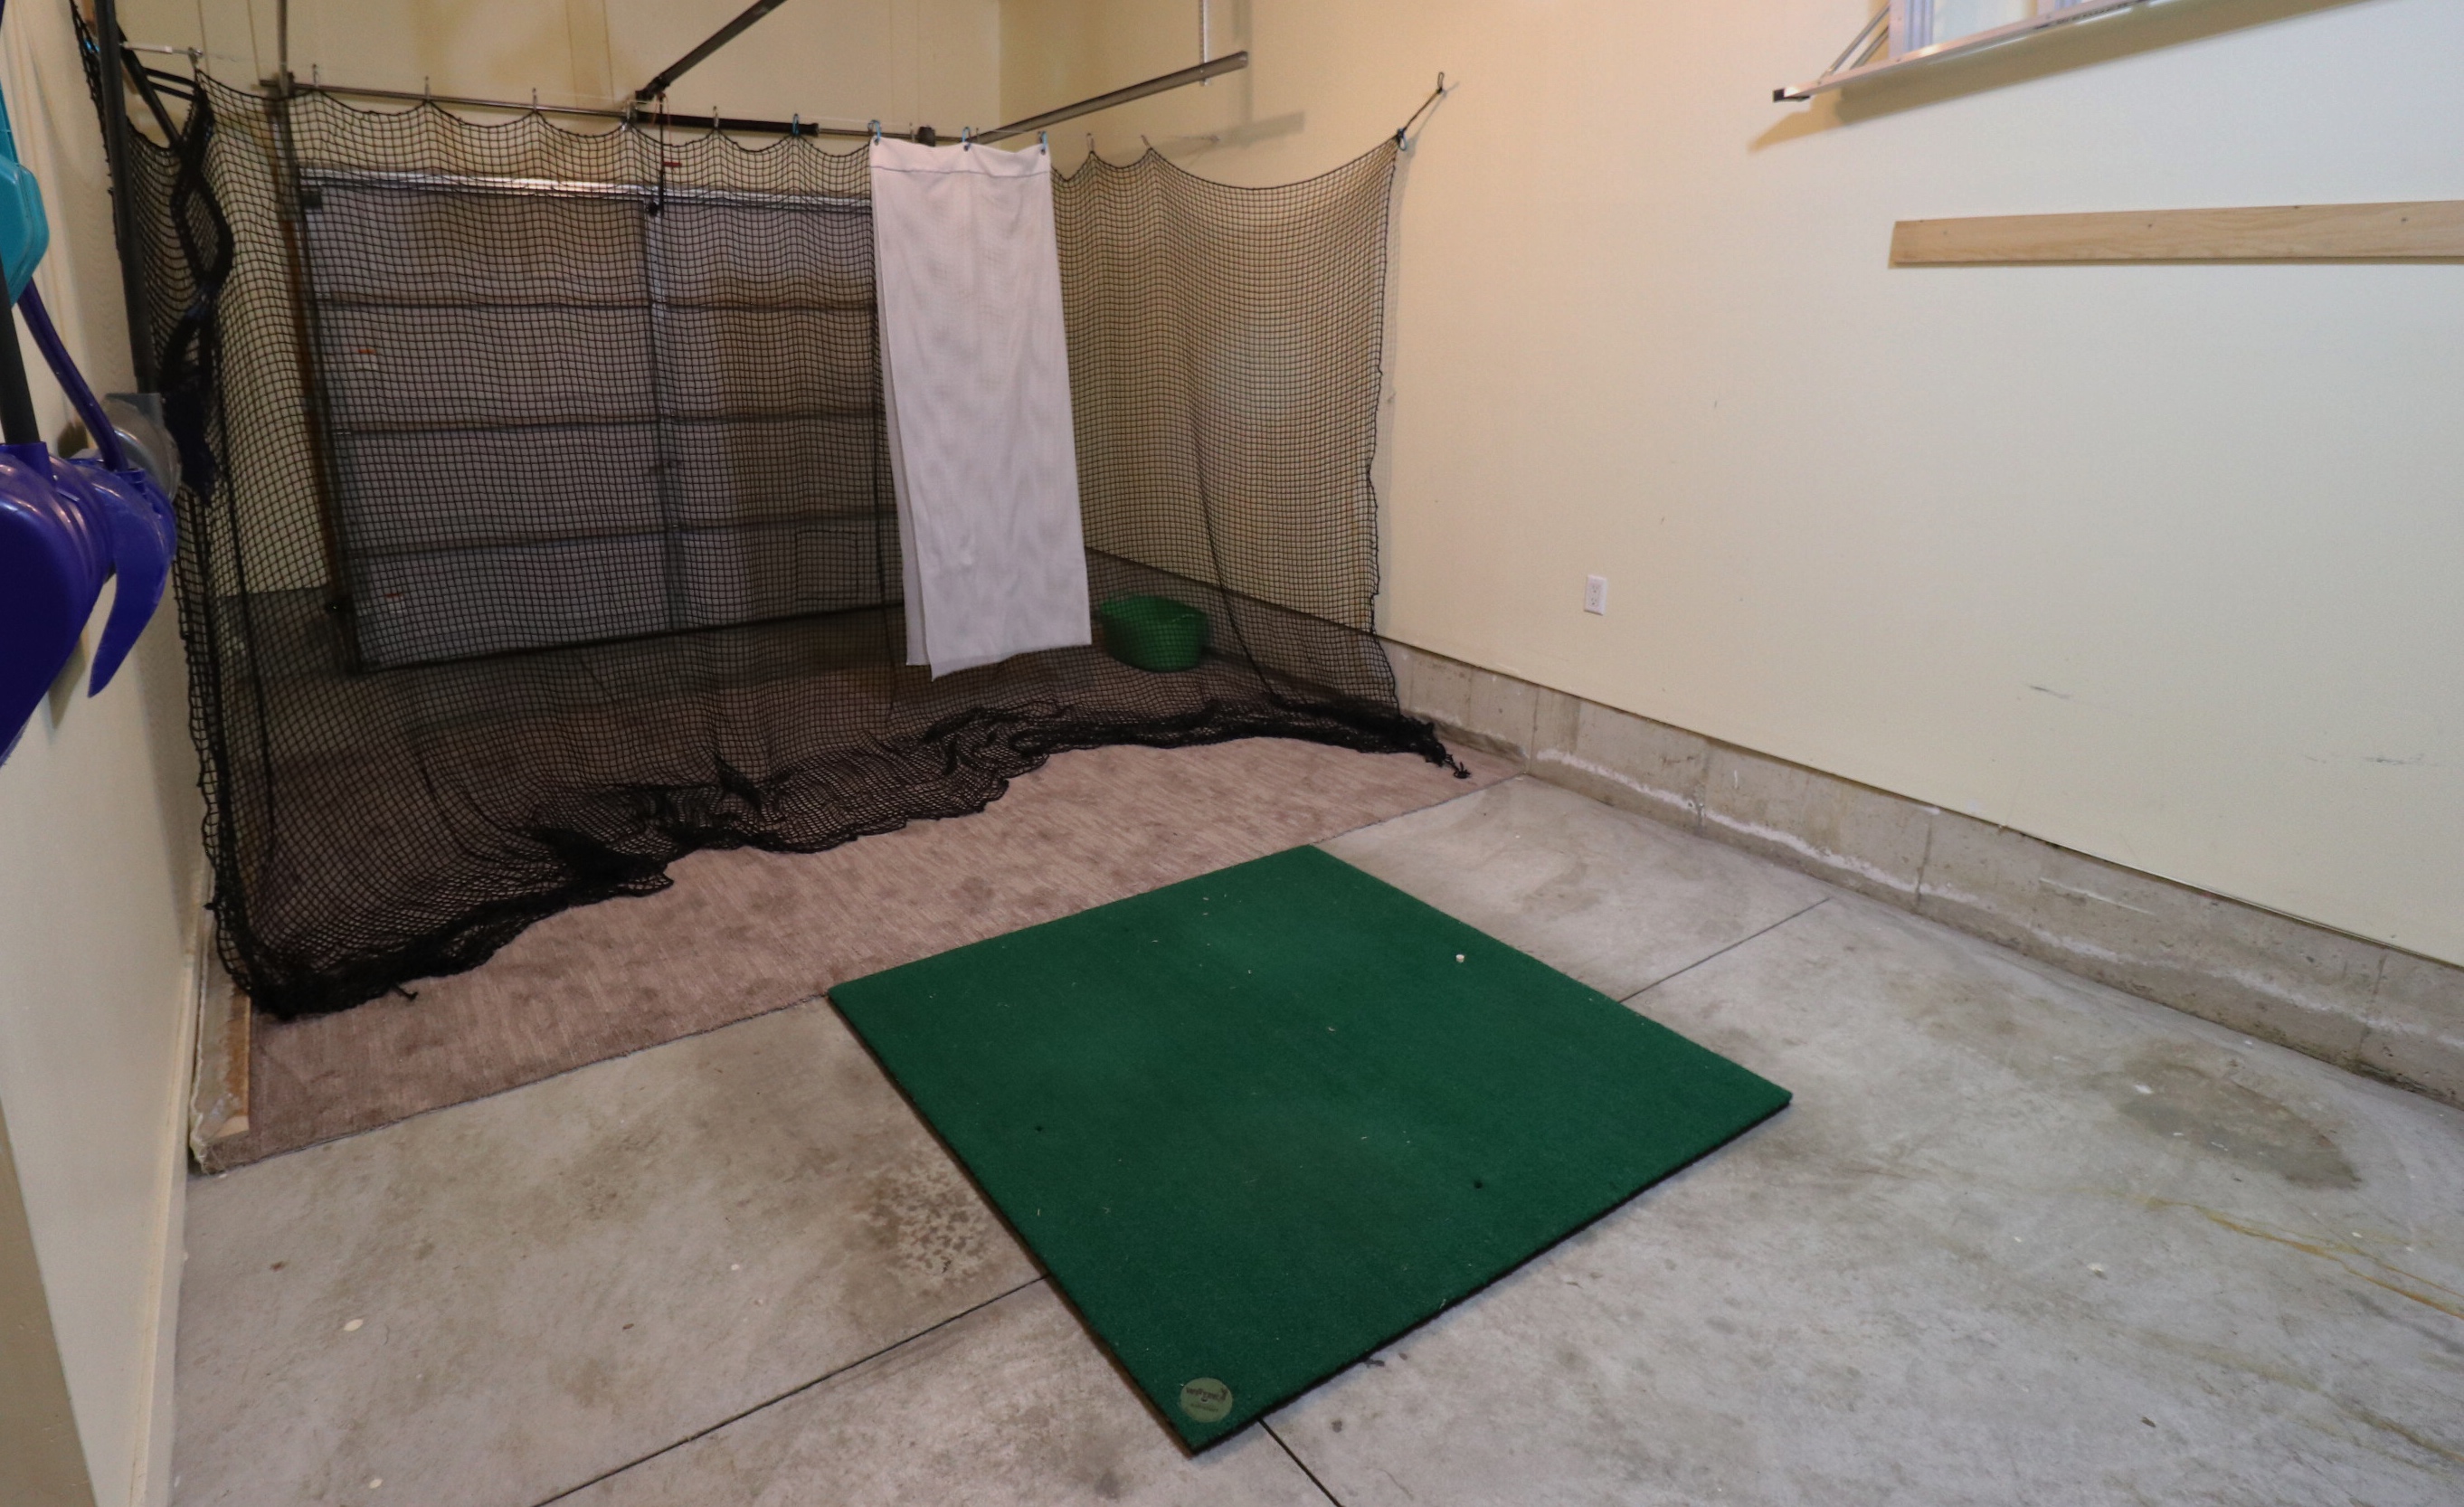
The first part of the process is accessing your wants and needs along with understanding any possible limitations your space might create. You have to consider which clubs you plan on using—and if that means hitting drivers, then you are going to need enough height and width to feel comfortable. The space I used is our garage, which is 12 feet wide and has 11-foot high ceilings, more than enough room to hit any club in the bag, and can easily accommodate both right and left-handed golfers.
Golf net and screen options
The Net Return hitting net
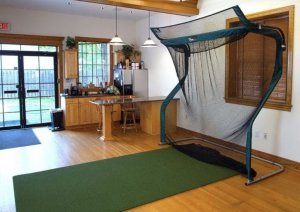
After figuring out your space, it comes down to selecting the best option for ease of use and flexibility—flexibility being the key ingredient in my situation. This is our only full garage bay, and if there is one thing I have gotten used to, it’s not having to clean snow off our car in the winter, so the net and mat had to be easily portable and storable.
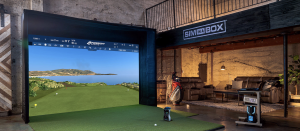
If you are repurposing a space that won’t require flexibility, then there are a number of fantastic options including The Net Return and others that provide projector screen capability. On the highest-end, before getting into a full room renovation, Costco has a $20,000 “Sim in a box” powered by a Foresight GCQuad—let’s call this the dream scenario.
Since I have no intention of using a projector, nor do I have $20,000 just lying around, I ended up going with standard golf impact netting from Amazon: 10′ x 20′ golf impact netting, which allowed me to build my own net system which I can open or store within minutes.
The last thing to remember is you will be putting a lot of wear on a small part of the net caused by proximity, which is why if you plan to practice a lot it’s important to reinforce the impact area of the net. There is nothing more dangerous or damaging than a rubber projectile (in our case a golf ball) ricocheting around a small space at over 140 mph.

My solution was fine mesh netting from a local fabric store. It’s light enough not to put extra stress on the suspended cable supporting the net but strong enough to take a lot of abuse. The nice thing is at only $5 per yard and 60″, wide it’s very affordable and easily replaceable. An interesting thing to note, is a net doesn’t wear out specifically from just high-speed impact but from the friction of the spinning ball as it hits the net with shorter clubs, so the more layers the better.
The parts list
The list will vary depending on your situation and personal setup, but here are the tools & supplies I used when putting together my own net system.
Tools
- Power drill and/or impact driver to drill pilot holes for the anchoring i-bolts. Since there will be a lot of tension on the supporting cable you have to be sure to put these anchors into wall studs.
- Stud finder
- Various size drill bits
- Level
- Tape measure
- Screwdrivers
- Pliers or vice grips
Supplies

There are a lot of ways to secure the net and create a welcoming space to use as a practice facility but these are all the supplies I used to install and support the net.
- Stainless steel aircraft cable (2mm) rated for 900lbs.
- Aircraft cable clamps
- I-bolts to secure the cable to walls
- Turnbuckle to properly tension the cable
- Small hooks to hold the corners of the net up and around
- Carabiners – Climbing rated ones are unnecessary, but they need to be sturdy
- Carpet (for noise dampening and to prevent balls hitting the floor after falling from the net)
The Mat

Beyond the net itself, this is by far the most important piece of any home hitting bay or simulator because it needs to have enough give/compression in the impact area to not cause joint or muscle pain when hitting irons and wedge. This could require you to use extra padding under the mat or purchasing a separate hitting area depending on the base it is on.
Note: At the time of publication, I am currently waiting for the soft hitting area of my mat to arrive
Getting fancy and simulated
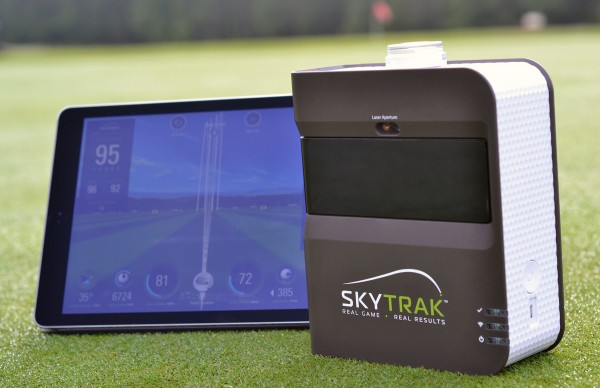

This is the part where we go from home hobby setup to full-blown golf nut practice facility. The options beyond a basic net setup can get pretty crazy and for data and shot information it will require a substantial investment, with the most affordable being a SkyTrak unit followed by the all-new FlightScope Mevo+. After that, we get into more expensive options like the Foresight GC2 with HMT or the newest option the GCQuad followed by the radar-based Trackman.
All of these systems can work alongside various simulator software to provide playable course options, but they all come at an additional cost depending on the company and package.

For my personal use, I already happen to own a FlightScope Xi+ (which I purchased used), which requires a minimum of 16′ from unit to net to capture data, and since I don’t have any plans for playing rounds of golf, it is the perfect solution for getting the information I want in the space I have.
So whether you are looking for a full-blown golf simulator at home or just a space to help you keep those “golf muscles” loose over the cold winter months, use this GolfWRX how-to guide as a starting point for finding the best solution for you.
The How-to Video


Equipment
Then and now: Comparing Rory McIlroy’s current setup to his record-breaking 2019 Canadian Open victory

In Rory McIlroy’s first appearance at the 2019 RBC Canadian Open, he crushed the record books to earn his 16th PGA Tour title in dominating fashion, winning by seven shots over Shane Lowry and Webb Simpson.
McIlroy’s score of 22-under-par 258 is the lowest 72-hole score to date at the Canadian Open, and his closing 61 is also the best final-round score in the history of one of golf’s oldest tournaments. Finally, with his win in 2019, McIlroy became only the sixth player to win the career Triple Crown, adding to his victories at the U.S. Open in 2011 and The Open Championship in 2014, joining Tommy Armour, Walter Hagen, Arnold Palmer, Lee Trevino and Tiger Woods in a coveted list.
So, with that, why not compare his current setup to the clubs he used to break all the records?
Driver
2019: TaylorMade M5 (9 degrees), Shaft: Mitsubishi Tensei CK Pro White 70 TX
2026: TaylorMade Qi4D (9 degrees @8), Shaft: Fujikura Ventus Black 7X (45 5/8 inches)
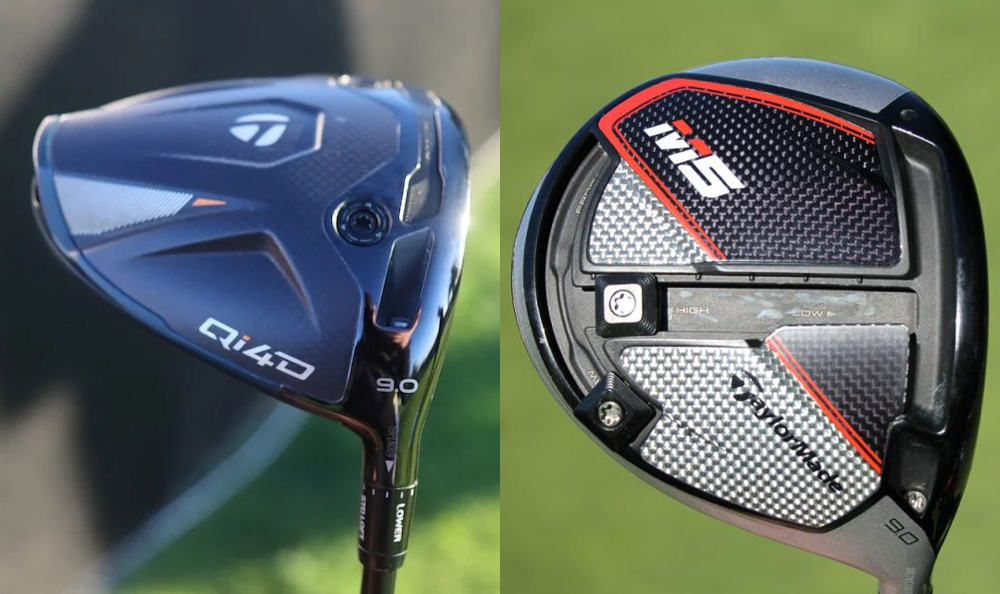
McIroy led the Tour in Strokes Gained: Off-the-Tee in 2019; he’s doing the same in 2026. Between now and then, McIlroy has switched from the Mitsubishi Tensei CK Pro White 70 TX (a shaft with slightly more feeling in the tip) to the original Fujikura Ventus Black 7X, having just made the change to the heavier version from playing the 60X.
What’s interesting about McIlroy’s 2019 setup is that the weighting on his driver is actually set in the high-draw setting, using the T-Track weighting system, whereas in the Qi4D, he’s currently using a heavily rear-weighted setup. (Two 13-gram weights in the rear and only two 4-gram front weights.)
The TaylorMade M5 driver he played in during his Canadian Open win was the company’s first head that they claimed to design to initially exceed the USGA’s COR limit, and then injected with tuning resin to bring it back in bounds.
Fairway woods
2019: TaylorMade M6 3-wood (15 degrees), Shaft: Mitsubishi Tensei CK Pro White 80 TX; TaylorMade M5 5-wood (19 degrees), Shaft: Mitsubishi Tensei CK Pro White 90 TX
2026: TaylorMade Qi4D 3-wood (15 degrees), Shaft: Fujikura Ventus Black 8X; TaylorMade Qi4D 5-wood (18 degrees), Shaft: Fujikura Ventus Black 9X

The TaylorMade M6 fairway wood that McIlroy was using during the 2019 season is still in the bag of some of the best golfers on Tour in 2026. Just check out Justin Rose’s winning setup from the Farmers Insurance Open earlier this year. This year, though, McIlroy has still been searching for his top-end-of-the-bag setup, having played both the new Qi4D and the Qi10, which he won the Masters with.

The same shaft swap can be seen in the fairway woods as the driver, along with slightly less loft on the 5-wood.
Irons
2019: TaylorMade P750 (4) Buy here, TaylorMade P730 (5-9), Shafts: Project X 7.0
2026: TaylorMade P760 (4), TaylorMade Rors Proto (5-9), Shafts: Project X 7.0

The biggest difference between McIlroy’s custom set and the stock P730s is the groove design. While the P730s were constructed with 14 MX-9 grooves on their milled faces, McIlroy’s proto heads instead use the higher-spinning, 16-groove layout of the TW2 grooves. Other big differences between the sets are that McIlroy’s 7- and 8-irons have thinner toplines, are 1 degree stronger in loft, and are 1/4 inch longer than the original P730 builds.
With McIlroy’s 4-iron, the switch from P750 to P760 sees a transition to a two-piece construction with Speed Foam in it, which allows McIlroy to launch the ball slightly higher, with more workability.
Wedges
2019: TaylorMade Milled Grind (48-09SB), TaylorMade MG Hi-Toe (52-09SB, 56-09SB, 60-LB09), Shafts: Project X Rifle 6.5
2026: TaylorMade MG5 (46-09SB, 50-09SB, 54-11SB, 60-08LB @61), Shafts: Project X 6.5 (46-54), Project X 6.5 Wedge (60)

Between 2019 and 2026, McIlroy’s focus on his short game has been much more apparent. It was the reason why he switched back to the TP5 golf ball, to help with launch, spin and control with his wedges leading up to his career Grand Slam victory in 2025. The most apparent changes to McIlroy’s wedge setup are his lofts and bounce. He’s slowly delofted his pitching to a sand wedge, but has increased the loft on the lob wedge, bending his current 60-degree to 61. With that, adding more loft to his lob wedge also slightly increases the bounce and leading-edge sit point, so, as a result, he plays a lower-bounce lob wedge compared to 2019. The MG5 wedges are also softer than the first Milled Grind option from 2019. McIlroy also no longer plays the full-face grooves found on the Hi-Toe.
Putter
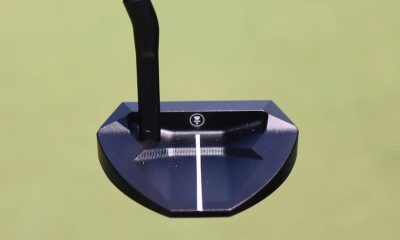
2019: TaylorMade Spider X
2026: TaylorMade Spider Tour X
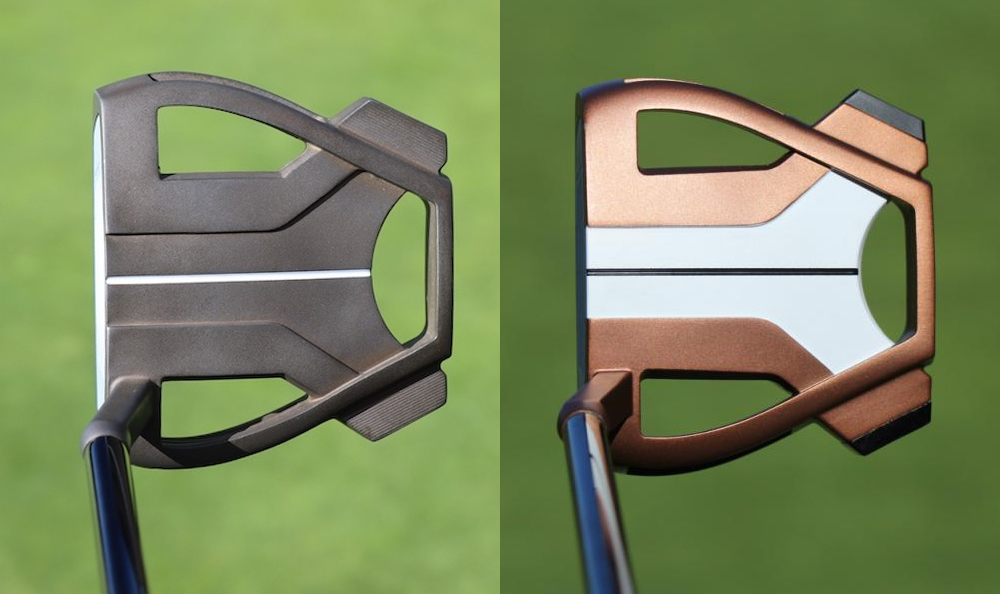
Notice anything similar. Yes, the copper finish on Rory McIlroy’s Spider X putter in 2019 is a slightly more reflective finish than the recently released torched PVD finish. McIlroy was using the True Path alignment system, but now uses only a single white sightline.
Ball
2019: 2019 TaylorMade TP5 (#22)
2026: 2025 TaylorMade TP5 (RORS)
As mentioned above, McIlroy had transitioned from the TP5 to TP5x golf ball since his victory in Canada in 2019, but now is black with the same style of golf ball as his victory at Hamilton Golf & Country Club.
Grips
2019: Golf Pride Tour Velvet Cord
2026: Golf Pride MCC
Interesting, McIlroy actually used Golf Pride’s Tour Velvet Cord grips during his victory in 2019 (it was during a 2+ year switch to the corded TV) as opposed to his usual MCC grips, which he has played for most of his career.

At GolfWRX, we are a community of like-minded individuals who all experience and express our enjoyment of the game in many ways.
It’s that sense of community that drives day-to-day interactions in the forums on topics that range from best driver to what marker you use to mark your ball. It even allows us to share another thing we all love – buying and selling equipment.
Currently, in our GolfWRX buy/sell/trade (BST) forum, @Putt4Dough is selling some prototype wedges from Vokey Wedgeworks. These include a 54 degree wedge with the M grind and a 60 degree wedge with a T grind.

From the listing:
(1) Titleist Vokey Proto Wedge 54M with a Tour Issue DGS400 shaft and Golf Pride Tour Velvet (logo down). Standard length, lie, and loft. BB&F ferrule. Raw wedge in good condition. No initials. Price is $200 shipped. Buy both wedges for $380 shipped.
(2) Titleist Vokey Proto Wedge 60T with a KBS Tour 130X shaft and Golf Pride Tour Velvet. Standard length, lie, and loft. Raw wedge in good condition. No initials. Price is $200 shipped. Buy both wedges for $380 shipped.
To check out the full listing in our BST forum, head through the link. If you are curious about the rules to participate in the BST Forum, you can learn more here: GolfWRX BST Rules.

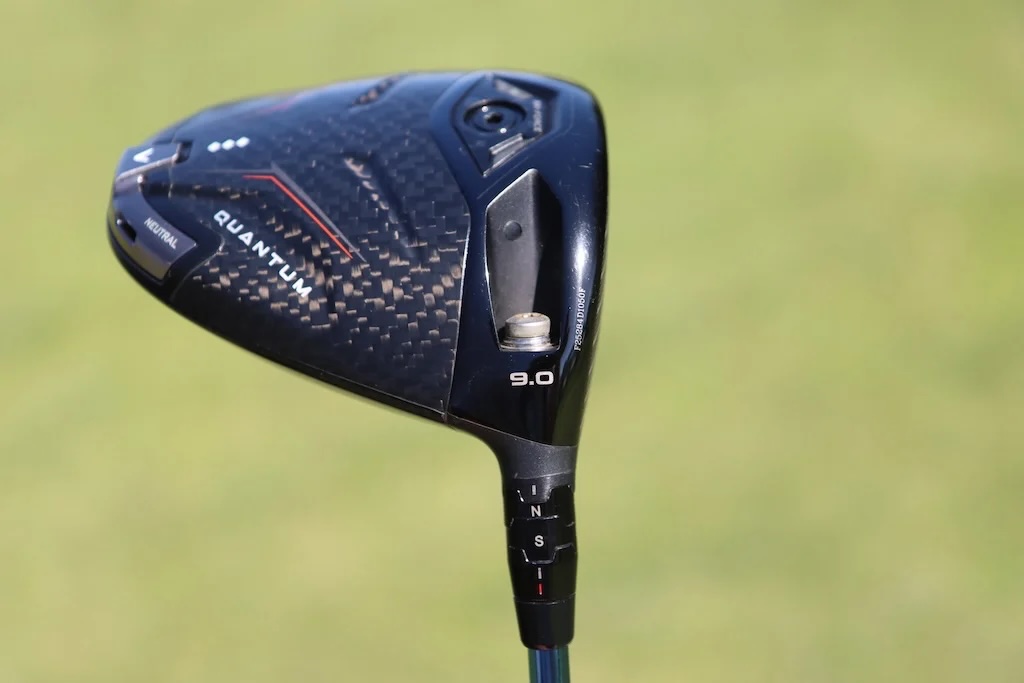
Driver: Callaway Quantum Triple Diamond (9 degrees)
Shaft: Project X HZRDUS Smoke Blue RDX 60 TX
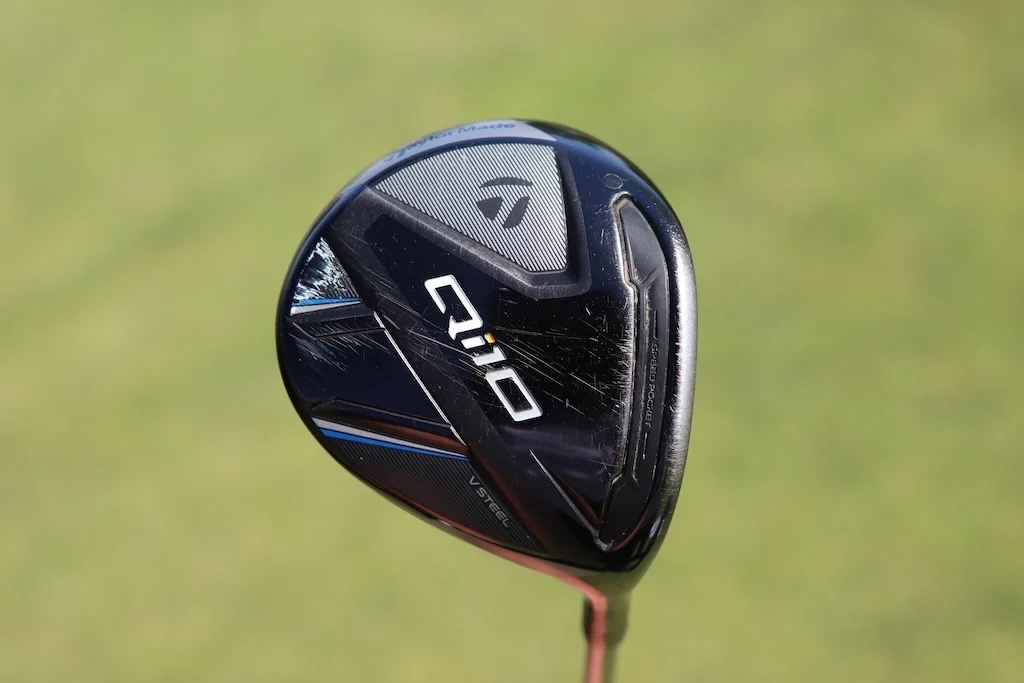
3-wood: TaylorMade Qi10 (15 degrees)
Shaft: Project X HZRDUS T1100 70 6.5
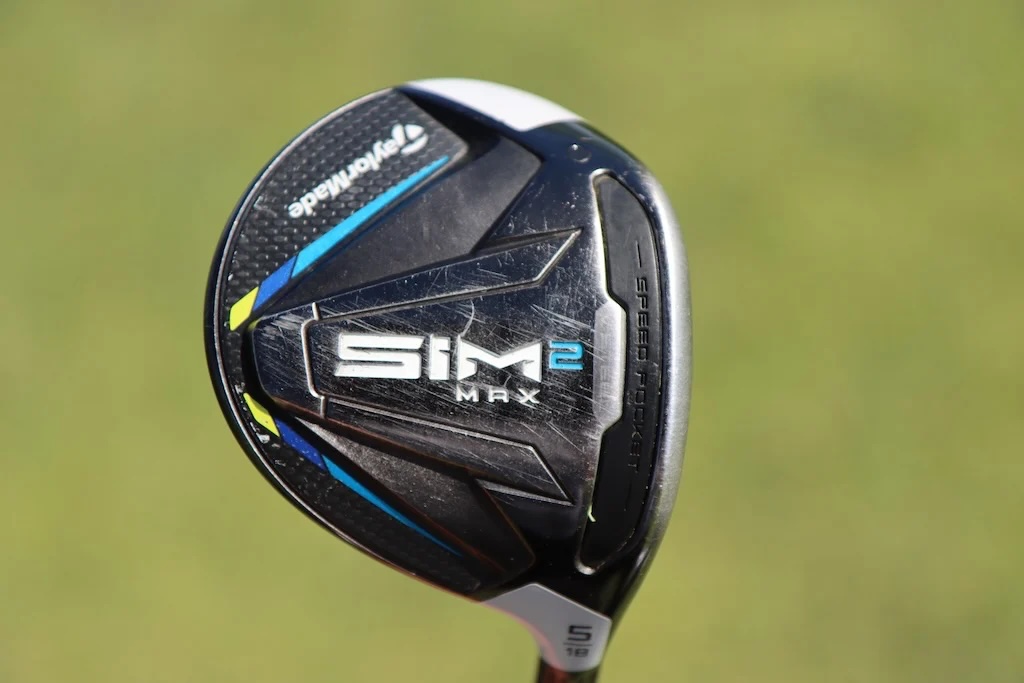
5-wood: TaylorMade SIM2 Max (18 degrees)
Shaft: Project X HZRDUS Smoke Black RDX 80 TX
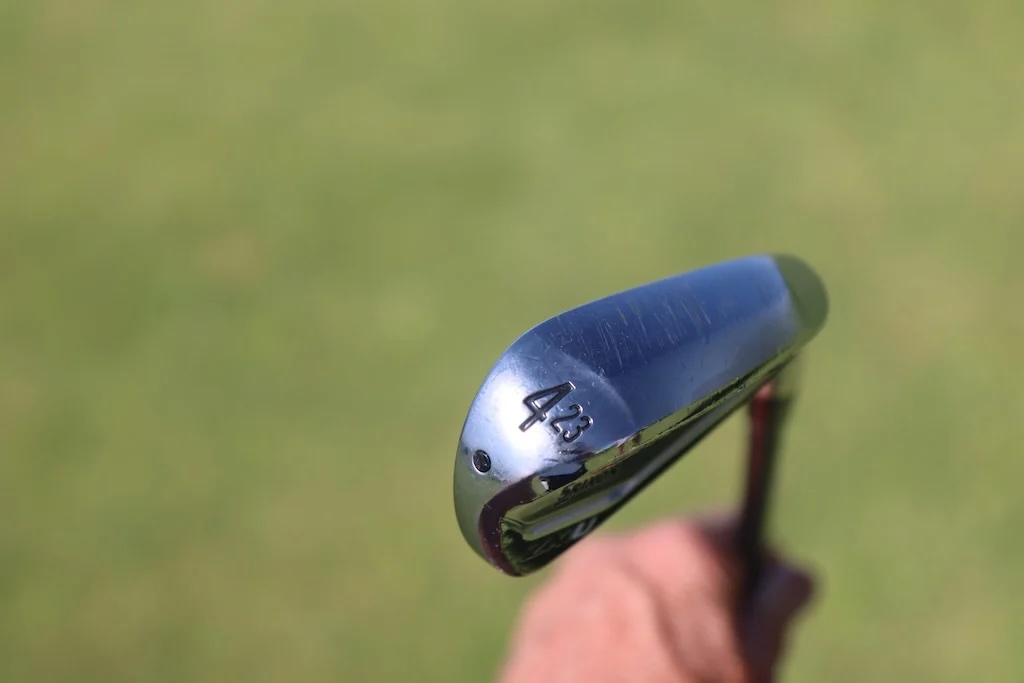
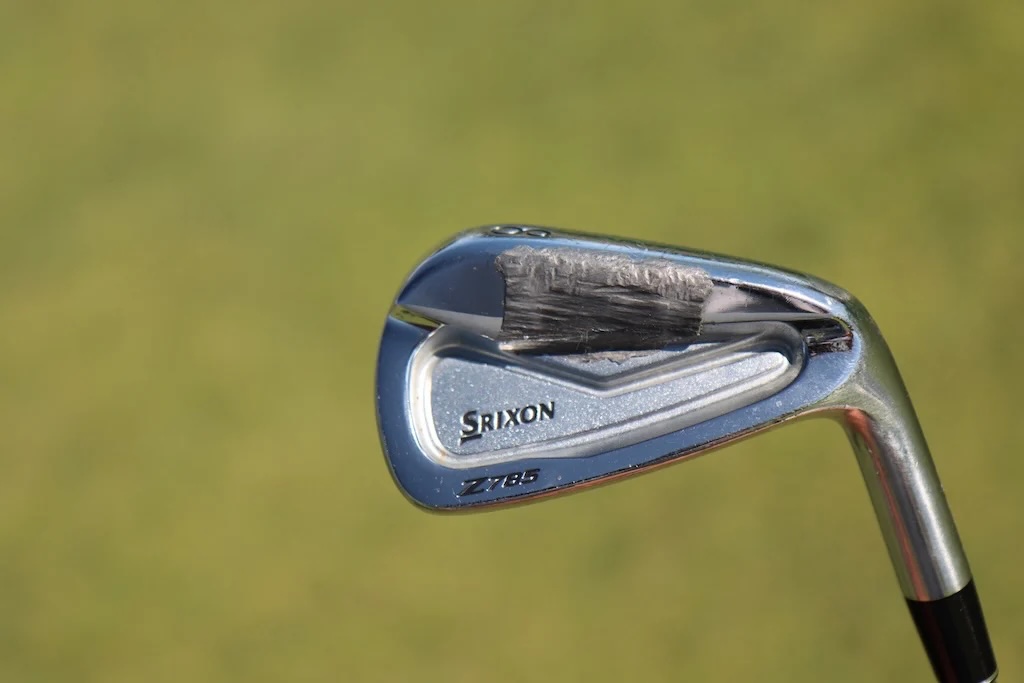
Irons: Srixon ZXiU (23 degrees), Srixon Z785 MB (5-PW)
Shafts: Project X HZRDUS Smoke Black RDX 100 6.5 (4), KBS Tour 130 X
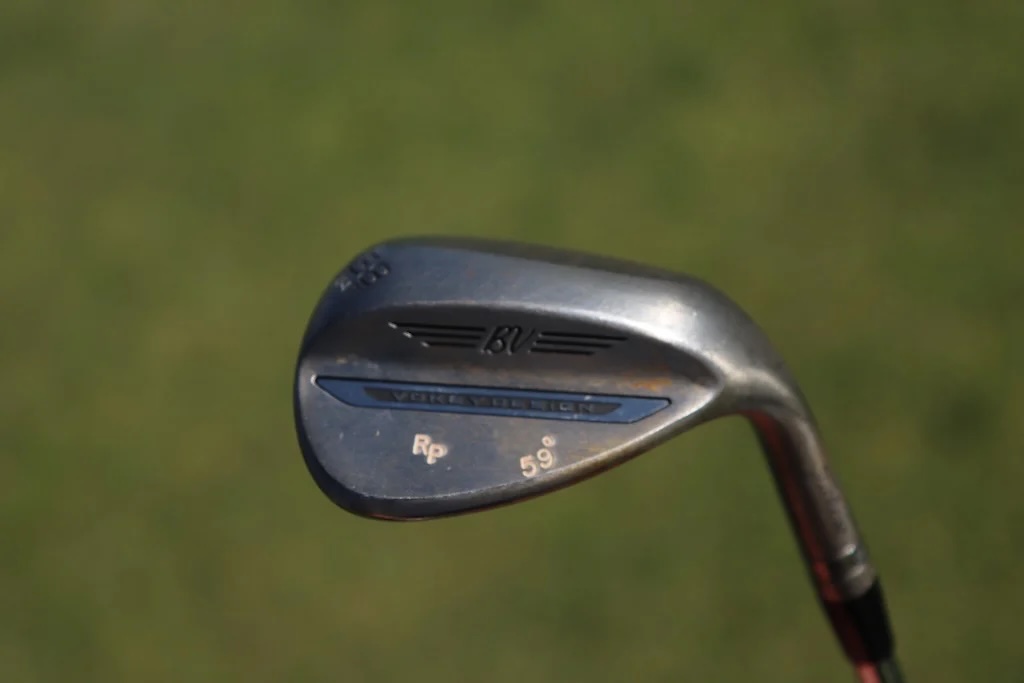
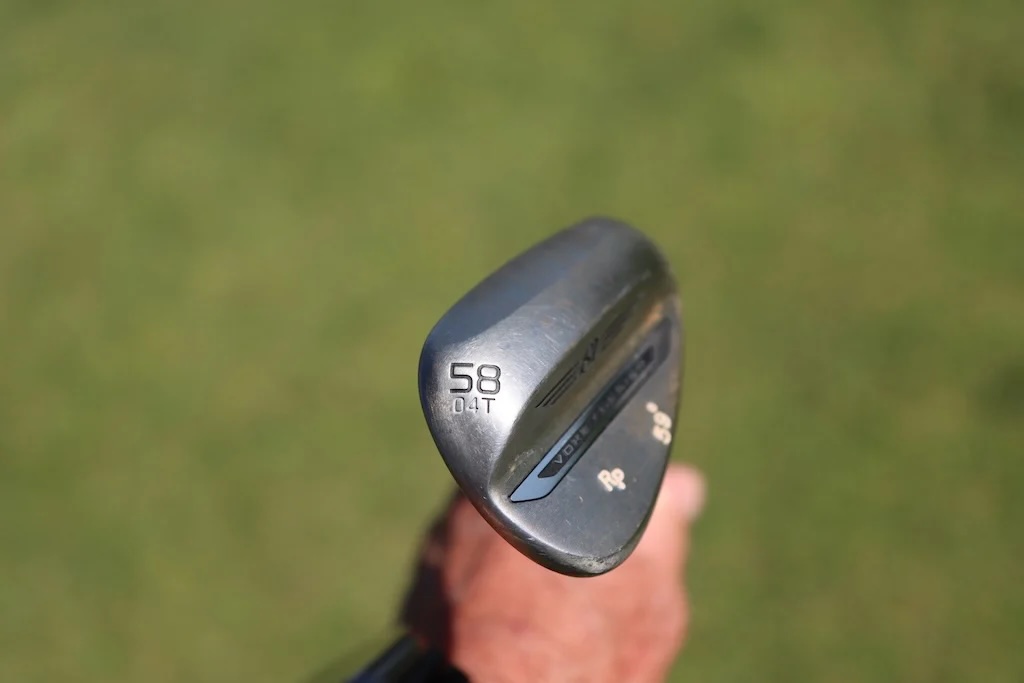
Wedges: Titleist Vokey Design SM11 (50-08F, 54-10S, 58-04T @59)
Shafts: KBS Tour 130 X
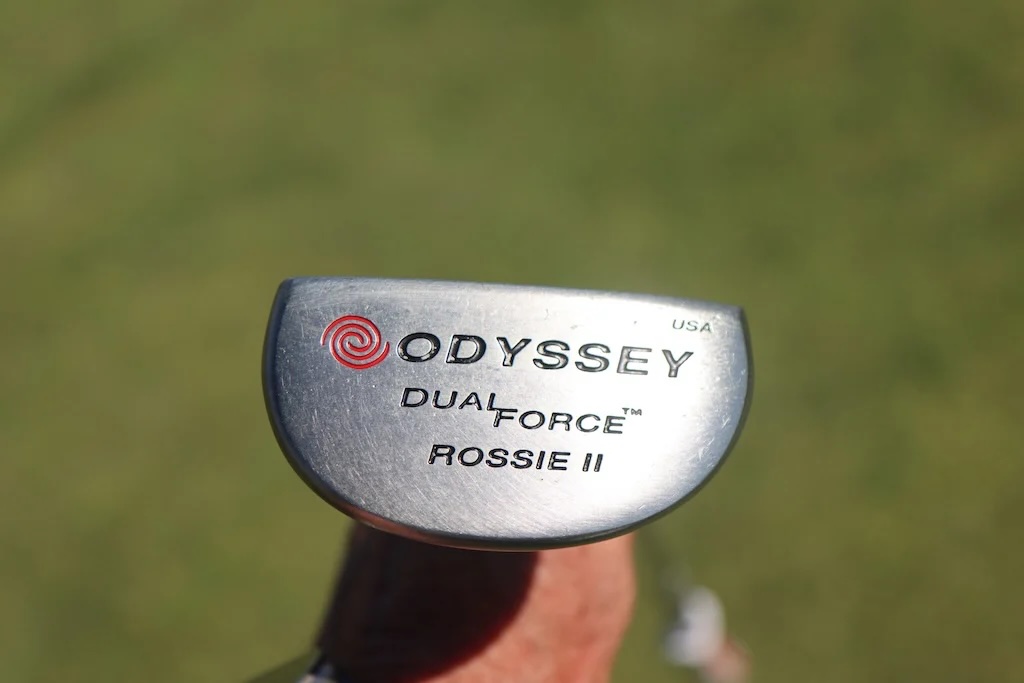
Putter: Odyssey Dual Force Rossie II

Ball: Titleist Pro V1x
Grips: Golf Pride Tour Velvet

What’s the story behind Webb Simpson’s custom-stamped irons?

Memorial Tournament Tour Report: Rory McIlroy, Cameron Young switch up drivers, and more

Cadillac Championship Tour Report: Spieth’s sizable changes, McLaren Golf launches, and more

Russell Henley’s winning WITB: 2026 Charles Schwab Challenge

Kristoffer Reitan’s winning WITB: 2026 Truist Championship

Best irons 2026: Best irons overall, most forgiving irons, and more

J.T. Poston’s winning WITB: 2026 Memorial Tournament

Aaron Rai’s winning WITB: 2026 PGA Championship

Cameron Young’s winning WITB: 2026 Cadillac Championship

Details on Jason Day’s latest prototype Avoda iron setup


Ryan Palmer WITB 2026 (June)
Driver: Callaway Quantum Triple Diamond (9 degrees) Shaft: Project X HZRDUS Smoke Blue RDX 60 TX 3-wood: TaylorMade Qi10 (15 degrees) Shaft:...


Bud Cauley WITB 2026 (June)
Bud Cauley had >14 clubs in his bag when photographed prior to the Memorial Tournament. Driver: Titleist GTS2 (8 degrees) Shaft: Fujikura...


Hannah Green WITB 2026 (June)
Driver: Titleist GTS3 (10 degrees, D4 SureFit setting) Shaft: Mitsubishi Chemical Diamana RB 53 S 3-wood: Titleist GT3 (15 degrees,...


Asterisk Talley WITB 2026 (June)
Driver: TaylorMade Qi4D (9 degrees) Shaft: Fujikura Ventus Blue 6 S 3-wood: TaylorMade Qi4D (16.5 degrees) Shaft: Fujikura Ventus Blue...
-
 Equipment6 days ago
Memorial Tournament Tour Report: Rory McIlroy, Cameron Young switch up drivers, and more
-
 News2 weeks ago
Russell Henley’s winning WITB: 2026 Charles Schwab Challenge
-
 Equipment3 days ago
Best irons 2026: Best irons overall, most forgiving irons, and more
-
 Whats in the Bag4 days ago
J.T. Poston’s winning WITB: 2026 Memorial Tournament
-
 Equipment1 week ago
Details on Jason Day’s latest prototype Avoda iron setup
-

 Equipment3 weeks ago
CJ Cup Byron Nelson Tour Report: Koepka and Kim’s newest putters finally get hot
-

 News2 weeks ago
Charles Schwab Challenge Tour Report: MacIntyre, Åberg and Spaun all switch putters, TaylorMade launches new Spider
-
 Equipment2 weeks ago
Details on J.J. Spaun’s surprise putter switch
Pingback: 2020: The year of the DIY golfer – GolfWRX
Max R
Oct 31, 2020 at 9:08 am
Thanks for the information. It’s extremely timely for me and my neighbor. We were looking at the Rapsodo MLM Launch Monitor. I would love to have $20K+ to get the cream of the crop but as a senior, your option for keeping everything affordable is the best way to go. I agree that money needs to be spent on a high mid to high quality mat. Otherwise, you’re potentially damaging your clubs.
Pelling
Oct 30, 2020 at 4:38 pm
Instead of spending mega bucks for a new mat, order a 5’x5’ Used commercial driving range mat (B grade) for about $150-$170, free delivery, off EBay from balldiver812. Excellent condition, like new. I ordered one for my son, prompt delivery, outstanding experience.
Cris Kennedy
Oct 30, 2020 at 9:59 am
The problem with this setup is when you sky a driver/3 wood/hybrid. Don’t think it won’t happen.
Grat702
Oct 29, 2020 at 1:58 pm
Thanks for this article, great stuff!
Shallowface
Oct 29, 2020 at 1:14 pm
I’ve had a net for 20 years. When I finally blew a hole through it, I hung a sheet of canvas duck material in front of the hole. Like the other materials mentioned, it’s cheap, durable and readily available.
Steve Hjortness
Oct 29, 2020 at 11:42 am
Ryan, thanks for the info. You mentioned your source for the netting and the launch monitor. Can you tell us what you purchased for the mats?
ChristianR
Oct 30, 2020 at 3:07 am
https://www.realfeelgolfmats.com/
Someone can confirm they are really working as advertised?
Q
Oct 30, 2020 at 10:33 am
I’ve got a full GC2 simulator setup at home and chose the CCE reel feel mat. It’s expensive but is as exactly as advertised. You know exactly when you hit it fat, can get the sensation of taking a divot, and it holds a tee. Have had my setup since 2014 and have been through two hitting screens but the mat looks virtually new.
Large chris
Oct 29, 2020 at 9:32 am
I’ve tried lots of different netting solutions. You won’t do any better than archery netting. It’s much quieter and more durable than anything else. Make sure to use a bungee type attachment solution to reduce the stress whatever net you use, Also, with sufficient unit to net flight space for a flight scope 11, you won’t have the net height to hit wedges or maybe even nine irons.
Lots of things to consider, it’s not an easy thing to get right and reliable.