Equipment
How to create your own custom-stamped wedges
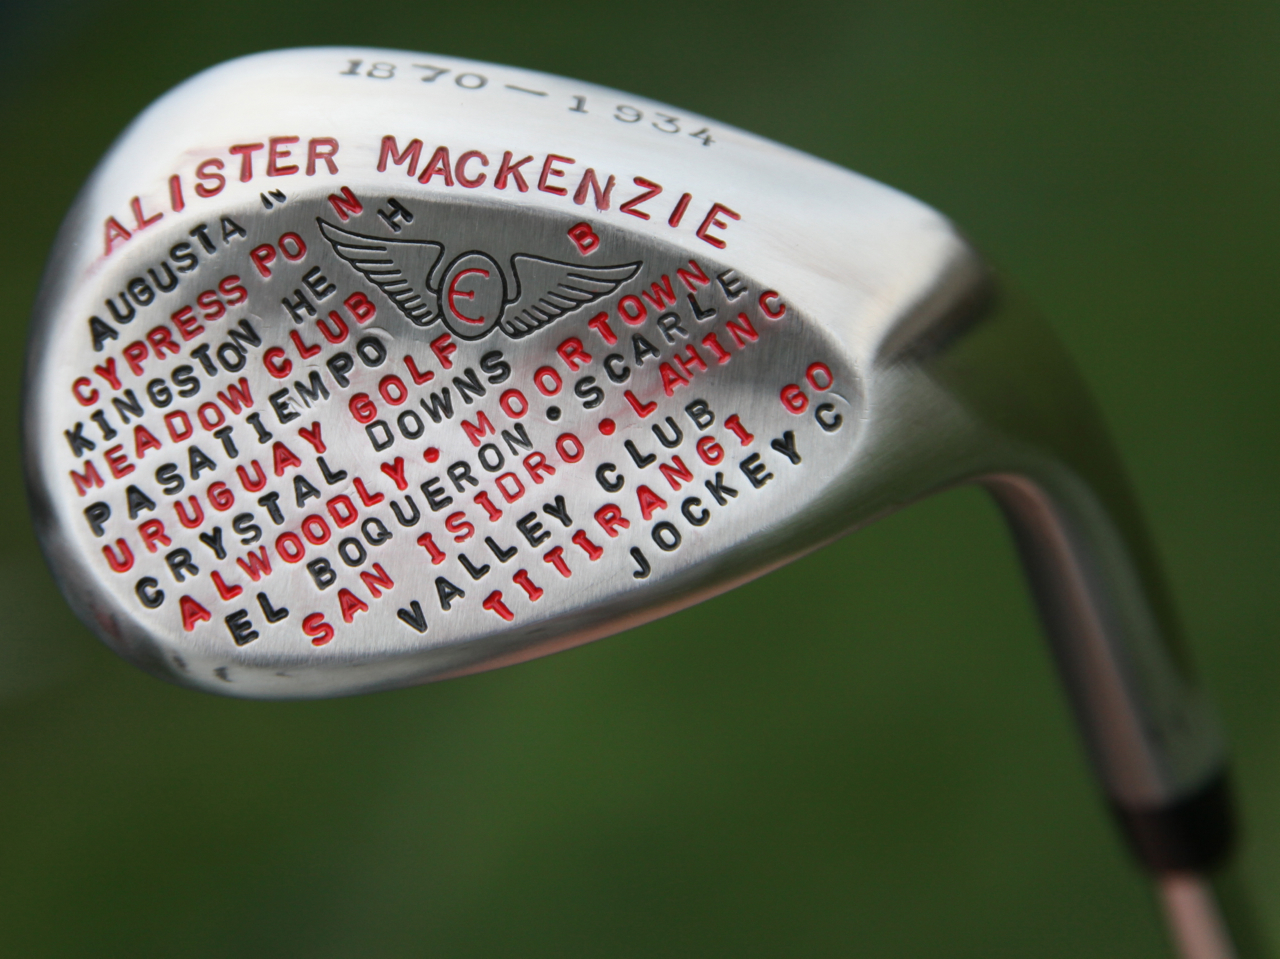
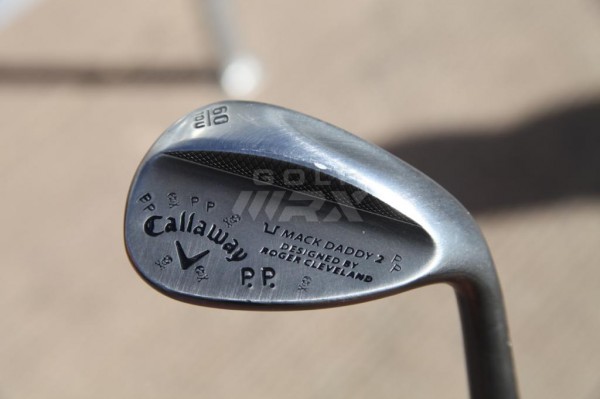
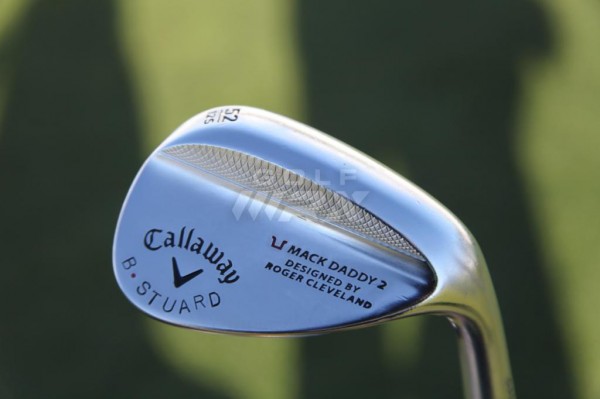
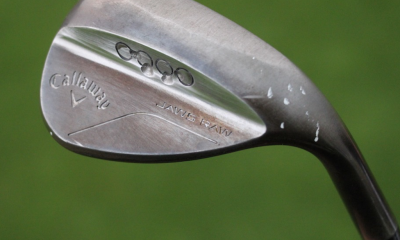
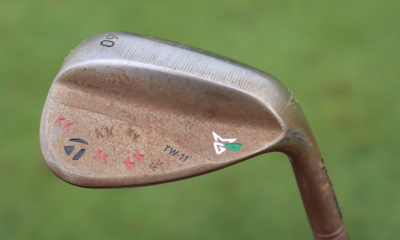
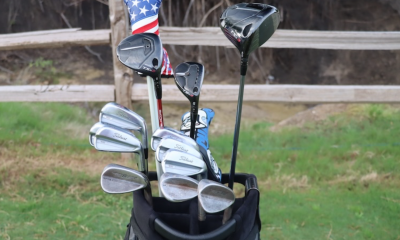
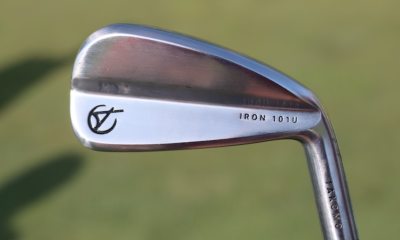
Like so many other readers here on GolfWRX, I eagerly look forward to PGA Tour WITB photos each week. One of the most interesting aspects of Tour bags for me (and especially at the Waste Management Open) has always been the custom-stamped wedges and irons, like Pat Perez wedge pictured above. Custom stamping is no longer just for the Tour, however.
Cleveland, Mizuno and Vokey offer different options as well as initial stamping on their wedges and this year Nike is offering it on its irons. But, like many other at-home projects, it’s just so much more satisfying to do it yourself. Let these pictures be a guide to getting started. It’s easier (and could be cheaper) than you think!
Materials
- Stamping kit: Harbor Freight $9.99, Amazon.com $15 to $100.
- Hammer/Mallet: I have a 4-pound mallet and found that to be the most effective.
- Tape: Double-sided and masking.
- Paint (Optional).
Setup
The goal here is to firmly secure the club face to a hard surface. If you have access to a vise, you are in business as most vises have an anvil. If not, just make sure that the clean club face is firmly secured with double-sided tape. You may need someone to hold the club head securely in place while you swing the mallet, which is not as dangerous as it sounds.

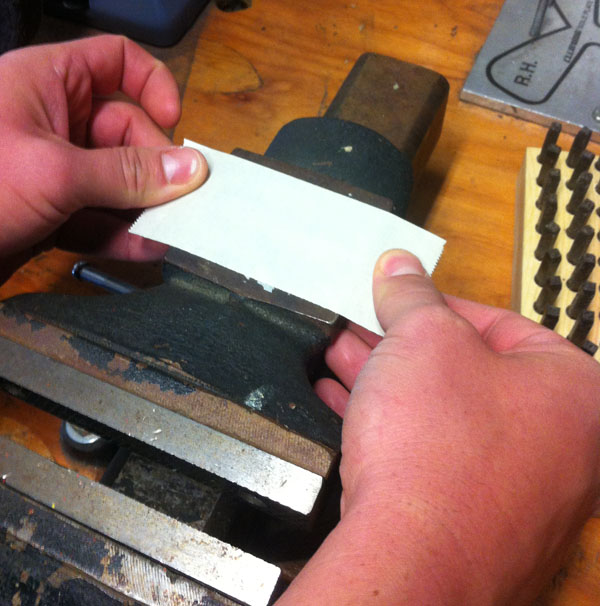
Stamping
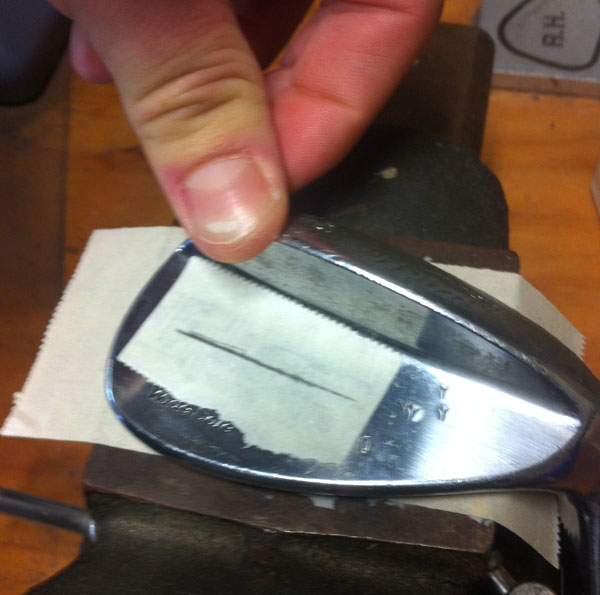
Identify the area you want to stamp and cover it with masking tape. This serves three purposes: you are able to draw reference lines with a straight edge to make your stamping neat, the imprint shows better on the tape so you can re-align your stamp for successive strikes and the tape absorbs some of the blow, making it less likely that the stamp will “bounce” and create a second impression on the wedge.
Take note of how far apart you are spacing consecutive letters as most first-time projects end up looking a bit like this: “G O L FW R X”
Let’s face it: some guys are better with a hammer than others. If you can make a confident swing at the stamp and create a deep imprint with just one swing then good for you! If not, it’s OK to take multiple swings. In fact, you’ll see Scotty Cameron doing just that if you watch this video from his website. According to Cameron, deeper strikes look “more finished … thin looks dainty and weak.” From my own experience, I have learned it is best to oscillate the stamping pin so that each successive strike drives the stamp from different angles to ensure that the stamping is symmetrical and deep.
Now bask in the glory of your very own “Tour” golf club! Obviously, this will take a little bit of practice. In the spirit of “measure twice, cut once,” you should probably try making a few practice stamps on an old club first. Keep in mind that forged clubs will be much more receptive to stamping than cast ones. Even with the cheaper Harbor Freight stamping kit, I still have not come across a wedge that is “unstampable” though.

Paint is optional and a great way to further customize your clubs. You can find many posts in the forums detailing different user methods. If nothing else, it most certainly brings a smile to my face when I look down in my bag to grab my DIY custom-stamped golf clubs.
- LIKE131
- LEGIT20
- WOW14
- LOL14
- IDHT7
- FLOP7
- OB6
- SHANK23


- Kris Kim what’s in the bag accurate as of the CJ Cup Byron Nelson. More photos from the event here.
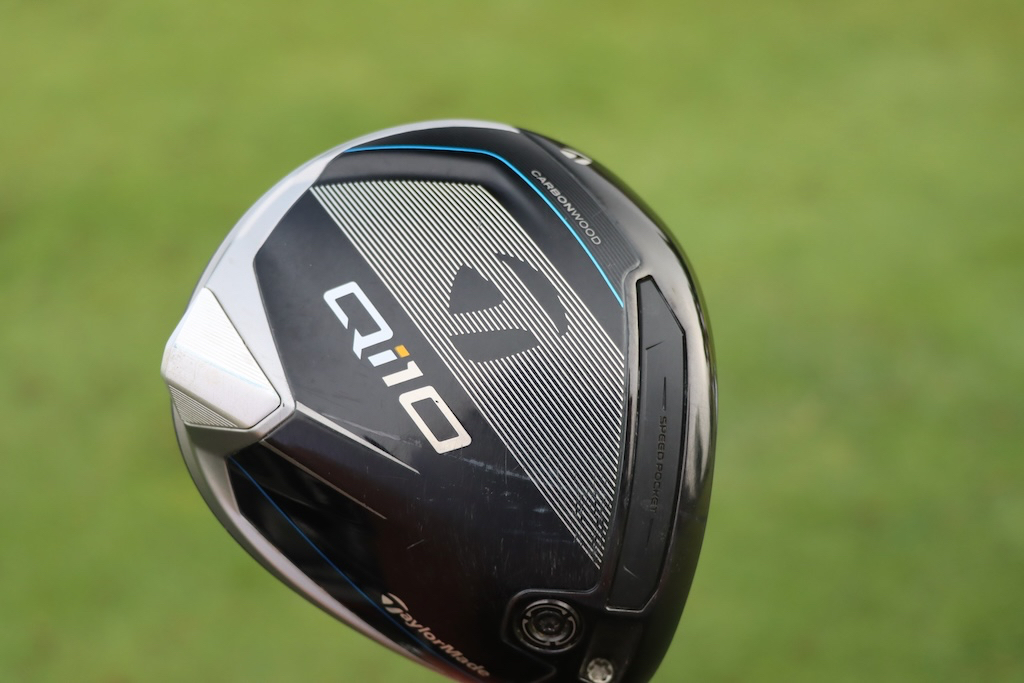
Driver: TaylorMade Qi10 (9 degrees @7)
Shaft: Mitsubishi Tensei 1K White 60 TX

3-wood: TaylorMade Qi10 Tour (15 degrees @13.5)
Shaft: Mitsubishi Diamana WB 73 TX
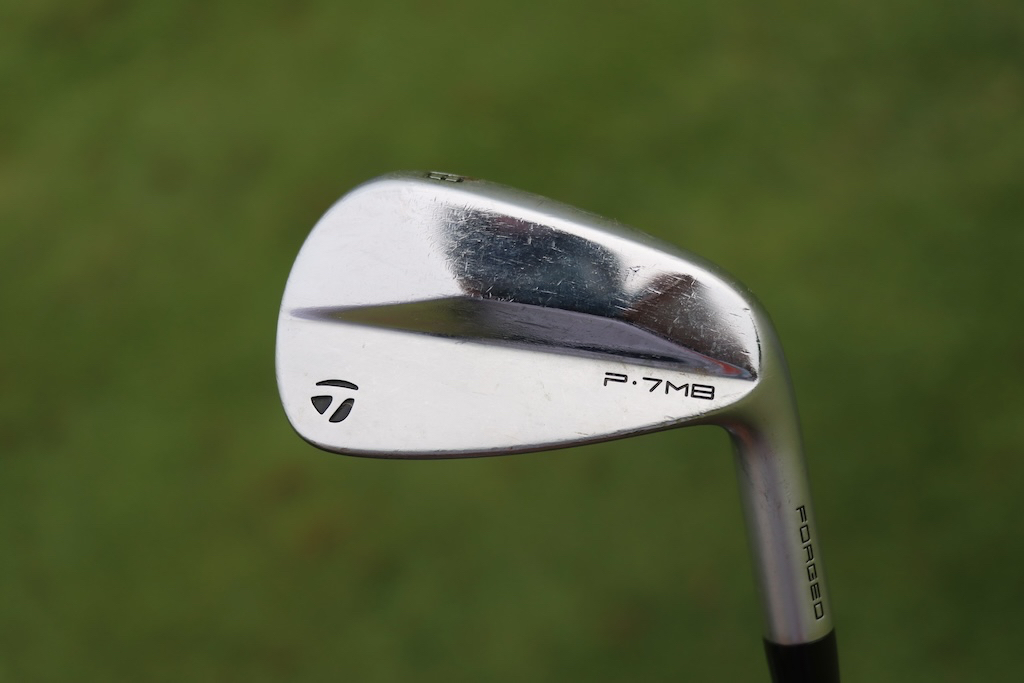
Irons: TaylorMade P770 (2, 4), TaylorMade P7MB (5-PW)
Shafts: Mitsubishi Tensei 1K White 80 TX (2), Nippon N.S. Pro Modus3 Tour 120 X

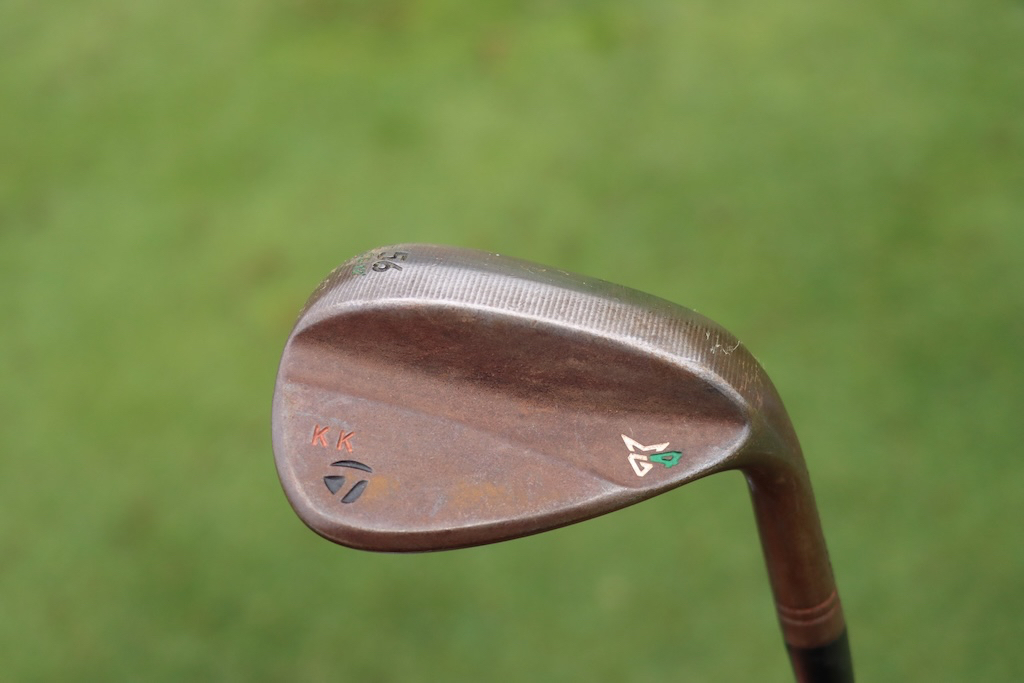
Wedges: TaylorMade MG4 (50-09SB, 56-12SB, 60-11TW)
Shafts: Nippon N.S. Pro Modus3 WV 125

Putter: TaylorMade Spider Tour
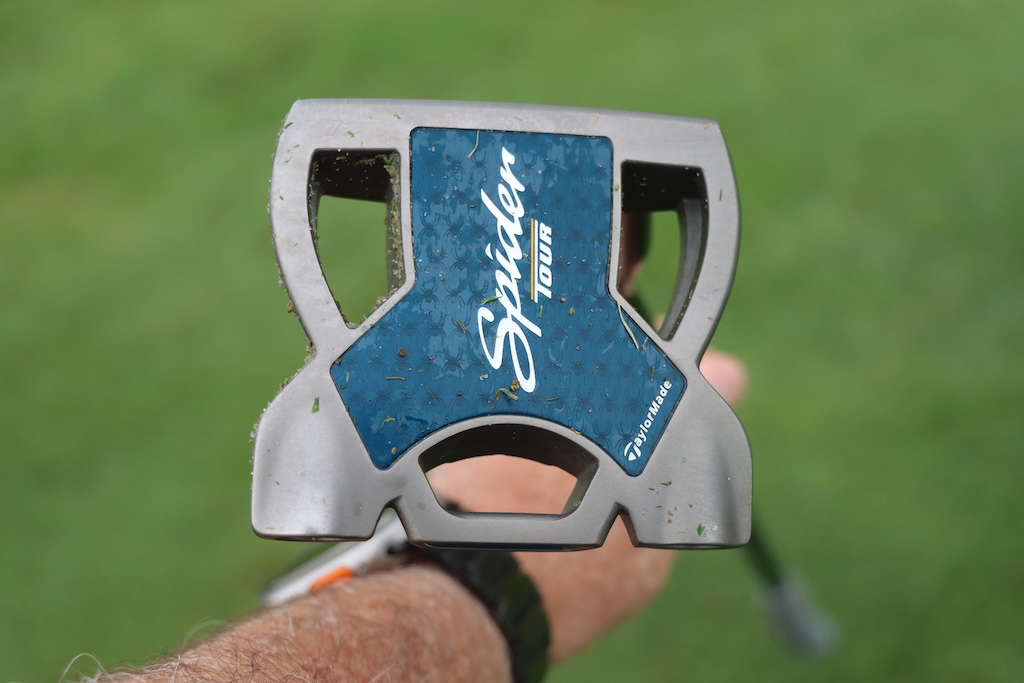
Grips: Golf Pride Tour Velvet Cord
Check out more in-hand photos of Kris Kim’s equipment here.
View this post on Instagram
- LIKE0
- LEGIT0
- WOW0
- LOL0
- IDHT0
- FLOP0
- OB0
- SHANK0
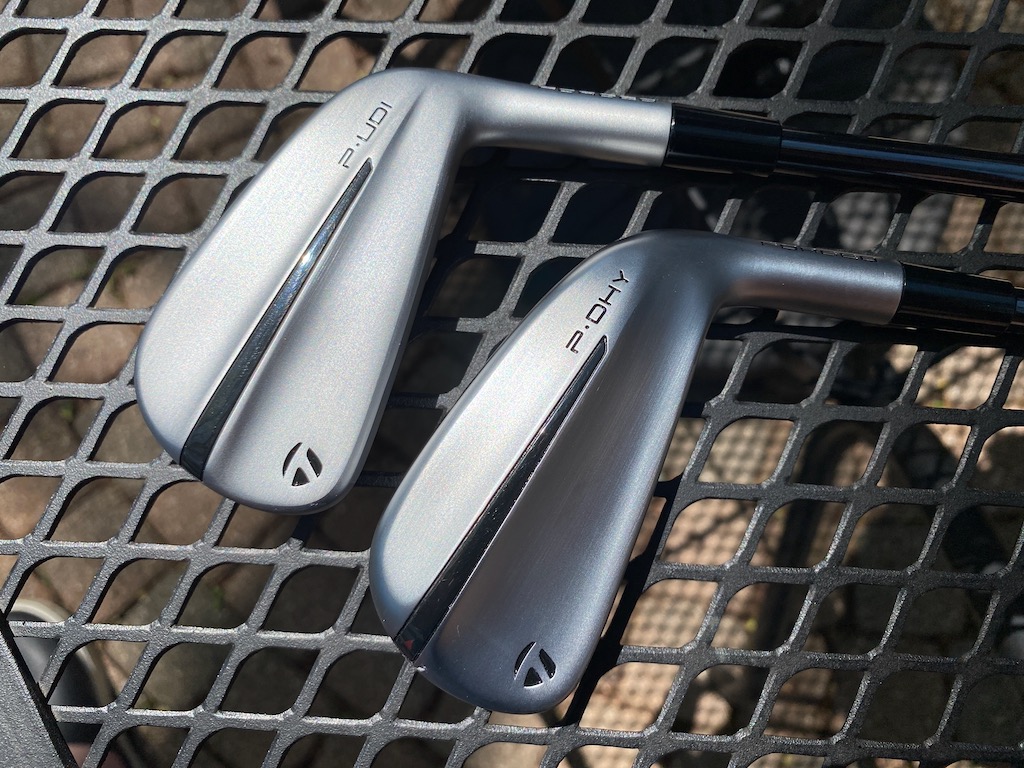
TaylorMade is continuing its UDI/DHY series with the successor to the Stealth UDI and DHY utility irons: PUDI and PDHY (which the company styles as P·UDI and P·DHY). TaylorMade is folding the designs in with its P Series of irons.
TaylorMade outlined the process of developing its new utilities this way. The company started with the data on utility iron usage. Not surprisingly, better players — i.e. those who generate more clubhead speed and strike the ball more precisely — were found to gravitate toward the UDI model. DHY usage, however, covered a wider swath than the company might have expected with six-to-18 handicappers found to be bagging the club.
TaylorMade also found that the majority of golfers playing UDI or DHY utilities were playing P Series irons at the top of their iron configurations.
Can you see where this is going?
Matt Bovee, Director of Product Creation, Iron and Wedge at TaylorMade: “As we look to the future, beyond the tech and the design language, we are excited about repositioning our utility irons into the P·Series family. P·UDI is an easy pair for players that currently play P·Series product and P·DHY is an extremely forgiving option for players of all skill levels. It is a natural fit to give these players the performance in this category that they are looking for.”
View this post on Instagram
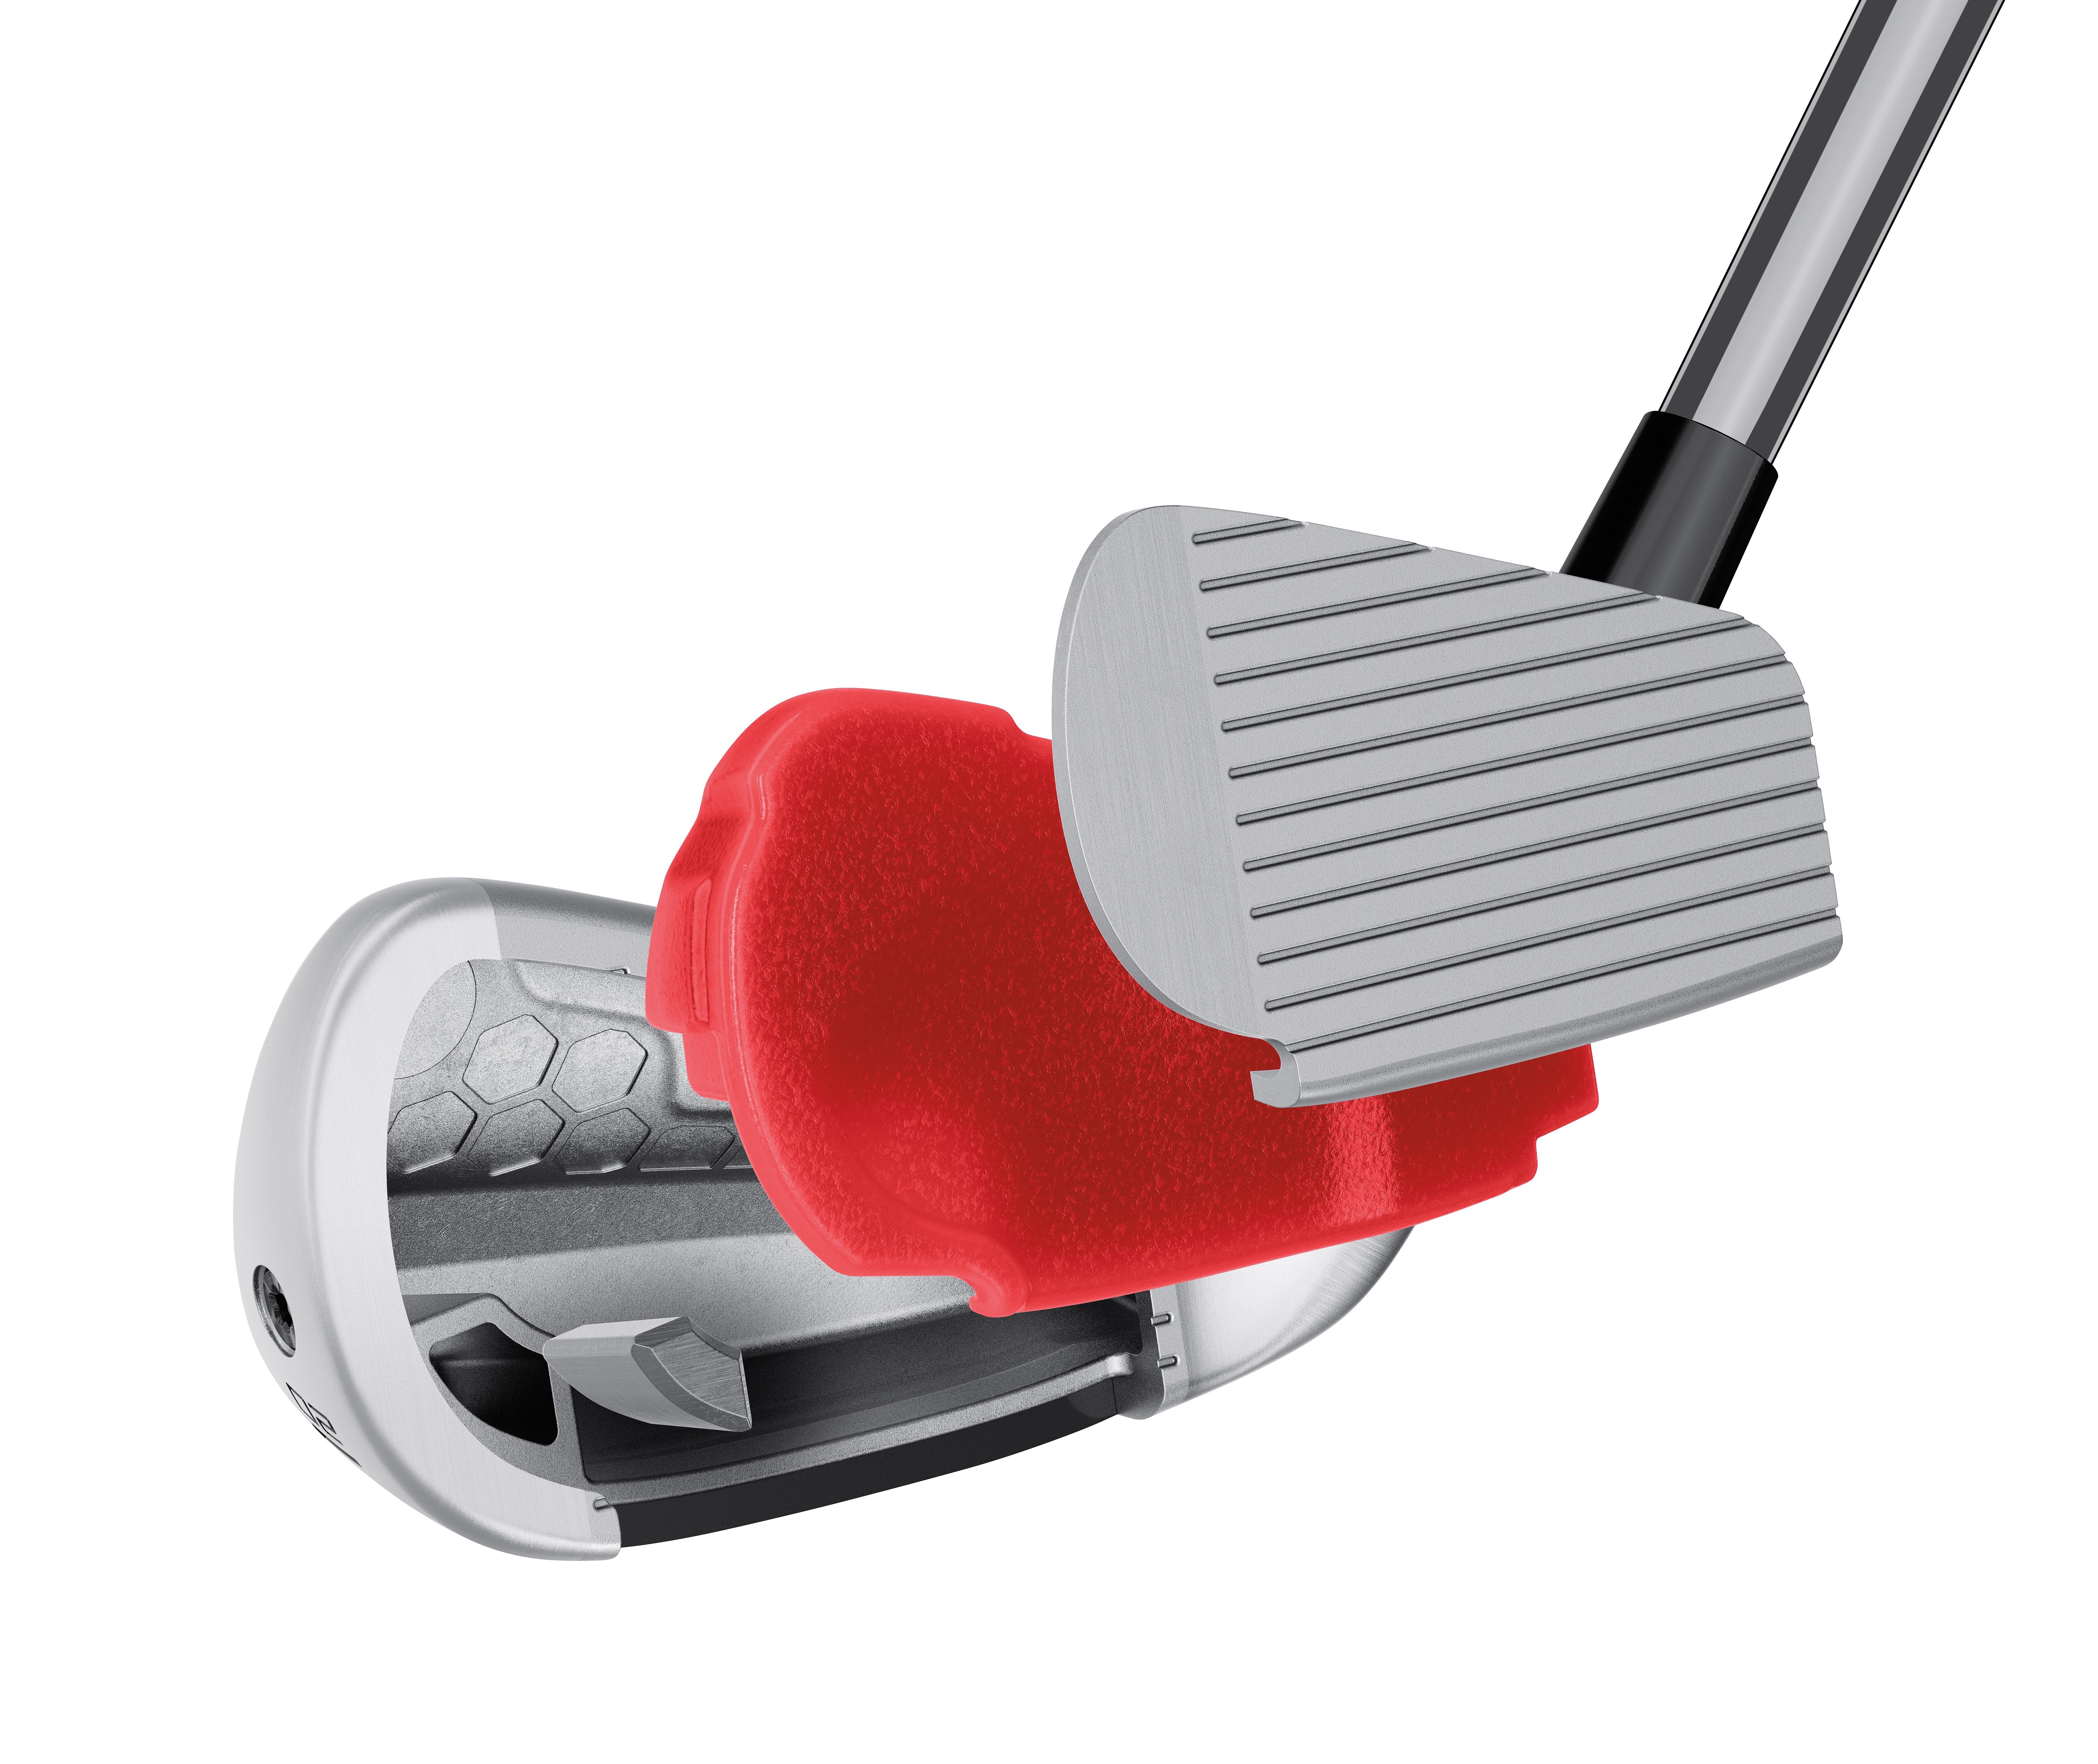
TaylorMade PUDI
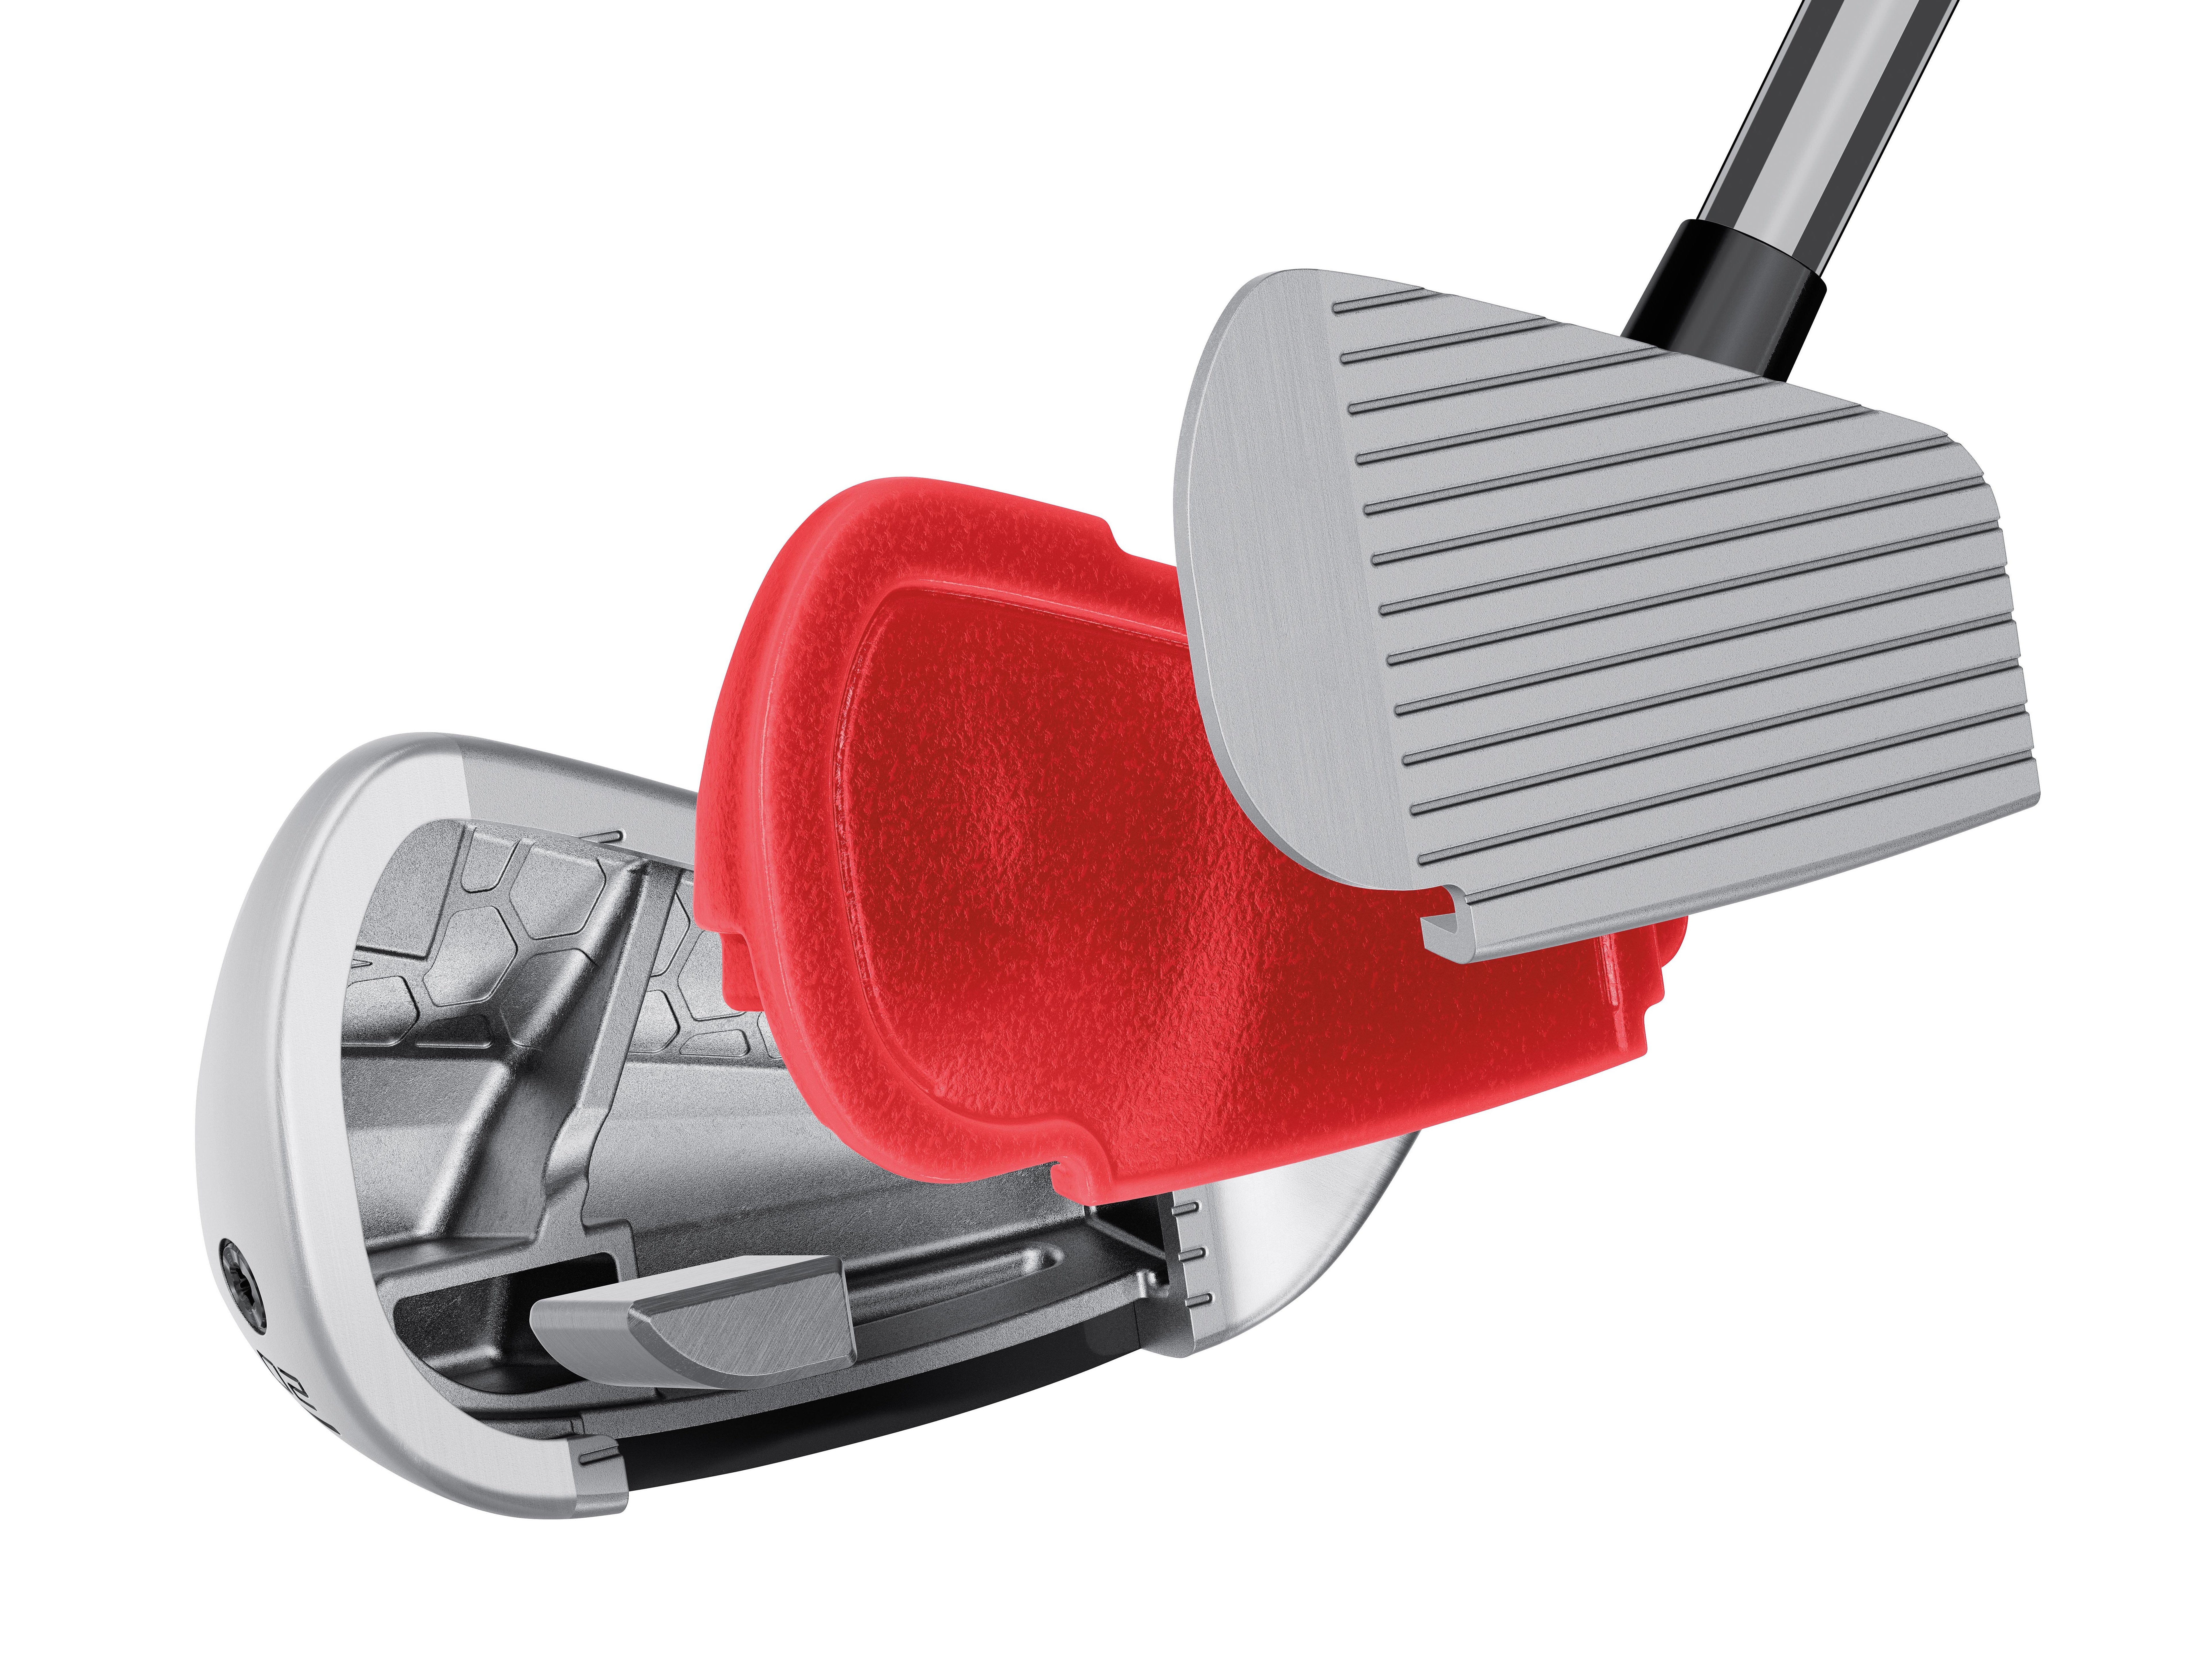
TaylorMade PUDI technology cutaway (via TaylorMade)
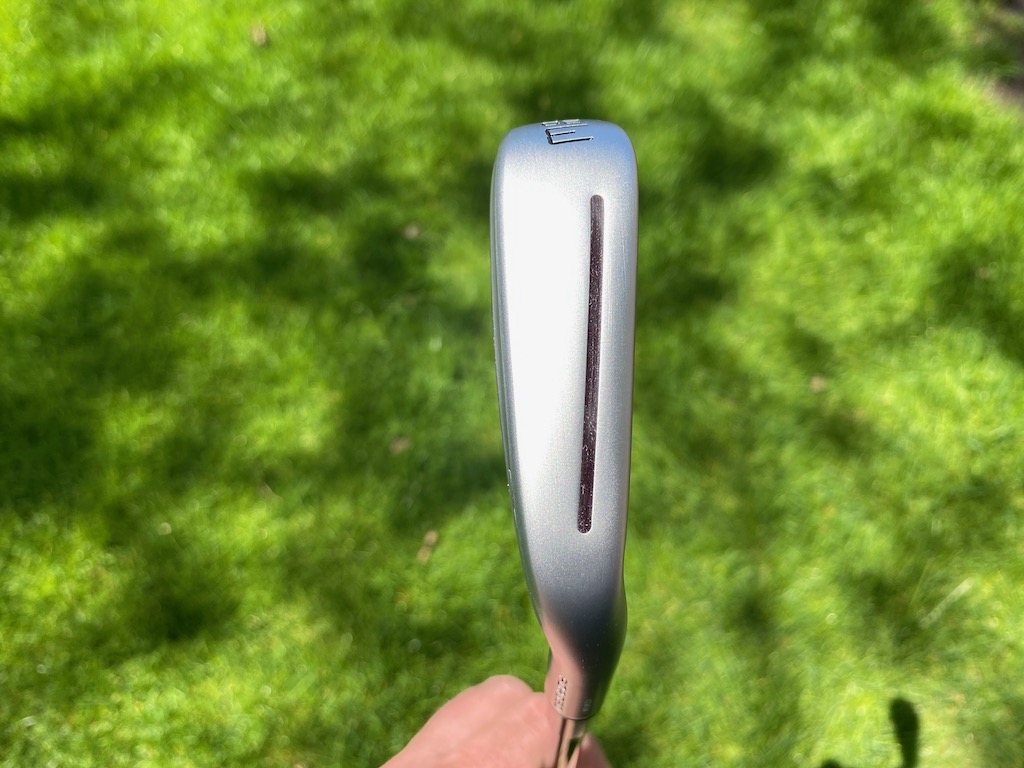
Crafted with tour player input, TaylorMade sought to develop a confidence-inspiring utility iron that blends with the rest of the P Series irons. Also of note: Interestingly, the PUDI has a more compact head than the P790.
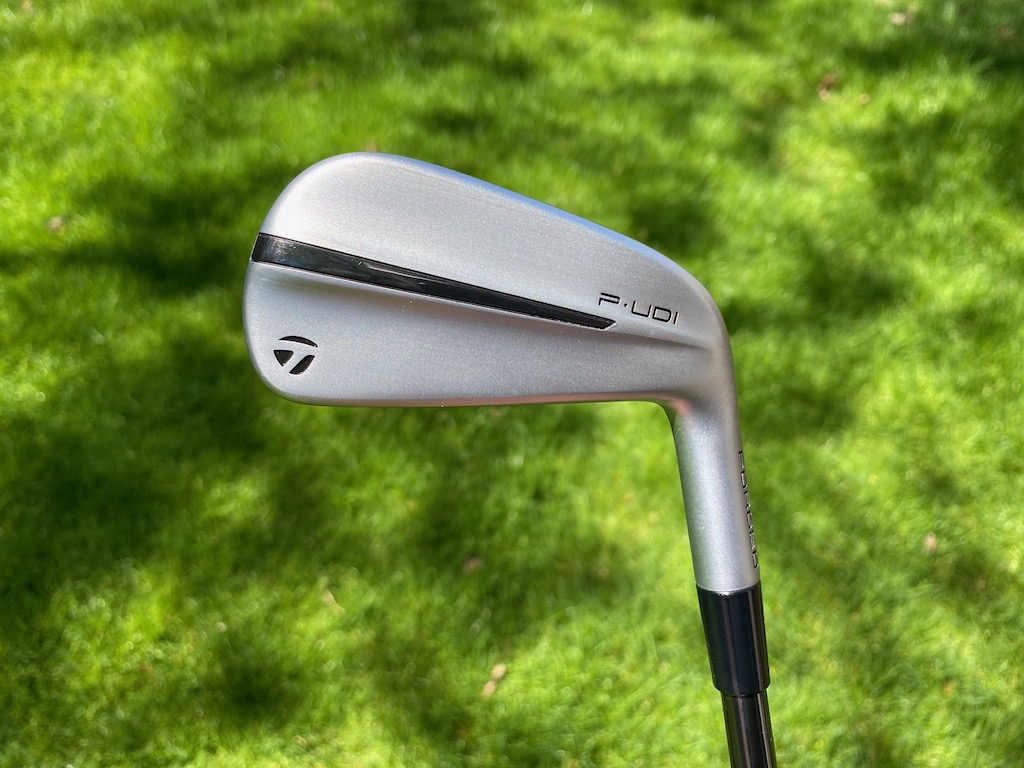
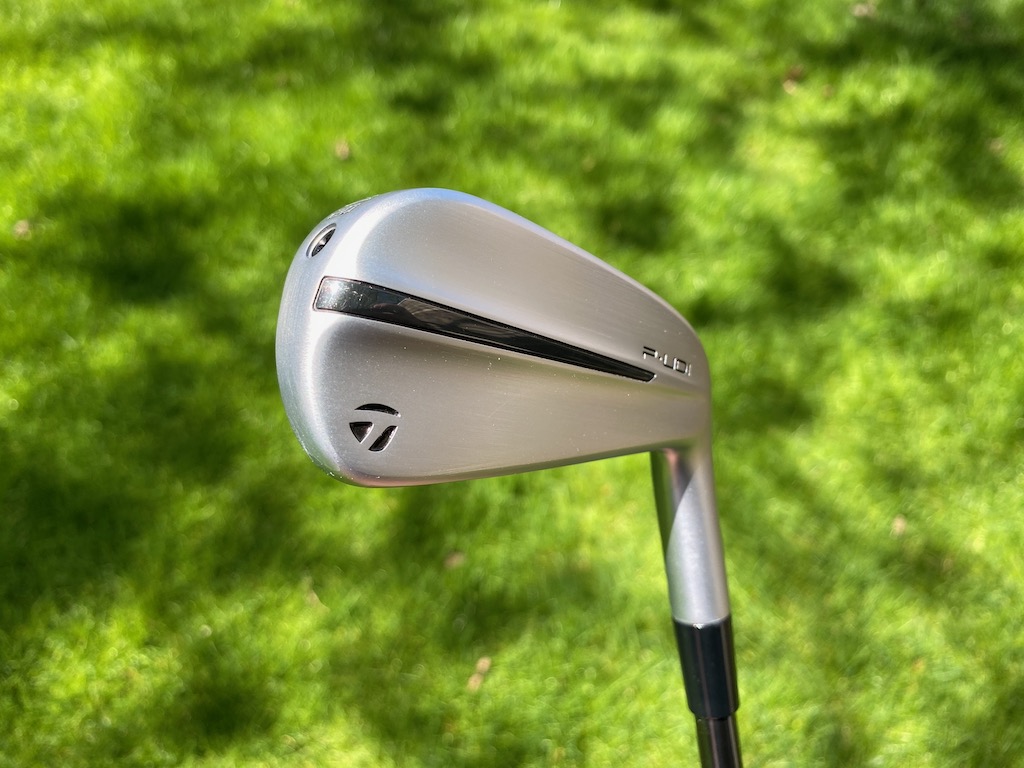
In comparison to past UDI products, the PUDI has a more traditional iron shape, slimmer toplines, and less offset with a little of the backbar visible at address.

TaylorMade PDHY
TaylorMade PDHY tech cutaway (via TaylorMade).
Larger in profile than the PUDI, the PDHY seeks to position center of gravity (CG) lower in the club for ease of launch. The toe height is larger and the profile is larger at address — roughly five millimeters longer than PUDI — the sole of the club is wider for improved forgiveness.


Club Junkie’s take
Golfers who feel like they are missing something at the top of the bag could find the PUDI or PDHY a great option. The look of the PUDI should fit the most discerning eye with a more compact look, less offset, and a thinner topline. If you want a little more confidence looking down the P-DHY will be slightly larger while still being a good-looking utility iron.
For being small packages both models pack a pretty good punch with fast ball speeds, even off-center. The feel is soft and you get a solid feel of the ball compressing off the face when you strike it well. Your ears are greeted with a nice heavy thud as the ball and club come together. The PDHY will launch a little higher for players who need it while the PUDI offers a more penetrating ball flight. Both utility irons could be the cure for an open spot in the top end of the bag.
PUDI, PDHY, or Rescue?
TaylorMade offers the following notes to assist golfers in filling out their bags:
- PUDI has mid-CG right behind the center face to create a more penetrating mid-to-low ball flight
- PDHY has a lower center of gravity to produce an easier-to-launch mid-to-high ball flight.
- Both PUDI and PDHY are lower-flying than the company’s hybrid/Rescue clubs.
- PUDI is more forgiving than P790.
- PDHY is the most forgiving iron in the entire TaylorMade iron family
Pricing, specs, and availability
Price: $249.99
At retail: Now
Stock shafts: UST Mamiya’s Recoil DART (105 X, 90 S and 75 R – only in PDHY)
Stock grip: Golf Pride’s ZGrip (black/grey)
PUDI lofts: 2-17°, 3-20°, 4-22° in both left and right-handed
PDHY lofts: 2-18°, 3-20° and 4-22° in both left and right-handed
- LIKE15
- LEGIT5
- WOW3
- LOL3
- IDHT1
- FLOP2
- OB2
- SHANK5
Equipment
Coolest thing for sale in the GolfWRX Classifieds (5/3/24): Scotty Cameron Champions Choice 2.5+ putter

At GolfWRX, we are a community of like-minded individuals that all experience and express our enjoyment of the game in many ways.
It’s that sense of community that drives day-to-day interactions in the forums on topics that range from best driver to what marker you use to mark your ball. It even allows us to share another thing we all love – buying and selling equipment.
Currently, in our GolfWRX buy/sell/trade (BST) forum, there is a listing for a Scotty Cameron Champions Choice 2.5+ putter
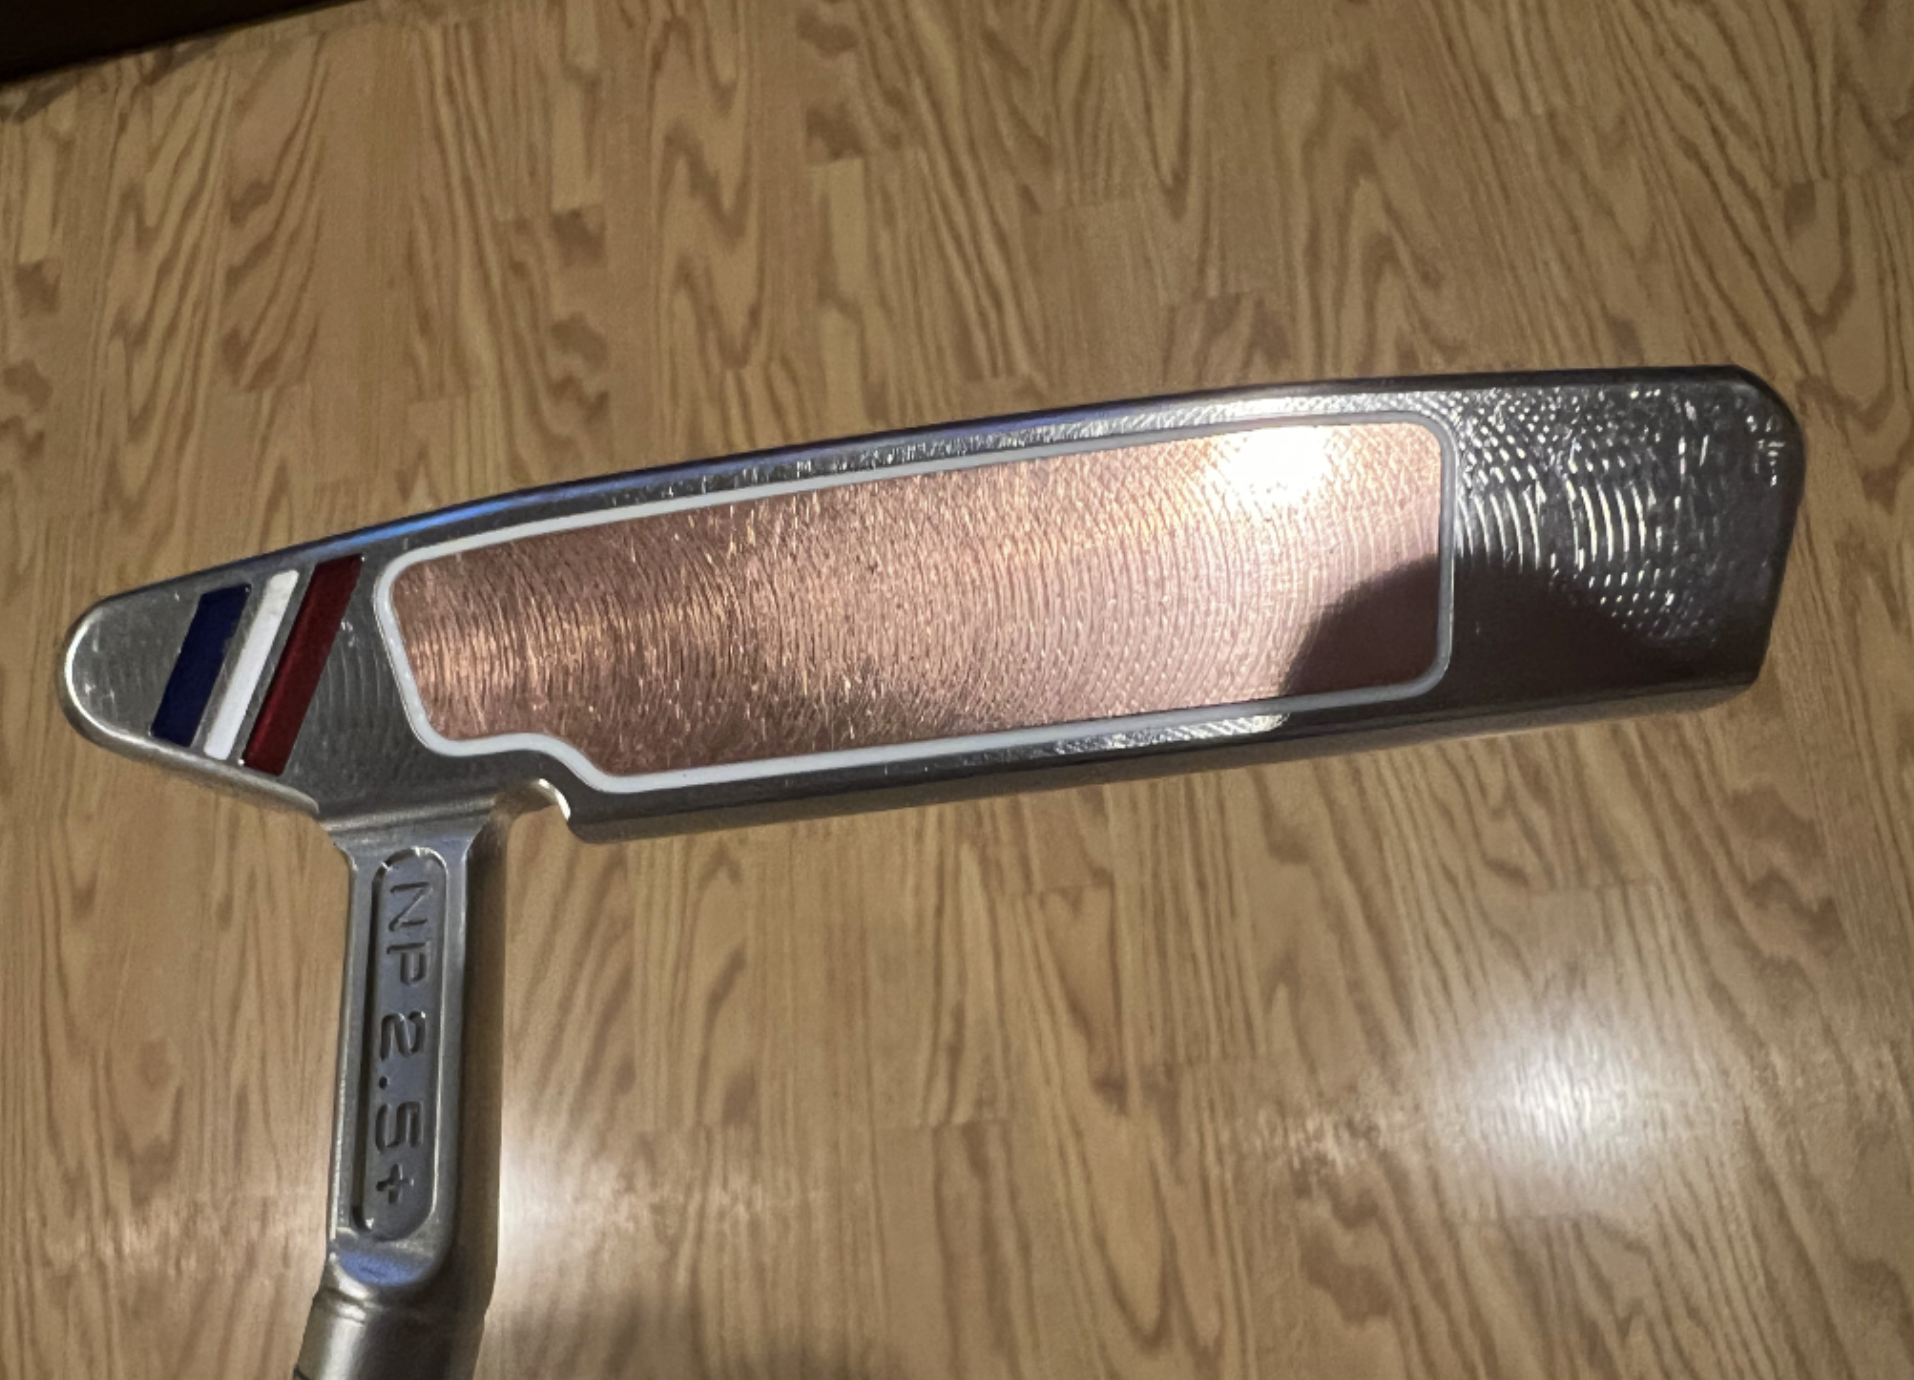
From the seller: (@wwcl): “Has been gamed as pics show. 33.5 includes original h/c and grip. $575 includes shipping and PP fees.”
To check out the full listing in our BST forum, head through the link: Scotty Cameron Champions Choice 2.5+ putter
This is the most impressive current listing from the GolfWRX BST, and if you are curious about the rules to participate in the BST Forum you can check them out here: GolfWRX BST Rules
- LIKE1
- LEGIT1
- WOW0
- LOL0
- IDHT0
- FLOP0
- OB0
- SHANK0


Dave Portnoy places monstrous outright bet for the 2024 Masters

John Daly stuns fans into silence with brutal opening tee shot on PGA Tour Champions

Things got heated at the Houston Open between Tony Finau and Alejandro Tosti. Here’s why

Justin Thomas on the equipment choice of Scottie Scheffler that he thinks is ‘weird’

Tiger Woods arrives at 2024 Masters equipped with a putter that may surprise you

‘Absolutely crazy’ – Major champ lays into Patrick Cantlay over his decision on final hole of RBC Heritage

Report: Tiger Woods has ‘eliminated sex’ in preparation for the 2024 Masters

Two star names reportedly blanked Jon Rahm all week at the Masters

Report: LIV Golf identifies latest star name they hope to sign to breakaway tour

Neal Shipley presser ends in awkward fashion after reporter claims Tiger handed him note on 8th fairway

Kris Kim WITB 2024 (May)
Kris Kim what’s in the bag accurate as of the CJ Cup Byron Nelson. More photos from the event here....

Richy Werenski WITB 2024 (May)
Richy Werenski what’s in the bag accurate as of the CJ Cup Houston Open. Driver: Titleist TSR3 (10 degrees, D1...

Wesley Bryan WITB 2024 (May)
Wesley Bryan what’s in the bag accurate as of the CJ Cup Byron Nelson. Driver: Callaway Paradym Ai Smoke Triple...

Adam Scott WITB 2024 (May)
Adam Scott what’s in the bag accurate as of the 2024 CJ Cup Byron Nelson. Driver: TaylorMade Qi10 (10.5 degrees)...
-
 19th Hole2 weeks ago
Justin Thomas on the equipment choice of Scottie Scheffler that he thinks is ‘weird’
-
 19th Hole2 weeks ago
‘Absolutely crazy’ – Major champ lays into Patrick Cantlay over his decision on final hole of RBC Heritage
-
 19th Hole3 weeks ago
Two star names reportedly blanked Jon Rahm all week at the Masters
-
 19th Hole3 weeks ago
Report: LIV Golf identifies latest star name they hope to sign to breakaway tour
-
 19th Hole3 weeks ago
Neal Shipley presser ends in awkward fashion after reporter claims Tiger handed him note on 8th fairway
-

 19th Hole3 weeks ago
Brandel Chamblee has ‘no doubt’ who started the McIlroy/LIV rumor and why
-

 19th Hole1 week ago
LET pro gives detailed financial breakdown of first week on tour…and the net result may shock you
-
 Equipment3 weeks ago
Jason Day on his recent switch into Srixon ZX5 and ZX7 Mk II irons
Gary
Jun 16, 2015 at 2:14 pm
Instead of using mallet would a impact driver work work?
Kevin
Dec 17, 2014 at 5:18 pm
I used to punch stamp my clubs but the results were not as good as I wanted. So after searching on the internet I found http://www.personaltouchsports.com These guys did amazing work. After going through them I would never punch stamp again!
Corey
Nov 8, 2014 at 1:29 pm
Where can I get that solid dot stamp and what’s the best way to fill in the stamps with paint
nik dallos
Feb 7, 2014 at 10:41 pm
I am embarrassed someone even had to give this tutorial. Next tip, how to tie laces on your shoes. And how to put new grips on your clubs! Man im a negative nantz. Feel free to swear at me and put me down.
melrosegod
Feb 7, 2014 at 4:31 pm
I have stamped a few wedges and I like the “not so clean look”. That said, layer 4 or 5 strips of masking tape to develop an indentation when you stamp. It will help you keep your die in place for multiple hits.
Tony
Feb 7, 2014 at 3:52 pm
Anyone tried this on Ping wedges? Specifically the Tour S’s.
Thx
Jon Deerman
Feb 6, 2014 at 12:43 pm
As a metal worker with stamping experience, I would suggest to practice your technique on an old club or scrap piece of metal. Many first timers (including myself at the beginning) will not place the stamp correctly, causing uneven stamps or even damage to the material itself. (This means you must take a grinder and remove material to take the “bad” stamp away, which could change the feel of your club) As all things with golf it comes with practice, so if you keep at it success will come. Just remember… don’t make your first stamp an attempt to do it on those new Vokey’s or Fourteens.
Eric Johnson
Feb 6, 2014 at 1:05 pm
Jon – good reminder. It was my experience that the spacing of the pins was difficult at first (instinctively I placed the stamps too far apart) and that the depth of the stamp was not uniform. It was when I struck the stamp from several different angles that I saw the best results. Any other suggestions from your experience?
Jon Deerman
Feb 6, 2014 at 2:37 pm
Don’t be afraid to swing the hammer harder then you think, it is steel and most of the time this is a problem leading to a dreaded double hit. (Same stamp, same location but slightly off) On ease of use, there are metal stamp holders which allow a number of pins(They very from size to price, ebay being the best source), will allow you to stamp it in one swing. You may have to go over a few of the stamps but it will be quicker. If there is a missed hit, rock the pin until it settles in the previous stamp, and rock it slightly to the unmarked area hitting it with the hammer. On spacing it is good to have a lined up one after the other method. The gaps between the pins are usually what size it is (1/8″ Stamp should have 1/8″ between letters). A cost effective approach is to put a light coat of removable metal paint marker (around $5) on the bottom of your pins, placing them where you would like to see them on your clubs. This should create a template for better spacing.
zack
Feb 5, 2014 at 6:03 pm
I have cleveland cg14 wedges and find them to be un-stampable. I was wondering if anybody has stamped a cg14 wedge before and can give me any tips
Eric Johnson
Feb 5, 2014 at 7:44 pm
Zack –
CG14 are the same wedges I use and have had success stamping them all (I have 5!). I would guess that your wedges are not set firmly enough in place or your hammer/mallet is not heavy enough.
Mark
Feb 5, 2014 at 4:34 pm
What size stamp should I buy? 1/8″ ?
Eric Johnson
Feb 5, 2014 at 5:58 pm
Yes 1/8″ is the size you normally see
John Moriarty
Feb 5, 2014 at 3:55 pm
You do not ruin the finish when you stamp into it. Also instead of masking tape us double sided tape where you are going to stamp. You can press the stamp in by hand first and it leaves a mark of the letter. It allows you to plan out a bit better. Also when you hammer away the stamp won’t slip since it’s held down by the tape.
Roberat Upton
Feb 5, 2014 at 2:52 pm
Frankly, that cheap square font on those punches looks amateurish, cheap and nasty to me ? Why would you want to de-value a relatively expensive club like that ?
Jack
Feb 6, 2014 at 3:09 am
Roberat, tons of golf pros have it done, so maybe we just want to be like them? I’ve not done it personally since it does affect the resale value.
Nate
Feb 7, 2014 at 4:16 pm
When I did mine I purchased a Comic Sans set of stamps instead of the block font (believe its Courier). There are also some design stamps people might find interesting, like a bird or clover. My vokeys get a clover for each chip-in or hole-out.
Anthony H Melia
Dec 27, 2020 at 10:22 am
Great idea, like a college football helmet! I’m stealing this.
Monster
Mar 30, 2014 at 8:59 am
Roberat, It is meant to look that way. Its personal, A wedge is to be used until the grooves are gone. They are not for real sale. Next time you’re working on the game, Put your driver down and Go practice some wedges.
Chris
Feb 5, 2014 at 2:50 pm
I always love the phrase “it is not as dangerous as you would think”
Kevin Hefner
Feb 5, 2014 at 2:33 pm
What happens to the plating on the wedge, if it is chrome plated or a black wedge?
Eric Johnson
Feb 5, 2014 at 3:03 pm
Kevin – I have had no wear issues stamping chrome plated and raw clubs. I personally have not stamped any darker finished clubs but cannot foresee any danger to the club’s integrity. If you’re worried about rust then I’d be sure to fill in your stamps with paint. Good luck with your “wedged” haha