Instruction
Jumping for Distance (Part 2): The One-Foot Jump
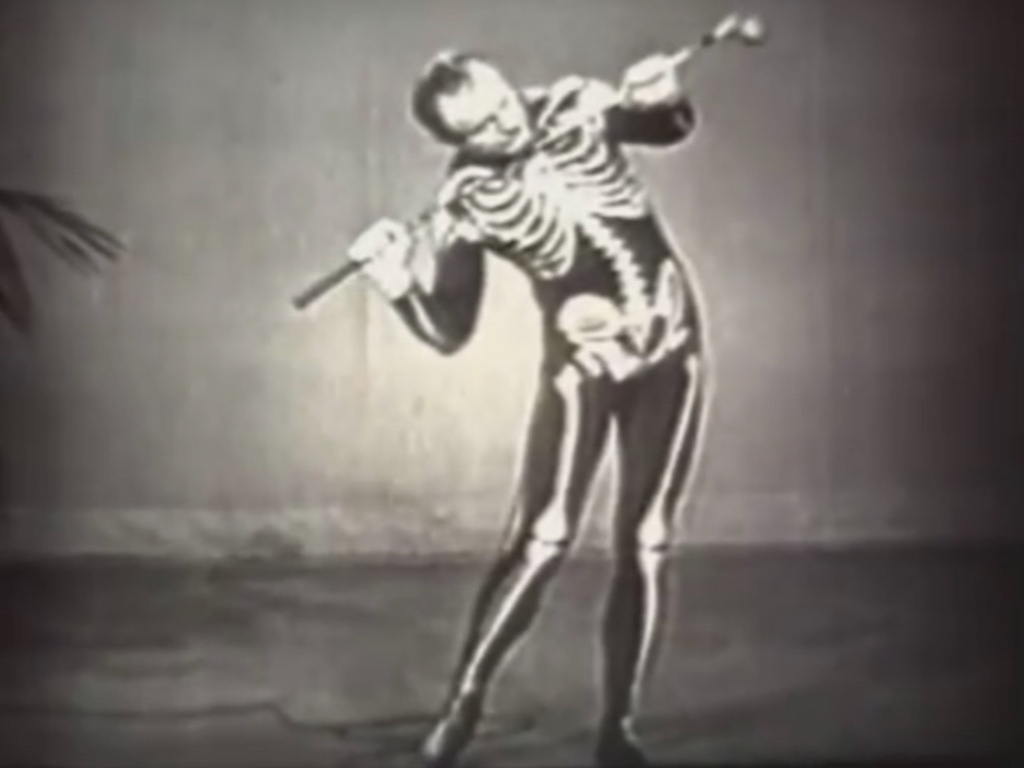
In Part 1, I wrote about how I think this concept of jumping up with both feet for more power may have come about in part due to misinterpretation of still photography and force plate data, self-propagation, and a possible case of correlation vs causation. I also covered reasoning why these players are often airborne, and that can be from flawed setups that include overly wide stances and/or lead foot positions that are too closed at setup or a re-planted lead foot that ends up too closed during the downswing.
In Part 2, let’s look at what I feel is a better alternative, the one foot jump. To me, it’s safer, it doesn’t complicate ball striking as much, and it can still generate huge amounts of vertical ground force.
First, set up with an appropriate stance width. I like to determine how wide to stand based on the length of your lower legs. If you go to your finish position and stand on your lead leg and let your trail leg dangle down so your knees are parallel, your lower trail leg should extend only as far back as it will go while being up on the tip of your trail toe. If you roll that trail foot back down to the ground, viola, you’ll have a stance width that’s wide enough to be “athletic” and stable but not so wide you lose balance when swinging. You can go a little wider than this, but not much.
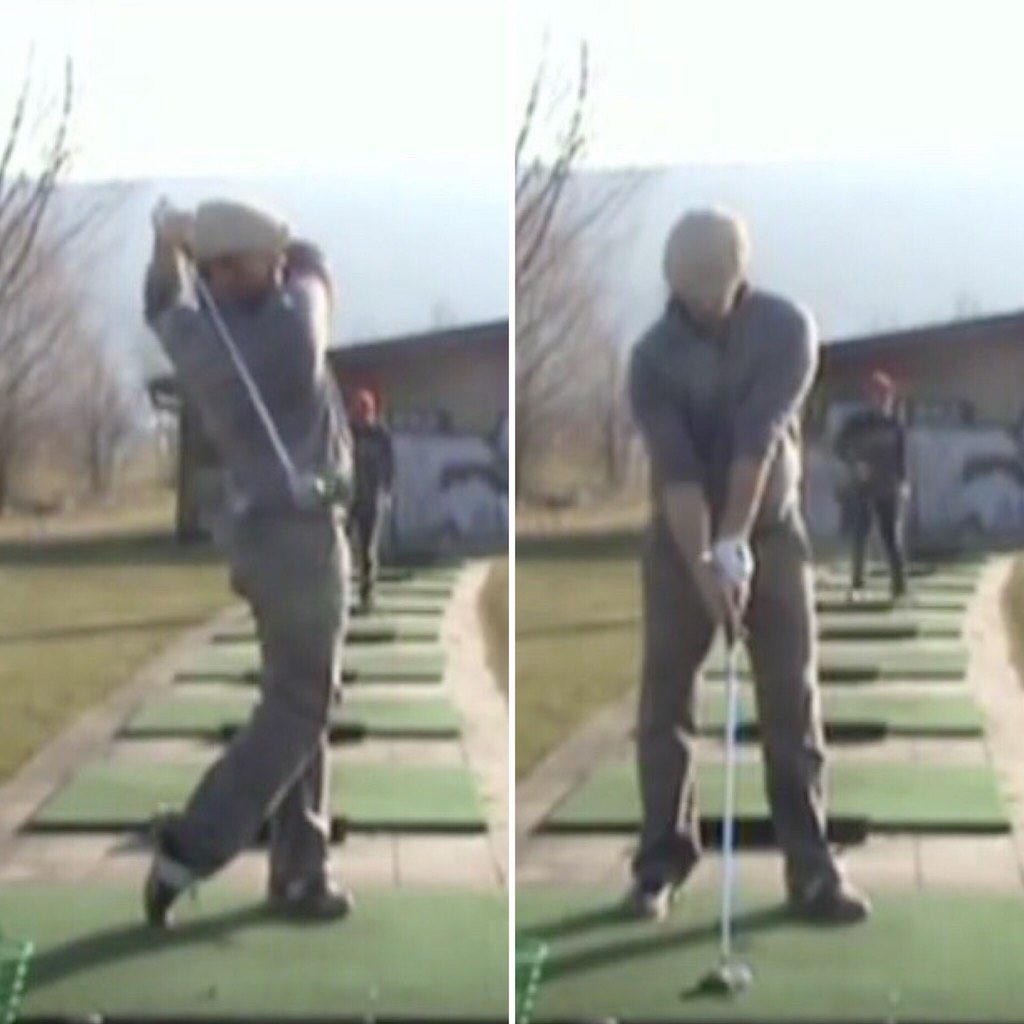
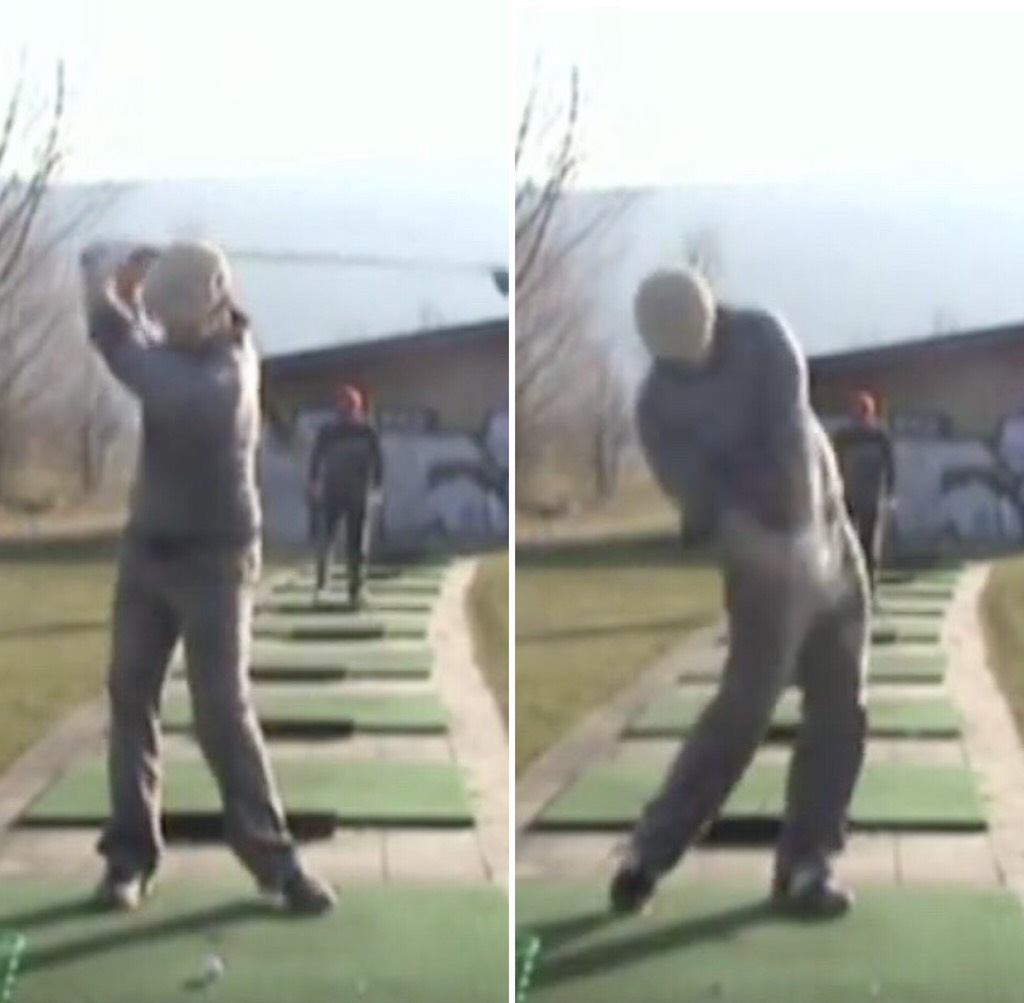
To contrast, the stance below would be too wide.
Second, make sure your lead foot is open sufficiently at address. I’ve previously outlined how to do both these first two points in this article.
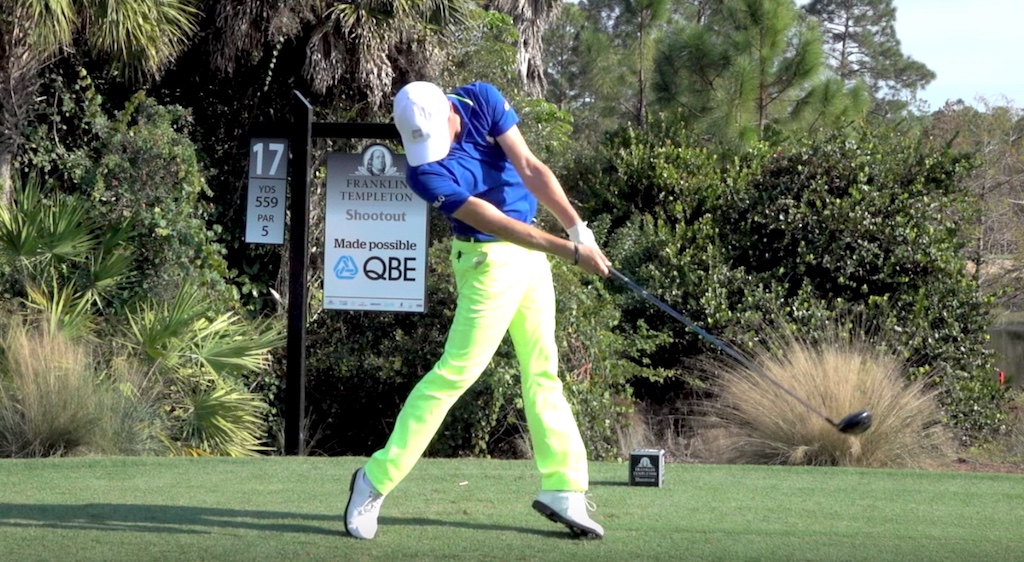
Third, whether you shift your weight to your trail foot or keep a more centered weight type feeling in the backswing, when you shift your weight to your lead foot, be careful of the Bubba replant, and then push up with that lead leg to push your lead shoulder up. This is the one-foot “jump” and it will take advantage of parametric acceleration (read more about that here).
But also at the same time, shift your lower spine towards the target.
From a face-on viewpoint, this can look like back bend, but in 3D space it’s side bend. It kind of feels like you are crunching the trail side of your mid-section, or maybe just bending over to the side to pick up a suitcase, for example. This move helps lower your trail shoulder, which brings down the club (whereas this is more difficult to do if you try to two-foot jump with your trail leg). It also helps you to keep from getting airborne off your lead foot. Further it doesn’t change your low point (by not changing the relative position of the C7 vertebrae in its general orb in space) and complicate ball striking like a two-foot jump does.
At this point, the club releases and you can stand up out of the shot (you don’t need to transition in to any sort of dangerous back bend) in balance on your lead foot having generates tons of vertical ground force without having jumped off the ground or putting yourself at risk for injury.
“Movember” mustache… not required!
- LIKE50
- LEGIT6
- WOW3
- LOL2
- IDHT0
- FLOP8
- OB2
- SHANK27
Instruction
Clement: Laid-off or perfect fade? Across-the-line or perfect draw?

Some call the image on the left laid off, but if you are hitting a fade, this could be a perfect backswing for it! Same for across the line for a draw! Stop racking your brain with perceived mistakes and simply match backswing to shot shape!
- LIKE0
- LEGIT0
- WOW0
- LOL0
- IDHT0
- FLOP0
- OB0
- SHANK1
Instruction
The Wedge Guy: The easiest-to-learn golf basic
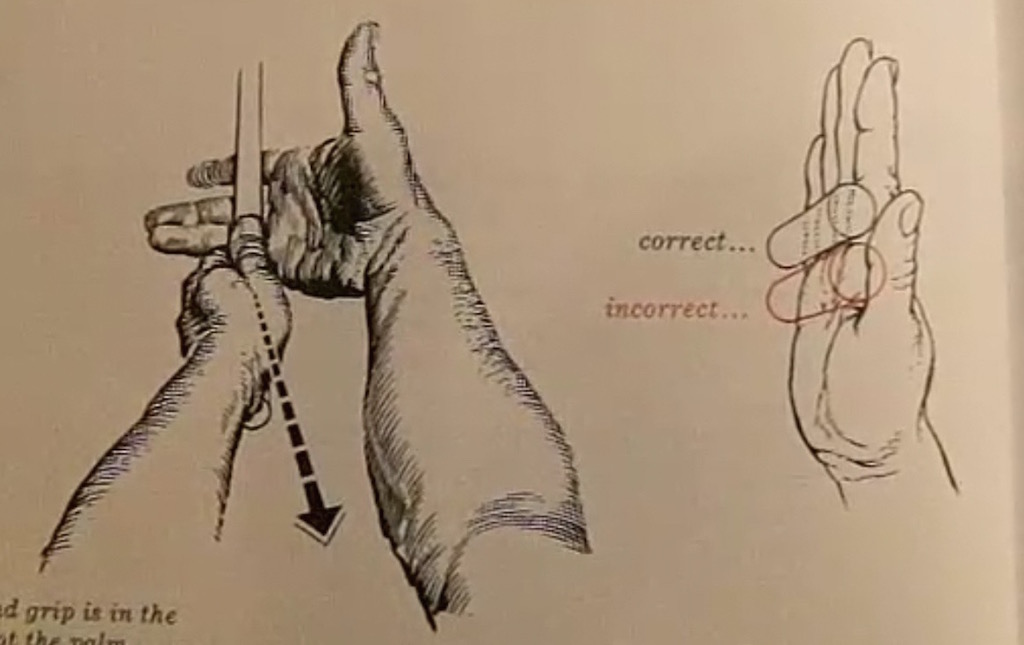
My golf learning began with this simple fact – if you don’t have a fundamentally sound hold on the golf club, it is practically impossible for your body to execute a fundamentally sound golf swing. I’m still a big believer that the golf swing is much easier to execute if you begin with the proper hold on the club.
As you might imagine, I come into contact with hundreds of golfers of all skill levels. And it is very rare to see a good player with a bad hold on the golf club. There are some exceptions, for sure, but they are very few and very far between, and they typically have beat so many balls with their poor grip that they’ve found a way to work around it.
The reality of biophysics is that the body moves only in certain ways – and the particulars of the way you hold the golf club can totally prevent a sound swing motion that allows the club to release properly through the impact zone. The wonderful thing is that anyone can learn how to put a fundamentally sound hold on the golf club, and you can practice it anywhere your hands are not otherwise engaged, like watching TV or just sitting and relaxing.
Whether you prefer an overlap, interlock or full-finger (not baseball!) grip on the club, the same fundamentals apply. Here are the major grip faults I see most often, in the order of the frequency:
Mis-aligned hands
By this I mean that the palms of the two hands are not parallel to each other. Too many golfers have a weak left hand and strong right, or vice versa. The easiest way to learn how to hold the club with your palms aligned properly is to grip a plain wooden ruler or yardstick. It forces the hands to align properly and shows you how that feels. If you grip and re-grip a yardstick several times, then grip a club, you’ll see that the learning curve is almost immediate.
The position of the grip in the upper/left hand
I also observe many golfers who have the butt of the grip too far into the heel pad of the upper hand (the left hand for right-handed players). It’s amazing how much easier it is to release the club through the ball if even 1/4-1/2″ of the butt is beyond the left heel pad. Try this yourself to see what I mean. Swing the club freely with just your left hand and notice the difference in its release from when you hold it at the end of the grip, versus gripping down even a half inch.
To help you really understand how this works, go to the range and hit shots with your five-iron gripped down a full inch to make the club the same length as your seven-iron. You will probably see an amazing shot shape difference, and likely not see as much distance loss as you would expect.
Too much lower (right) hand on the club
It seems like almost all golfers of 8-10 handicap or higher have the club too far into the palm of the lower hand, because that feels “good” if you are trying to control the path of the clubhead to the ball. But the golf swing is not an effort to hit at the ball – it is a swing of the club. The proper hold on the club has the grip underneath the pad at the base of the fingers. This will likely feel “weak” to you — like you cannot control the club like that. EXACTLY. You should not be trying to control the club with your lower/master hand.
Gripping too tightly
Nearly all golfers hold the club too tightly, which tenses up the forearms and prevents a proper release of the club through impact. In order for the club to move back and through properly, you must feel that the club is controlled by the last three fingers of the upper hand, and the middle two fingers of the lower hand. If you engage your thumbs and forefingers in “holding” the club, the result will almost always be a grip that is too tight. Try this for yourself. Hold the club in your upper hand only, and squeeze firmly with just the last three fingers, with the forefinger and thumb off the club entirely. You have good control, but your forearms are not tense. Then begin to squeeze down with your thumb and forefinger and observe the tensing of the entire forearm. This is the way we are made, so the key to preventing tenseness in the arms is to hold the club very lightly with the “pinchers” — the thumbs and forefingers.
So, those are what I believe are the four fundamentals of a good grip. Anyone can learn them in their home or office very quickly. There is no easier way to improve your ball striking consistency and add distance than giving more attention to the way you hold the golf club.
More from the Wedge Guy
- The Wedge Guy: Golf mastery begins with your wedge game
- The Wedge Guy: Why golf is 20 times harder than brain surgery
- The Wedge Guy: Musings on the golf ball rollback
- LIKE86
- LEGIT13
- WOW6
- LOL1
- IDHT0
- FLOP4
- OB1
- SHANK8
Instruction
Clement: Stop ripping off your swing with this drill!

Not the dreaded headcover under the armpit drill! As if your body is defective and can’t function by itself! Have you seen how incredible the human machine is with all the incredible feats of agility all kinds of athletes are accomplishing? You think your body is so defective (the good Lord is laughing his head off at you) that it needs a headcover tucked under the armpit so you can swing like T-Rex?
- LIKE0
- LEGIT2
- WOW2
- LOL0
- IDHT0
- FLOP0
- OB0
- SHANK2
-

 19th Hole2 weeks ago
Dave Portnoy places monstrous outright bet for the 2024 Masters
-
 19th Hole3 days ago
Justin Thomas on the equipment choice of Scottie Scheffler that he thinks is ‘weird’
-

 19th Hole2 weeks ago
Tiger Woods arrives at 2024 Masters equipped with a putter that may surprise you
-

 19th Hole3 days ago
‘Absolutely crazy’ – Major champ lays into Patrick Cantlay over his decision on final hole of RBC Heritage
-
 19th Hole2 weeks ago
Two star names reportedly blanked Jon Rahm all week at the Masters
-
 19th Hole1 week ago
Report: LIV Golf identifies latest star name they hope to sign to breakaway tour
-

 19th Hole1 week ago
Neal Shipley presser ends in awkward fashion after reporter claims Tiger handed him note on 8th fairway
-

 19th Hole1 week ago
Brandel Chamblee has ‘no doubt’ who started the McIlroy/LIV rumor and why













Pingback: Jumping for Distance (Part 2): The One-Foot Jump | Swing Man Golf
Brian Mills
Dec 15, 2017 at 5:55 pm
I assume the guy in the skeleton suit is Mike Austin?
Alfred
Dec 15, 2017 at 7:53 am
Parts 1 and 2 are lovely articles, but as a very long hitter (but just a bit better than average golfer – putting…) I can testify that the mechanical generalities written about are fine in the laboratory, but general models don’t cut it on the golf course. We all have differently proportioned and/or more or less marginalized bodies, whether from injury, habit or genetics. Everybody has to find their own swing based on our own eccentricities. I’ve tried the formula written about above – go to your lead leg with the trailing toe on the ground and then move down into a proper stance width (ore or less) – and if I were to adhere to this model, my hips are totally out of whack (typically badly open) because of my life history of injuries and habits from other sports played. My “most balanced” (and most effective) stance width would be “too wide” for the author. My buddies see me walk all over the place and jump as I hit when my ball striking is at its best because of the relative stability of my upper body that my “too wide” stance allows. A narrow stance which typically opens my hips at set-up usually results in my front leg posting up and spinning out, causing me to lose balance and thus creating a need to compensate with my smallest muscles (hands, wrists, forearms) in an attempt to square the club face at impact. My best set-up is one that allows my upper body to remain as stable as possible through impact – “level and square” – while my lower body does what it needs to do to get out of the way. Let’s not forget that the best ball strikers in the world do what they do however they do it because their conditions – exemplary practice, coaching and physical training – allow them to do it. For the rest of us, without all the time we’d like to practice, the deep pockets for consistent and excellent coaching and bodies not trained since youth to hit golf balls, we have to make do with finding a technique to best allow us to square the club face with the ball to get it to the target. My advice – work yourself into a posture relative to the target line which allows your arms to swing in front of you as your lower body clears – all without breaking (cupping) the leading wrist as you come into the ball at impact, which allows you to finish your swing in a balanced and comfortable posture facing “towards” the target. It’s personal.
stevek
Dec 17, 2017 at 2:09 pm
Thank you Charles “Alfred” Barkley …. Alabamy bound … 🙂
Kyle
Dec 14, 2017 at 8:49 pm
Jaacob, any examples of PGA tour pros that would represent good examples of this method?
Jaacob Bowden
Dec 15, 2017 at 11:16 am
Guys that have a lot of these things (front foot sufficiently open at setup, not too wide of stance at setup, pretty good footwork, increasing spine angle from a face-on viewpoint, pushing up somewhat with the lead leg, not getting airborne or spinning out on the front foot, finishing in balance, etc)…Sam Snead, John Daly, and Mike Austin come to mind. I’m sure there are many more, but those are usually the ones I think of first.
In the swing at 0:45 in https://www.youtube.com/watch?v=Qv_hi0mQr0s&t=44s, you can really see Austin pushing up with his lead leg. The swing at 1:13, you can see him increasing his spine angle on the way down.
stevek
Dec 14, 2017 at 11:31 am
LD contestants generate so much centrifugal force pulling them outwards and downwards they jump up to counteract these high centrifugal and ground reaction forces.
juststeve
Dec 14, 2017 at 11:26 am
I like what he says about stance width. It is easy to get too wide.
Steve
stevek
Dec 14, 2017 at 2:27 pm
A wider stance is necessary to counter the high lateral thrust forces generated when weight is shifted so fast. No mystery here.
RBImGuy
Dec 14, 2017 at 5:14 pm
hum what really?
Not so much
ron
Dec 14, 2017 at 11:07 pm
^^^High golf score/Low golf IQ Guy