Equipment
Taking the backyard putting green plunge
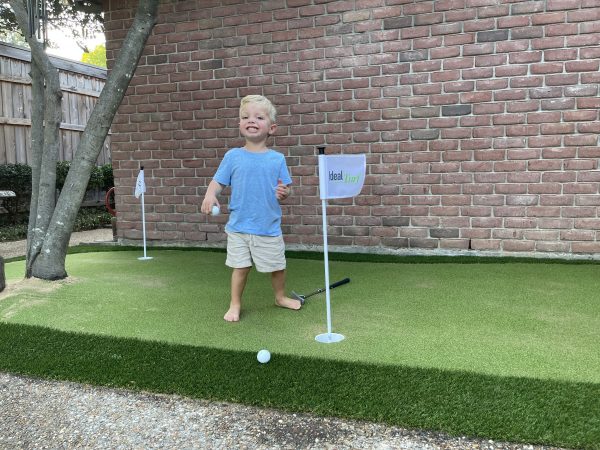
I’ve wanted a backyard putting green of my own for as long as I can remember. Every time I have moved houses, I’ve looked at each new backyard and wondered where a putting green would fit. It’s fun to dream. And I am pretty sure I am not alone in having that dream, especially amongst our GolfWRX readership full of golf nerds just like me.
I’ve researched it in the past. I’ve gotten bid estimates but never pulled the trigger. Until now. With a three-year-old son growing up, starting to really enjoy the game, it was time to make it happen.
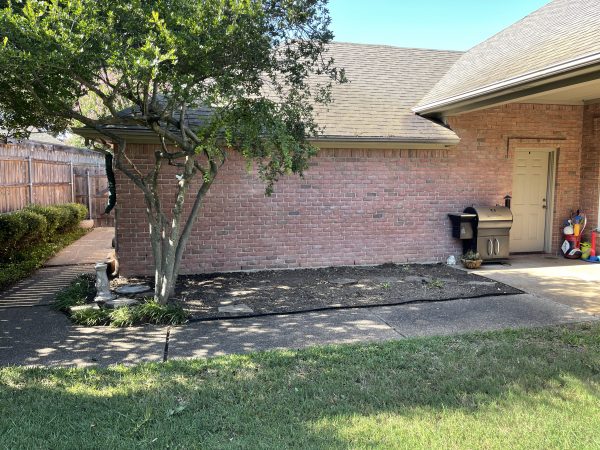
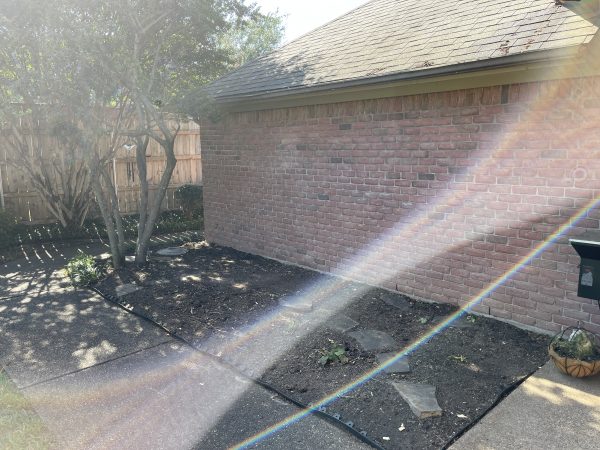
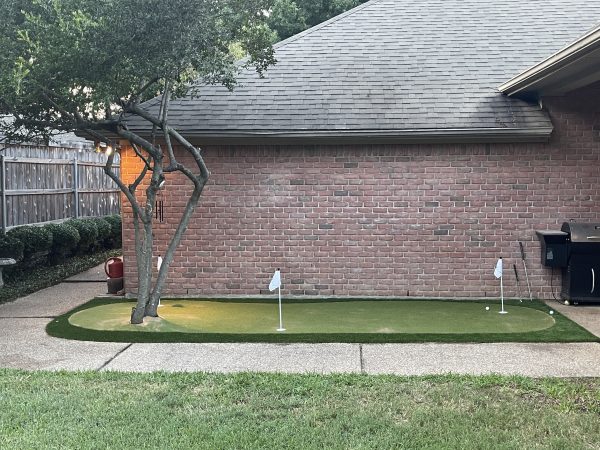
The cost was obviously a big decision point in finding the company I wanted to perform the work. I had several different companies come out for an estimate, and you’d be surprised at the range of bids I received. The area I had picked out is a garden just off my back patio, measuring 7.6 feet x 20.5 feet for a total of approximately 150 square feet. It wouldn’t be huge but big enough for three holes.
The Initial Consult
The other estimates I had received were for this garden as well as potential greens in other areas of the yard, more able to accommodate bigger green sizes, but ultimately I decided that a smaller green just off the porch would get the most use. And it was obviously more affordable. Some companies wouldn’t even entertain the garden area, stating their minimum jobs are $5,000.00 for any given project. That was out of my budget.
A putting green of the size I was hoping for, mind you, measures out to be between $1,500 to $2,600 depending on the turf chosen. Financing is available. That brings me to the most important decision you’ll make when embarking on a backyard putting green journey: choose your installer wisely based on your comfort with the people. Don’t just go with the first people you call. Go with the ones that you feel most comfortable with and who are the most transparent.
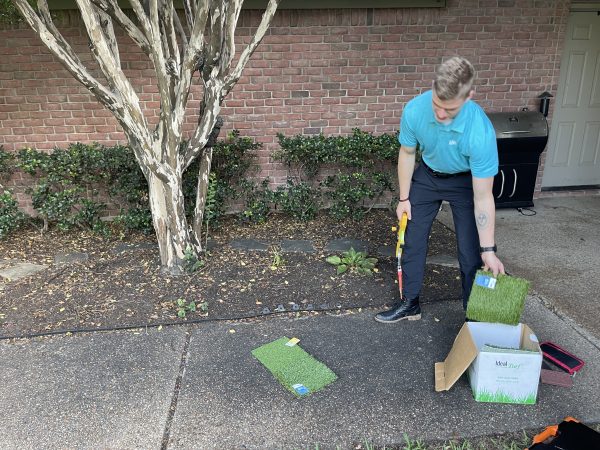
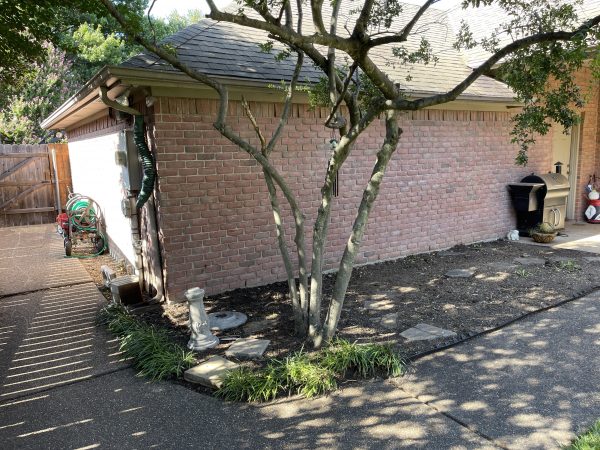
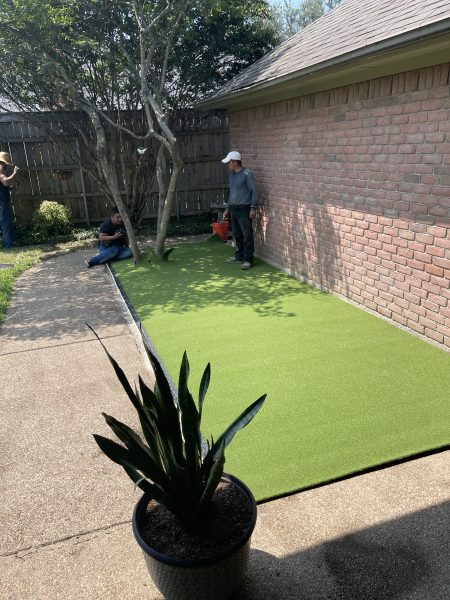
I chose a Texas-based company called Ideal Turf. They were local to me here in Fort Worth, but they provide service to the entire state of Texas and Oklahoma. Their website actually has a cost calculator so you can get a feel for the expense involved prior to even making a phone call. They were excited about this location, agreeing that it would be a nice size surface for what I was wanted. That made me feel better. Some of the present foliage would obviously need to come out, which can be done by a subcontractor that Ideal Turf uses or I could hire someone else or do it myself. I had the shrubs taken out as well as the Crepe Myrtle tree, but my designer was just fine with me leaving in the Yaupon tree, as he could work around it and give the green some shade and character.
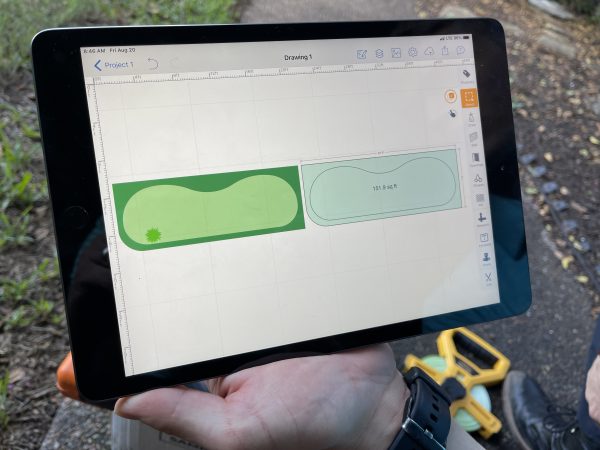
Logan, my green technician, came to the initial consultation with turf samples and a tablet that he could actually use to begin the design right there on the spot. This was the first company that I had seen do that, which was really impressive to me.

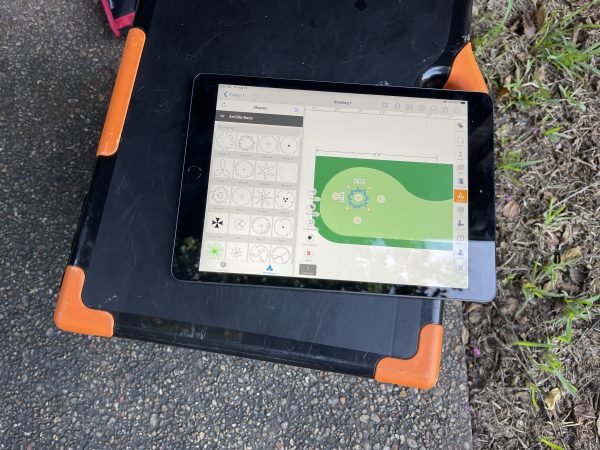
We went through the different artificial turf options for both the putting surface and the longer grass border that would surround the green. The shape is completely customizable, with hourglass or kidney bean being the most common choices. I really had three goals in mind. First, I wanted to maximize the size of the putting surface, knowing that my square footage was already on the smaller size. Second, I wanted to find the grass that looked really good but would hold up to weather conditions. Third, I wanted turf that performed as close to a real putting surface as possible.
With Logan’s help, I felt satisfied that Ideal Turf could deliver on all three items of concern. We started with an hourglass design, but we ended up widening the putting surface at most turns to ensure as large a putting area as possible. The changes were made to the design app in a matter of seconds.
The turf we went with includes UV inhibitors that are added to the fibers to reduce fading from exposure to the sun. With quality turf, drainage isn’t a concern either. Ideal Turf uses a “cascade backing system” that allows for rainwater to drain at 1,500 inches per hour. Puddling apparently won’t be an issue.
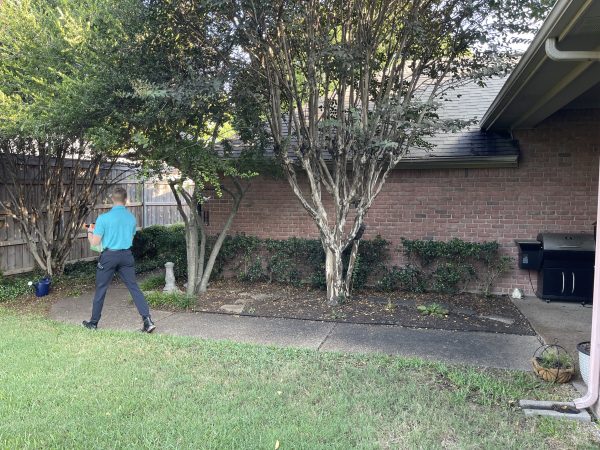
The initial visit and consultation took less than an hour, but a lot got done. When Ideal Turf was gone, I went ahead and began preparing the space for installation. The removal of the tree and shrubs needed to include the roots because three inches of the dirt are actually cleared out during the installation process and replaced with a topsoil mix ideal for leveling and drainage.
Installation Day
Ideal Turf was great at communication, with a series of emails leading up to the day of installation. I was assigned a personal Client Liason (shoutout to Samantha) who was with me every step of the way, from the estimate and design agreement to the coordination of scheduling. We were able to get the installation scheduled just over a week from the date I signed my contract.
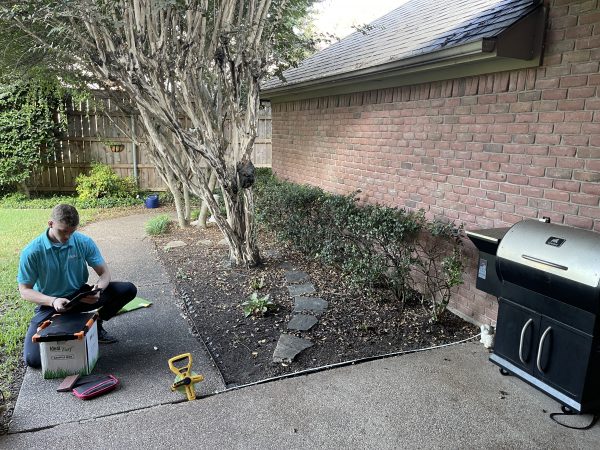
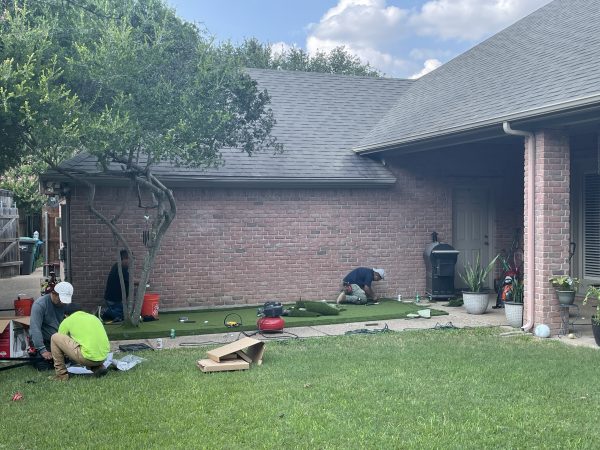
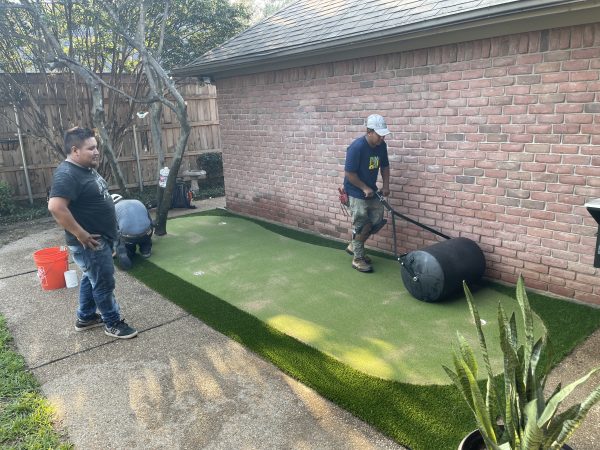
The installers were out to my house at 10:30 am on a Thursday and I was rolling putts before sundown. As I mentioned before, they cleared the existing dirt out three inches deep and replaced it with that drainable topsoil. They also marked and capped all existing sprinkler heads in the garden. That was something I didn’t think much about prior to installation day so I was relieved to learn they would be handling it.
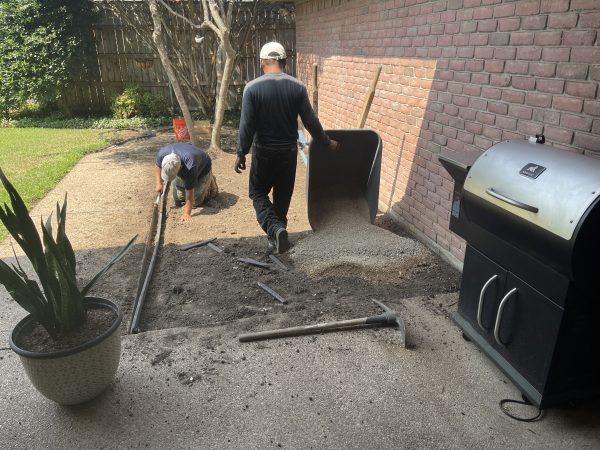
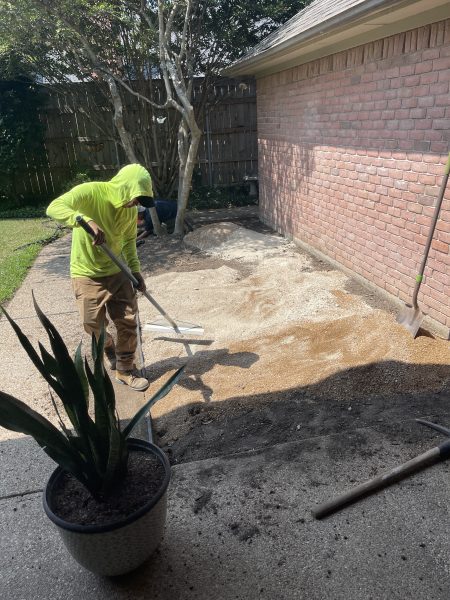
They then wet the topsoil and then smoothed and rolled it. I decided to not add many undulations to the putting surface since it was a smaller green. I wanted to make sure I had flat 15-foot putts to practice intermediate strokes. The crew was able to work around the Yaupon tree we left behind to add some charm to the green.
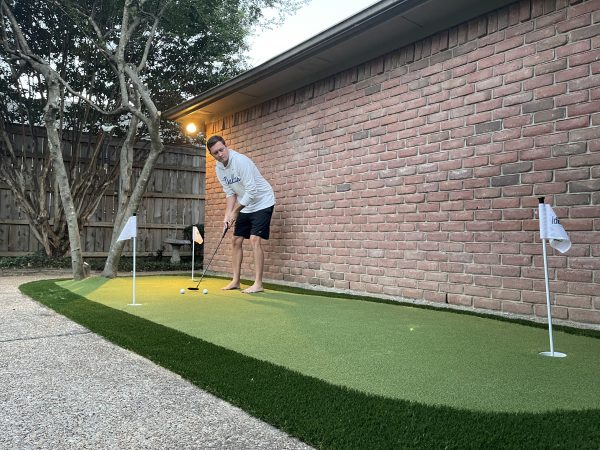
Next, the Ace Putt 56 putting turf was rolled out over the entire surface and the digital design was used to measure out and trace the green. Once marked, the green was cut to shape and the border turf was laid to form the edges. The border rough works great with wedges for short pitches and chips. Since the green has been installed, I actually turn and chip back into the heart of my backyard off the border grass for longer short game work.
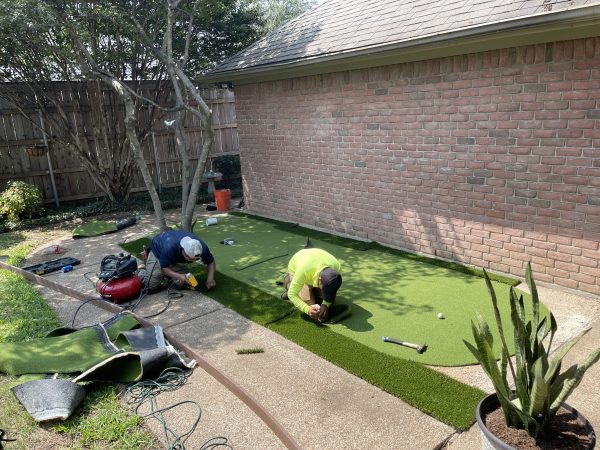
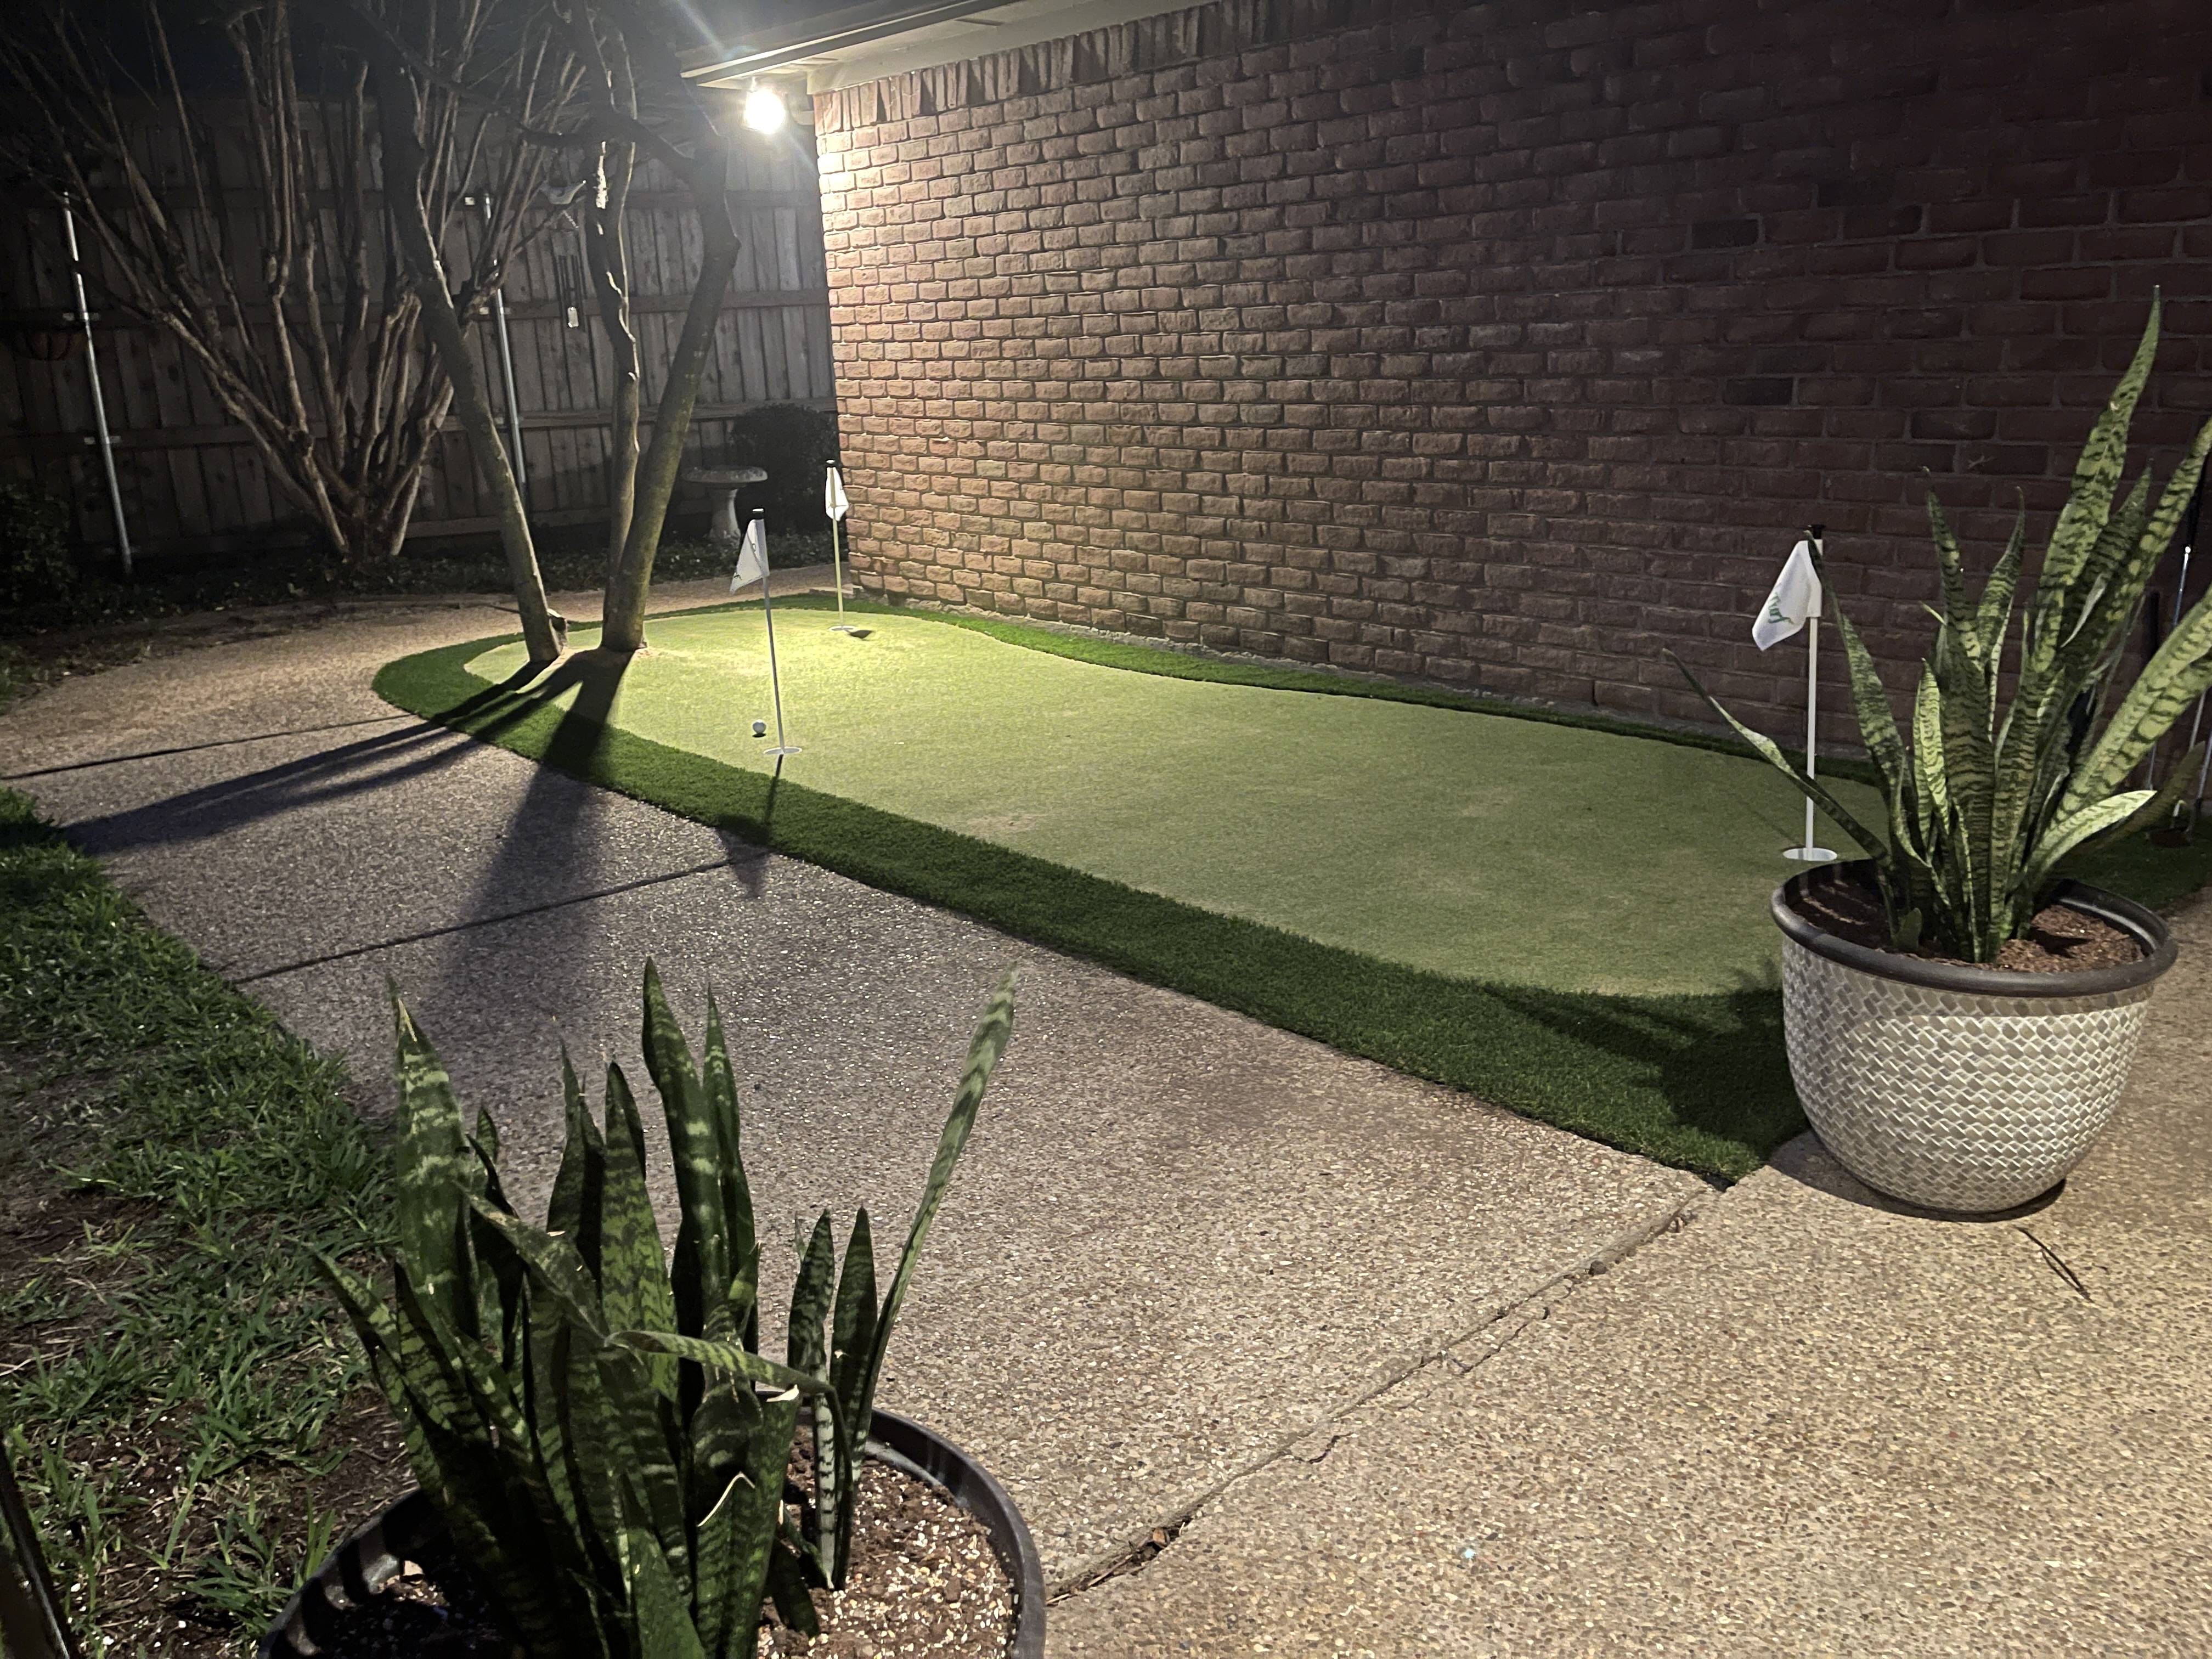
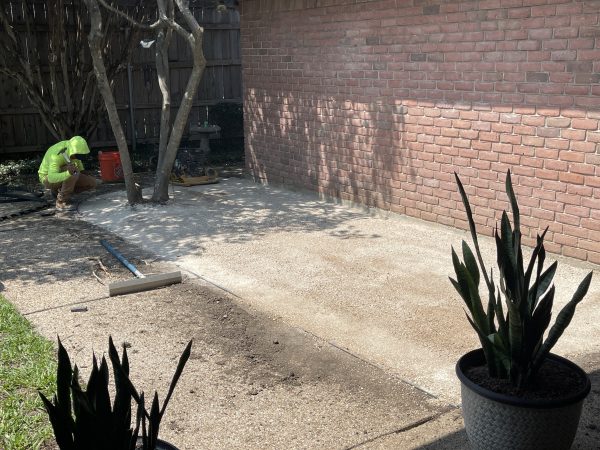
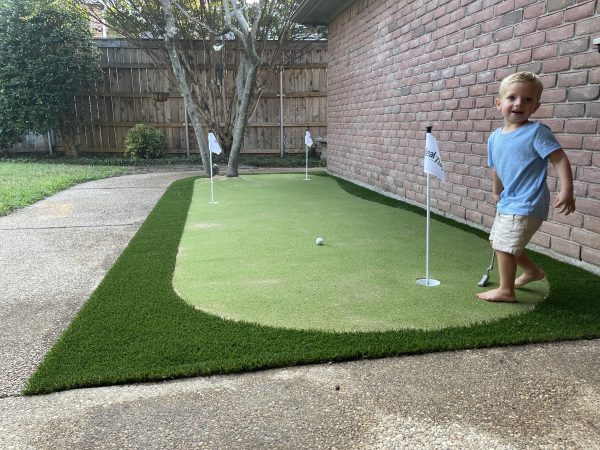
Finally, the green is sanded and rolled to level the surface and make sure the turf is laying smooth and flat. Three holes were brought out and I was asked to design their placement myself. I was my own yard’s Gil Hanse for about 25 minutes, walking the entire surface several times with putter in hand, rolling balls, deciding how I would like my own course to be routed. It was a ton of fun. I ended up going with a more Golden Age design.
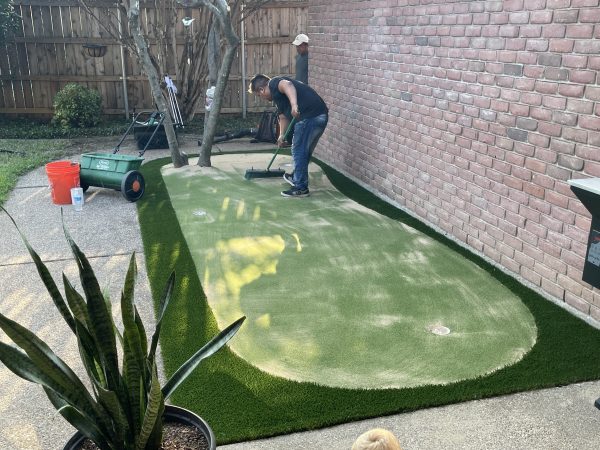
The holes are traced, cut, and then hammered into the earth. I did appreciate that a bit of extra attention was given to the hole installation so that they fit flat and clean with the turf around them. And that’s really it…the green is ready for play! Ideal Turf provided three pins and flags for the finishing touch. In less than two weeks from consultation to installation and less than eight hours for installation, the process went incredibly smooth.
Maintenance has been a breeze, as a broom and leaf blower is pretty much all you need to keep it looking perfect. The installation itself came with a one-year warranty from Ideal Turf, and a twenty-year product warranty for the turf itself. Check with whoever you decided to use for something similar.
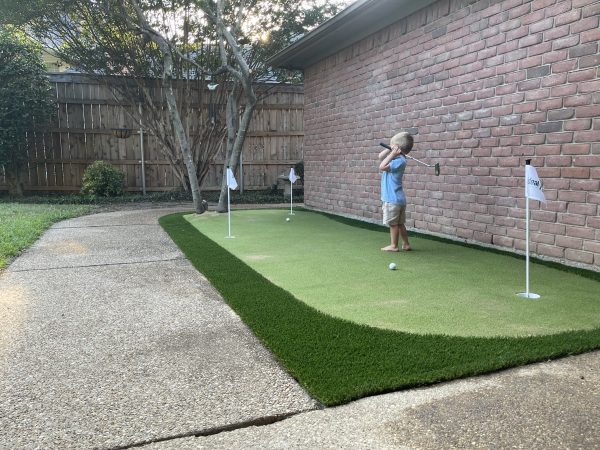
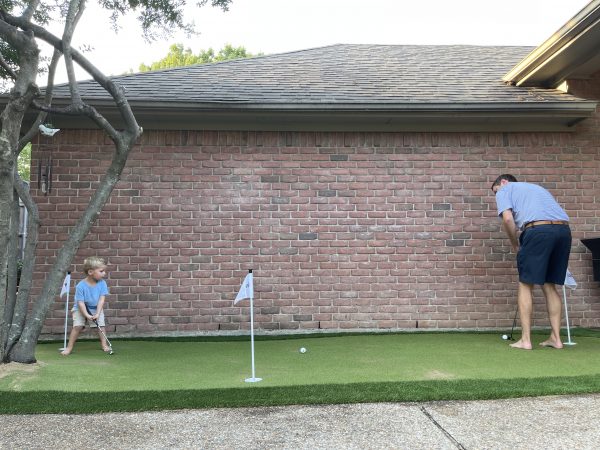
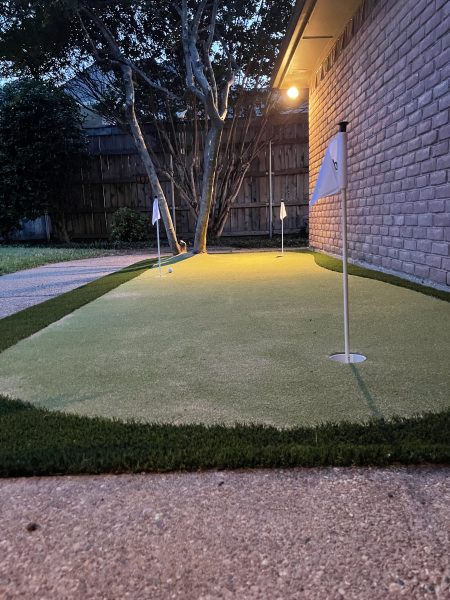
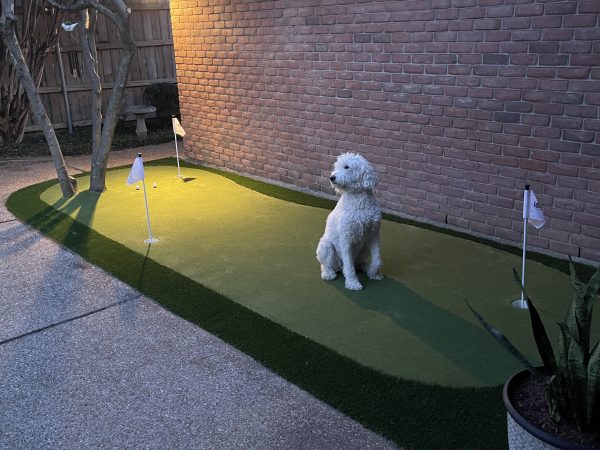
It’s been several days now and I’ve had time to enjoy the green at different hours of the day. I wake up, walk out with a cup of coffee with just the dog, and enjoy some quiet time before the sun comes up. The kiddo also loves to “practice golf” before bedtime, a delay tactic I’m happy to entertain.

Time will tell how much use the green will get as my son gets older, backyard parties are had, and the shine of a “new toy” begins to wear. But I guess the point of all this is to simply say that a backyard green is possible for all of us. There are good companies out there that aren’t trying to just take all your money. So far, I couldn’t be happier with the decision we made as a family to embark on this putting green adventure. Here’s to many sunken putts ahead.
- LIKE477
- LEGIT68
- WOW40
- LOL7
- IDHT0
- FLOP2
- OB1
- SHANK8


Equipment
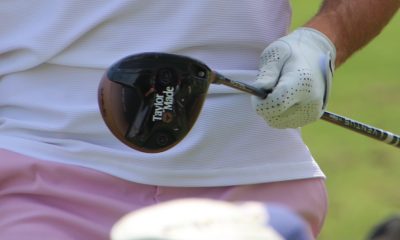
Why Rory McIlroy will likely use the new TaylorMade BRNR Mini Driver Copper at the RBC Heritage
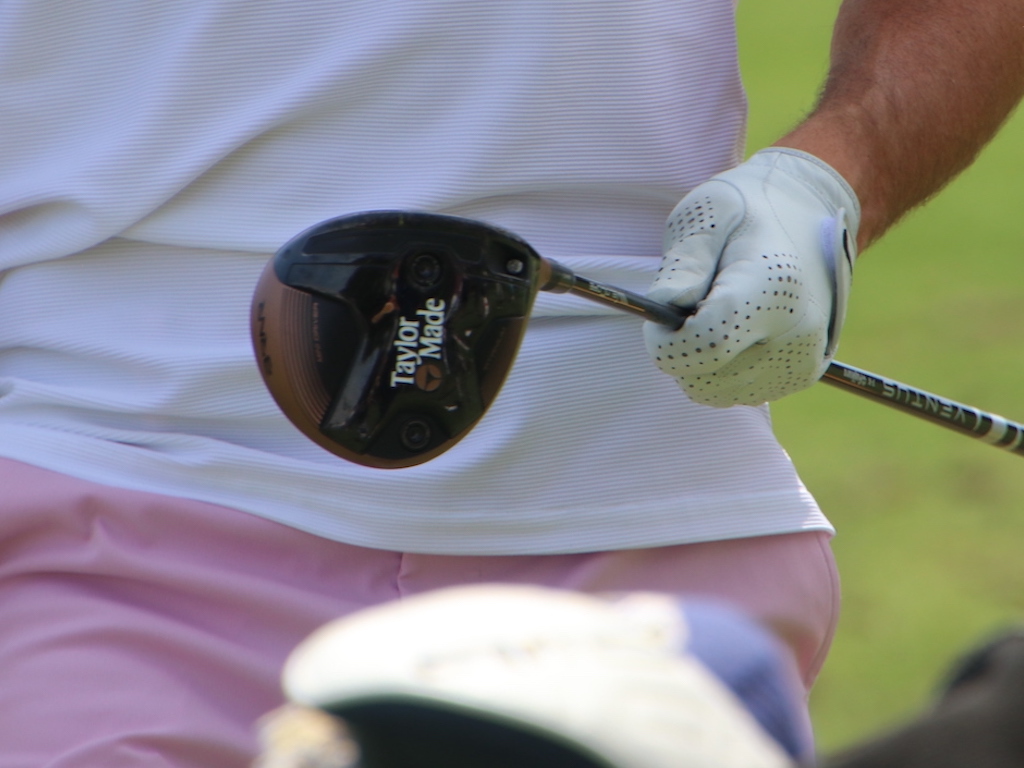
Although we spotted Rory McIlroy testing the new TaylorMade BRNR Mini Driver Copper last week during practice rounds at the Masters, he ultimately didn’t decide to use the club in competition.
It seems that will change this week at the 2024 RBC Heritage, played at the short-and-tight Harbour Town Golf Links in Hilton Head.
When asked on Wednesday following his morning Pro-Am if he’d be using the new, nostalgic BRNR Copper this week, McIlroy said, “I think so.”
“I like it,” McIlroy told GolfWRX.com on Tuesday regarding the BRNR. “This would be a good week for it.”
View this post on Instagram
According to Adrian Rietveld, the Senior Manager of Tour at TaylorMade, the BRNR Mini Driver can help McIlroy position himself properly off the tee at the tight layout.

Here’s what Rietveld told GolfWRX.com on Wednesday:
“For someone like Rory, who’s that long at the top end of the bag, and then you put him on a course like Harbour Town, it’s tough off the tee. It’s tight into the greens, and you have to put yourself in position off the tee to have a shot into the green. It kind of reminds me of Valderrama in Spain, where you can be in the fairway and have no shot into the green.
“I’m caddying for Tommy [Fleetwood] this week, so I was walking the course last night and looking at a few things. There’s just such a small margin for error. You can be standing in the fairway at 300 yards and have a shot, but at 320 you don’t. So if you don’t hit a perfect shot, you could be stuck behind a tree. And then if you’re back at 280, it might be a really tough shot into the small greens.
“So for Rory [with the BRNR], it’s a nice course-specific golf club for him. He’s got both shots with it; he can move it right-to-left or left-to-right. And the main thing about this club has been the accuracy and the dispersion with it. I mean, it’s been amazing for Tommy.
“This was the first event Tommy used a BRNR last year, and I remember talking to him about it, and he said he couldn’t wait to play it at Augusta next year. And he just never took it out of the bag because he’s so comfortable with it, and hitting it off the deck.
“So you look at Rory, and you want to have the tools working to your advantage out here, and the driver could hand-cuff him a bit with all of the shots you’d have to manufacture.”
So, although McIlroy might not be making a permanent switch into the new TaylorMade BRNR Mini Driver Copper, he’s likely to switch into it this week.
His version is lofted at 13.5 degrees, and equipped with a Fujikura Ventus Black 7X shaft.
See more photos of Rory testing the BRNR Mini here
- LIKE19
- LEGIT1
- WOW0
- LOL1
- IDHT0
- FLOP0
- OB1
- SHANK3
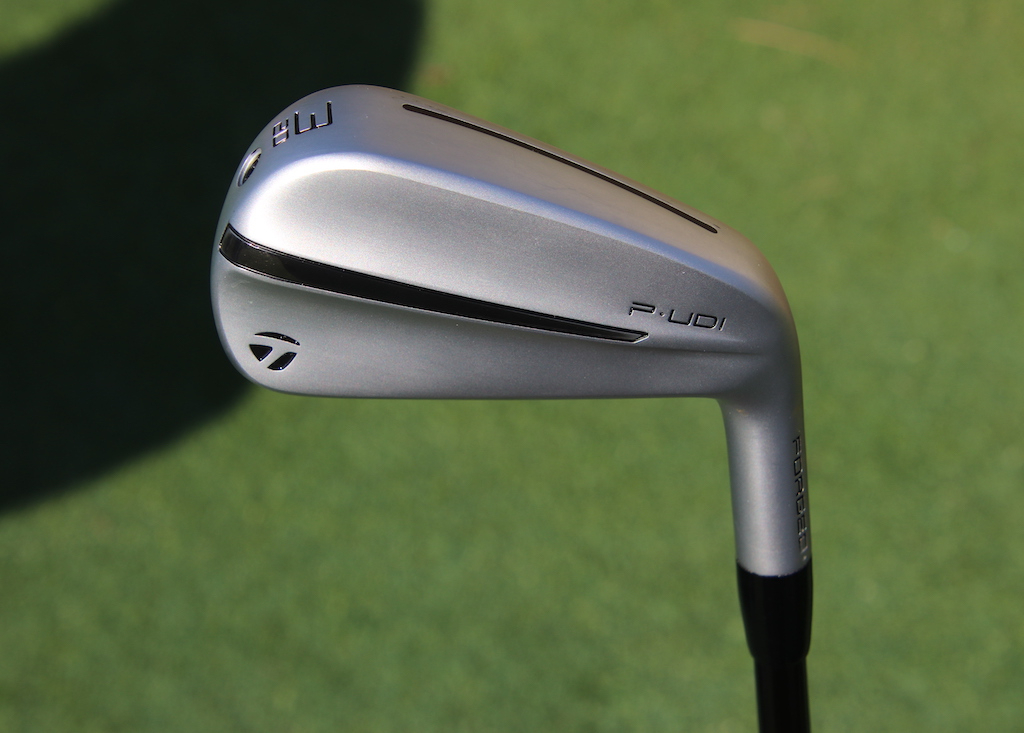
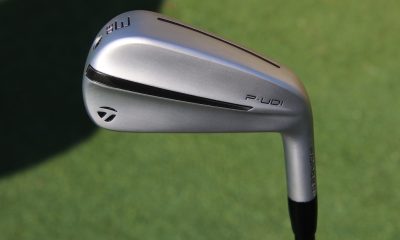
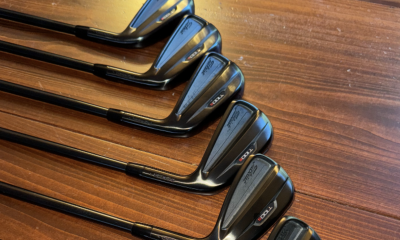
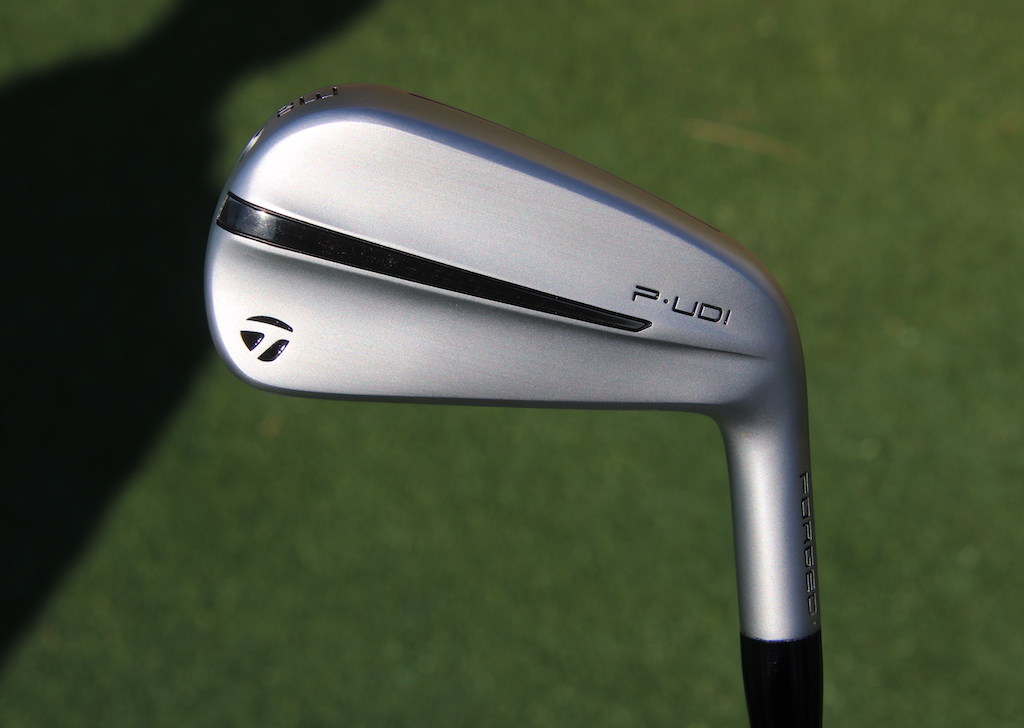
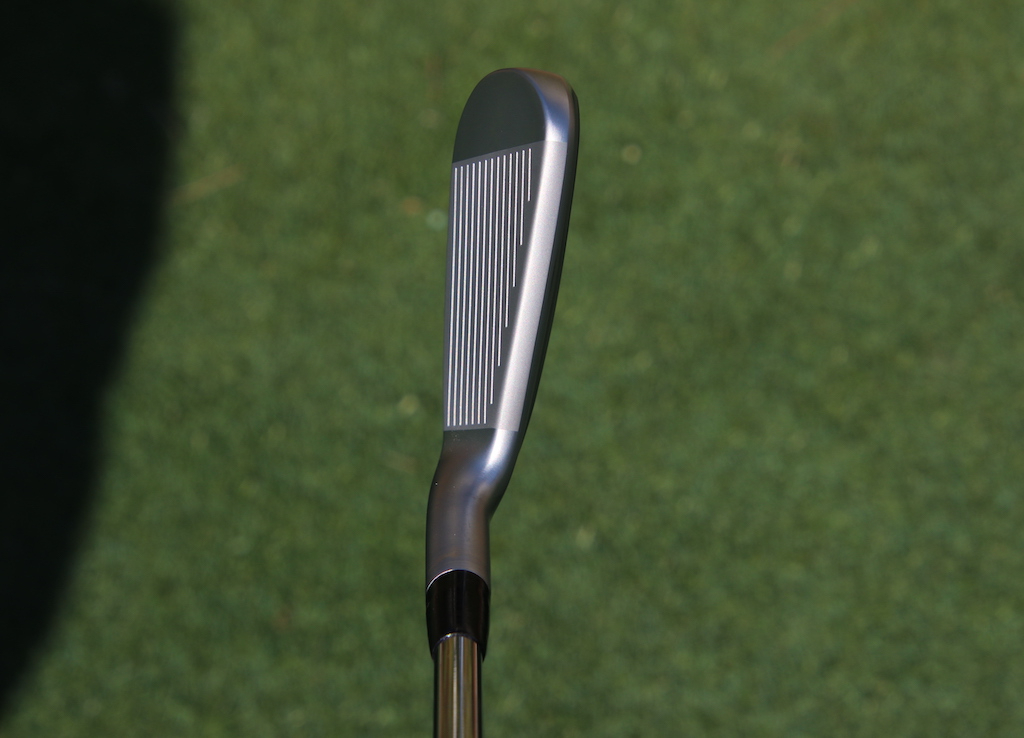
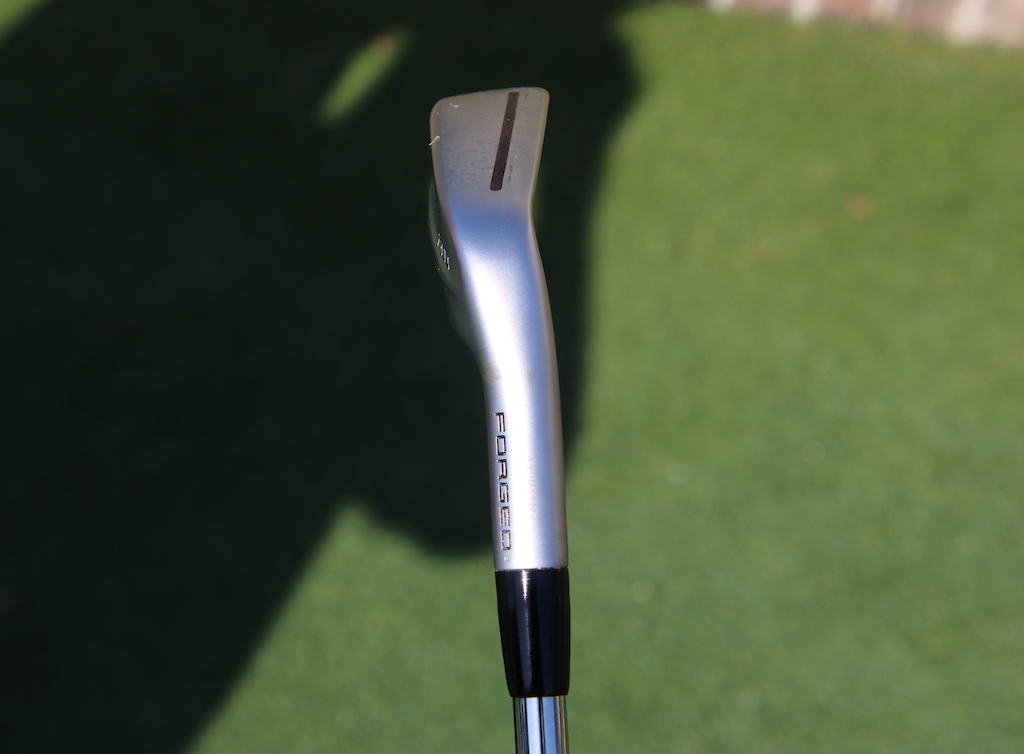
It seems like the RBC Heritage is full of new gear to be spotted, and you can add TaylorMade’s P-UDI utility irons to that list.
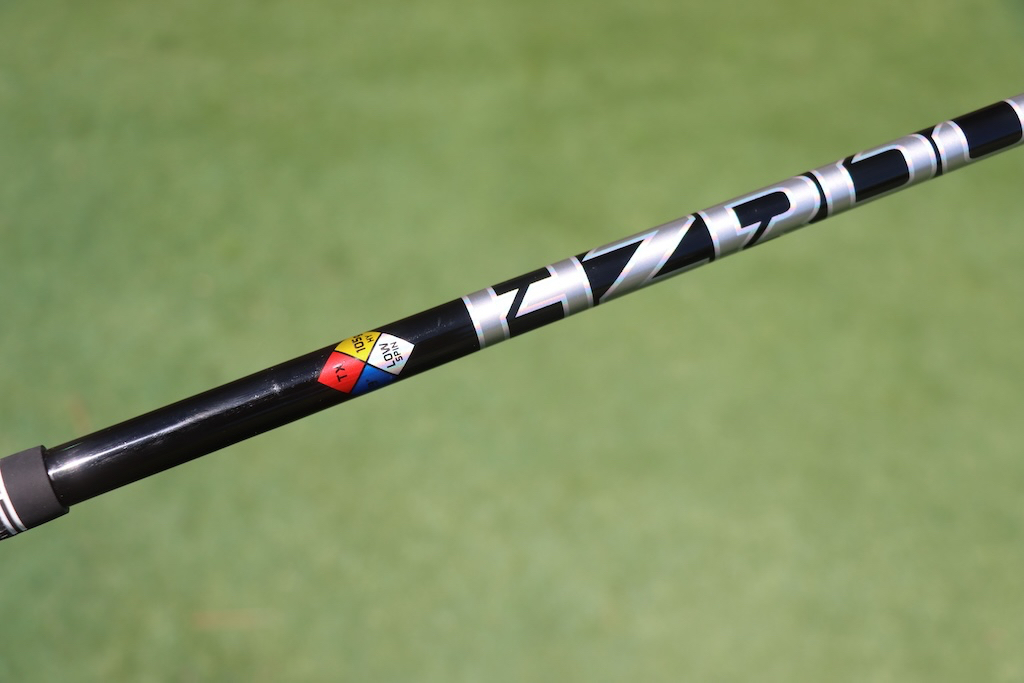
We spotted a 17-degree P-UDI 2-iron in Nick Dunlap’s bag yesterday, and now have some photos of both the 3- and 4-irons. Nick has his P-UDI 2-iron setup with a Project X HZRDUS Black 4th Gen 105g TX shaft.
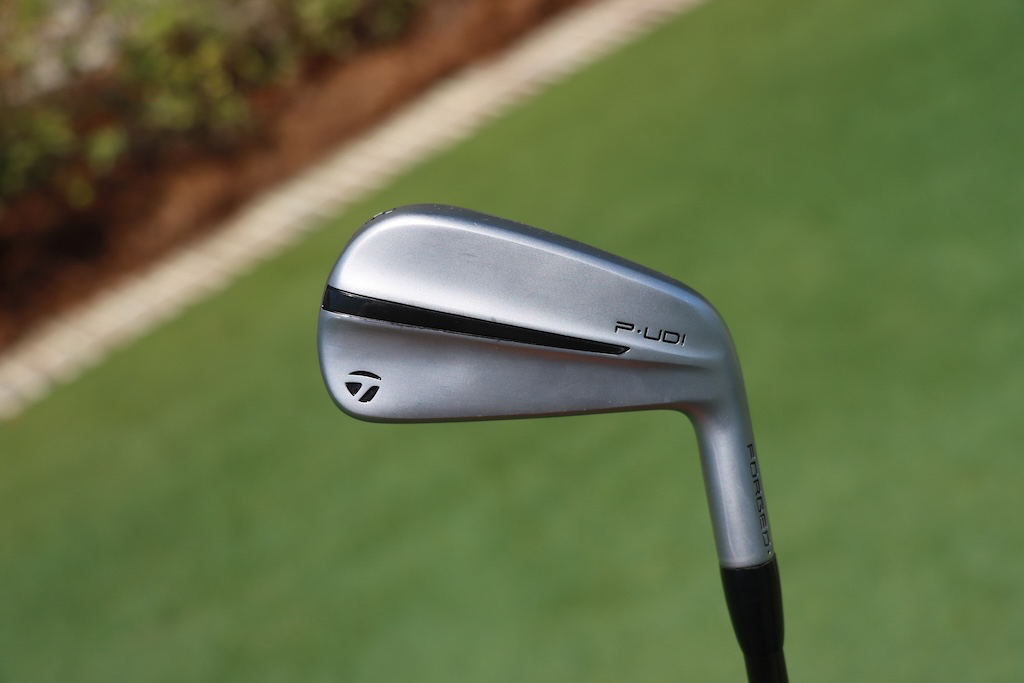
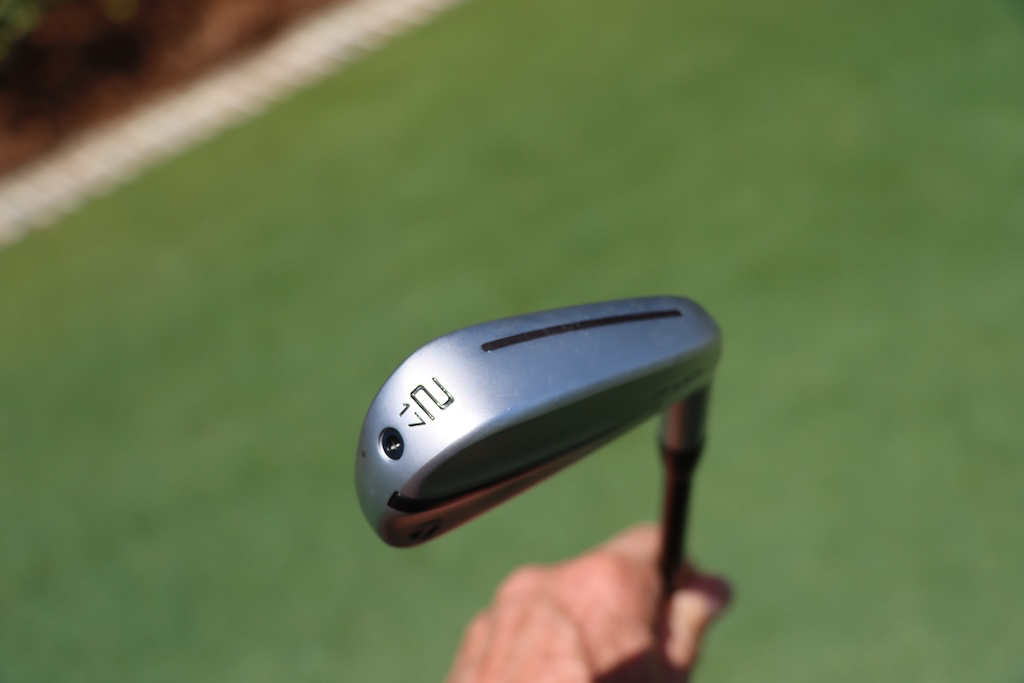
From what we can tell, this new P-UDI utility iron looks to have some of the usual TaylorMade technology as we can see the Speed Slot on the sole of the club for additional face flexibility. A toe screw is usually used to close off the hollow body design that will probably be filled with a version of TaylorMade’s Speed Foam that is present in the current iron lineup. This hollow body, foam-filled design should offer additional ball speed, soft feel, and sound, as well as an optimized CG for ball flight.
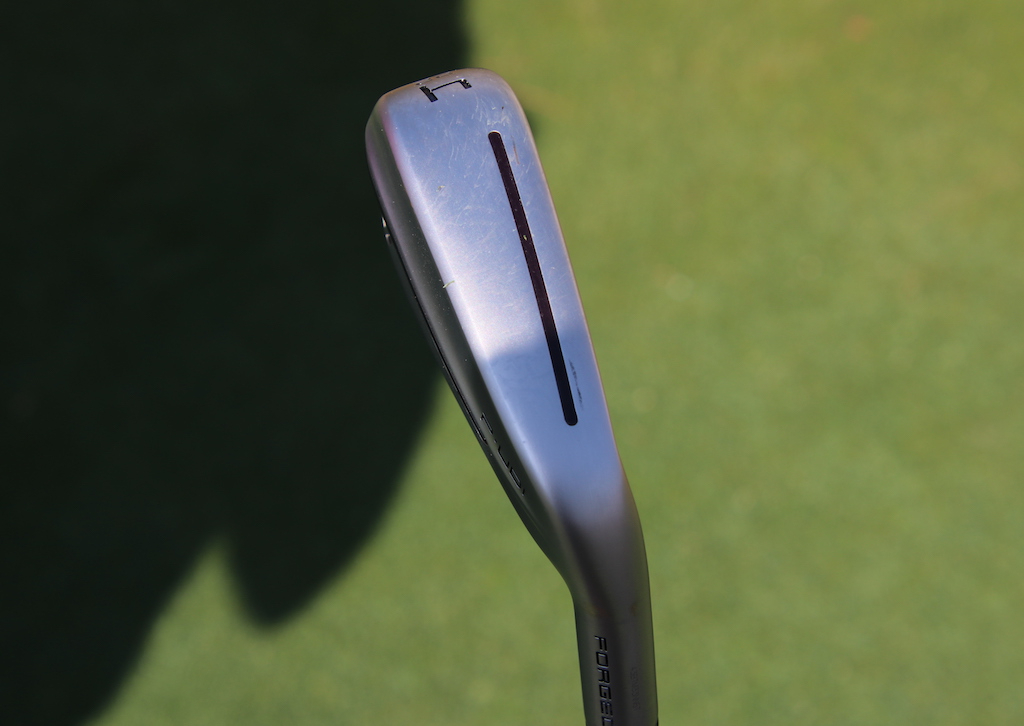
“Forged” is etched into the hosel, so we can assume that either the face, body, or both are forged for a soft and responsive feel. The club looks good from behind and at address, where we can see just a little offset and a topline that I would consider medium thickness. We don’t have the full details on what is under the hood or how many loft options will be available yet.
TaylorMade P-UDI 3-iron – 20°
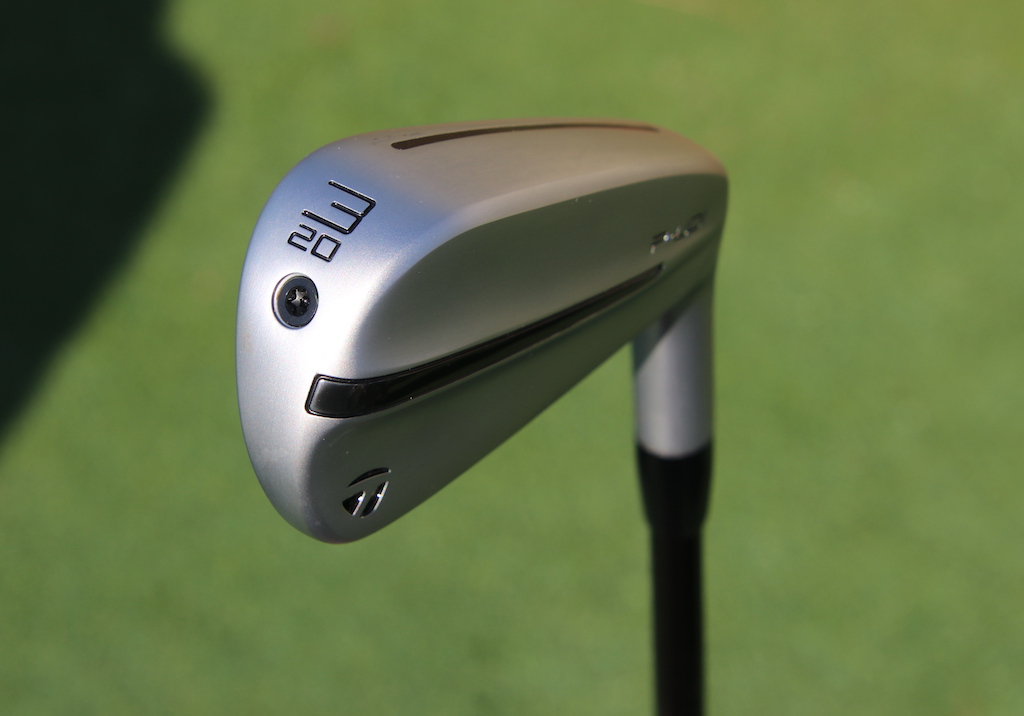

TaylorMade P-UDI 4-iron – 22°
- Check out the rest of our photos from the 2024 RBC Heritage
- LIKE12
- LEGIT1
- WOW3
- LOL0
- IDHT0
- FLOP1
- OB0
- SHANK1
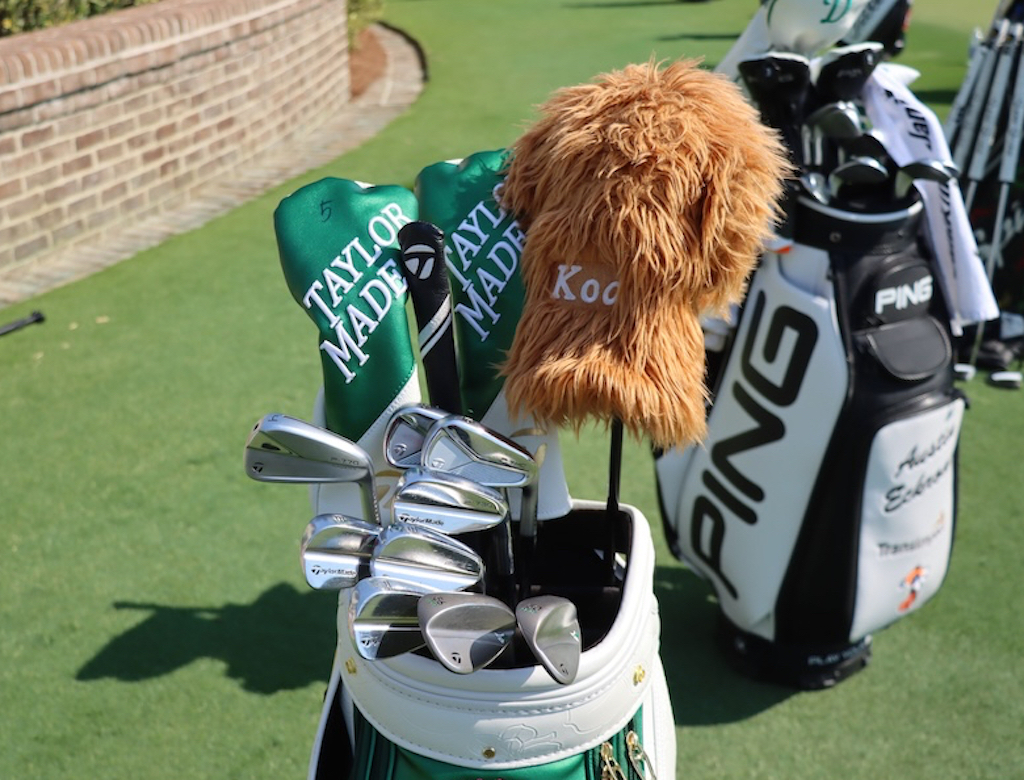
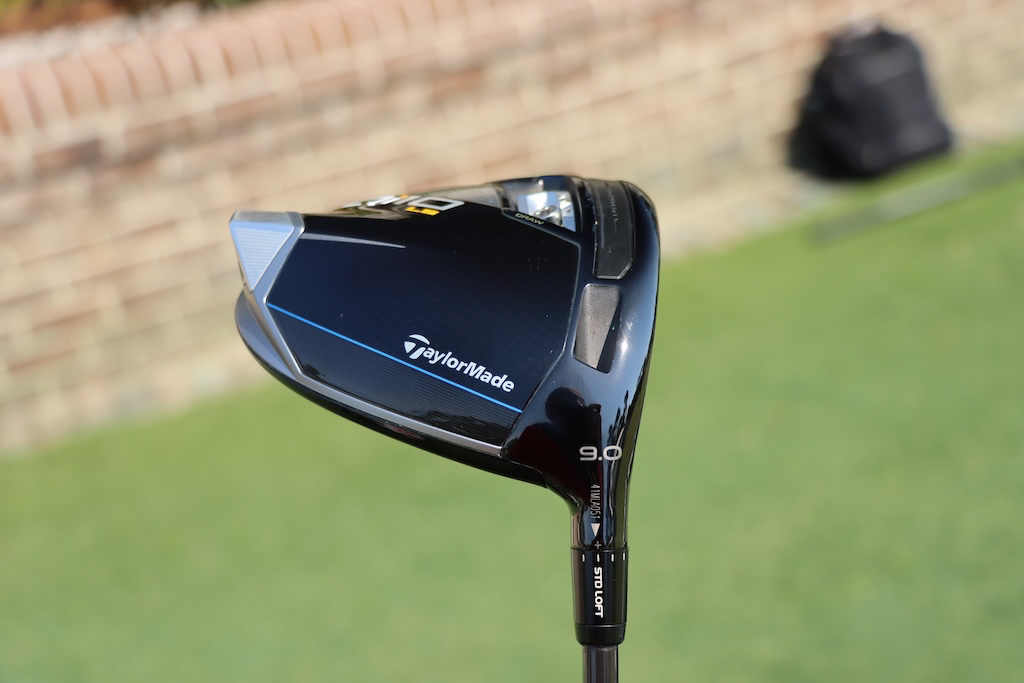
- Collin Morikawa what’s in the bag accurate as of the RBC Heritage. More photos from the event here.
Driver: TaylorMade Qi10 LS (9 degrees)
Shaft: Mitsubishi Diamana D+ Limited 60 TX (45 inches)
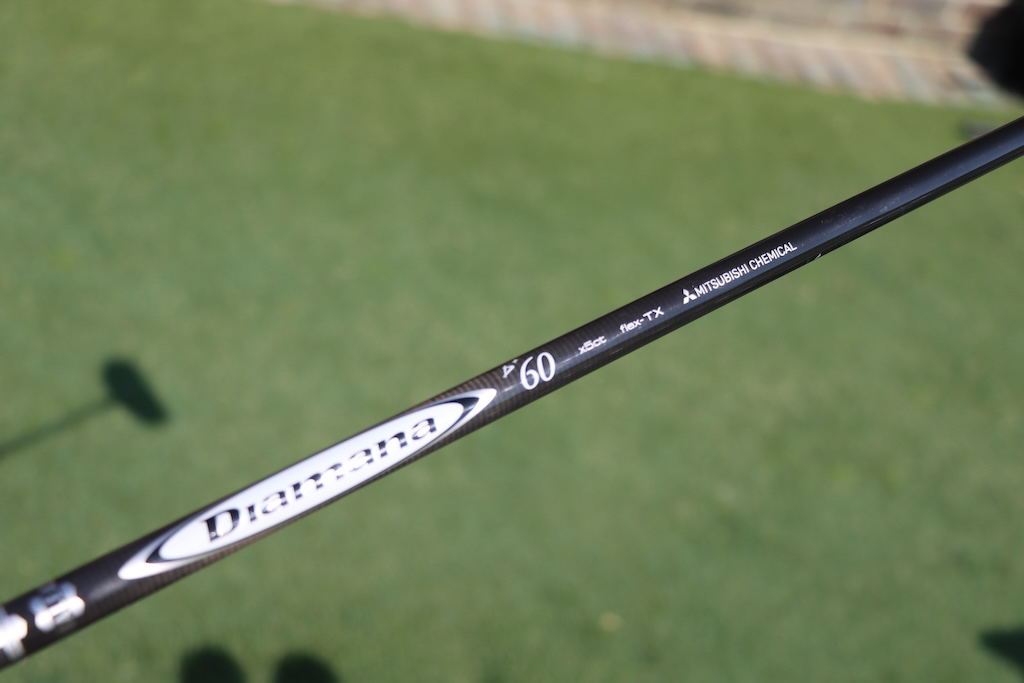
3-wood: TaylorMade Qi10 (13.5 degrees)
Shaft: Mitsubishi Diamana D+ Limited 80 TX
5-wood: TaylorMade Qi10 (18 degrees)
Shaft: Mitsubishi Diamana D+ Limited 80 TX
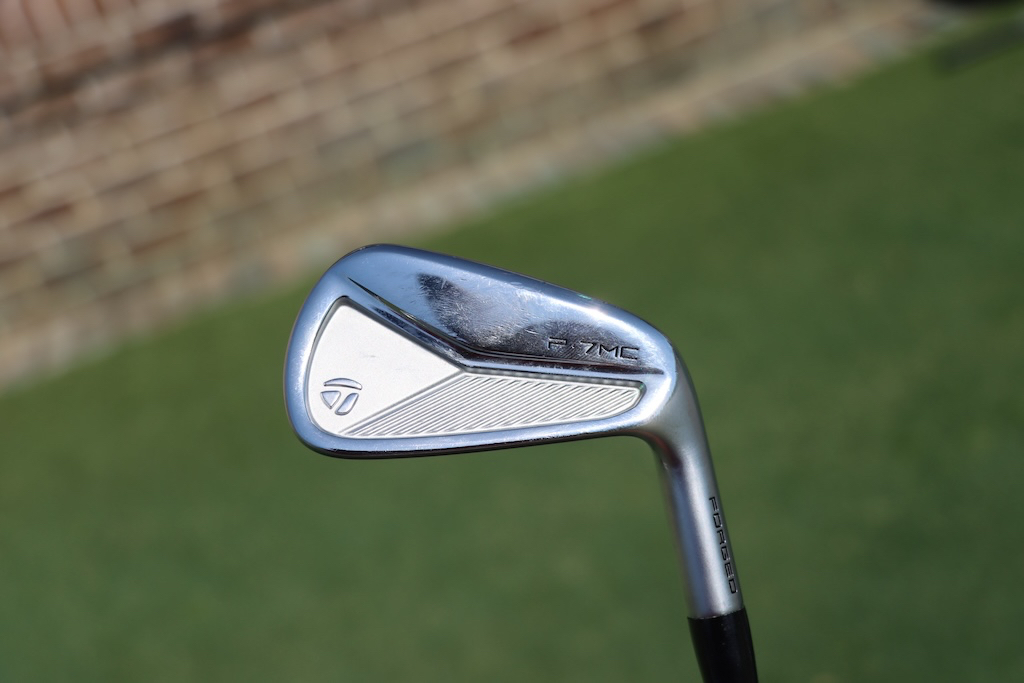
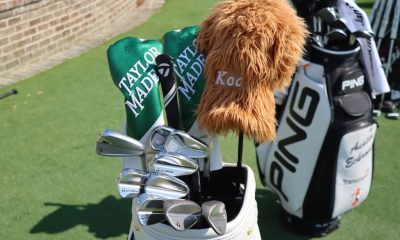
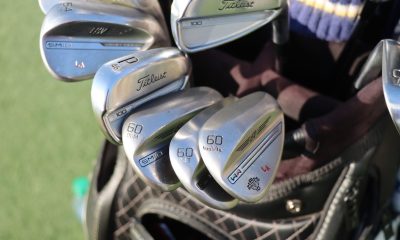
Irons: TaylorMade P770 (4), P7MC (5-6), P730 (7-PW)
Shafts: True Temper Dynamic Gold Tour Issue Mid 115 X100 (4-6), True Temper Dynamic Gold Tour Issue X100 (7-PW)
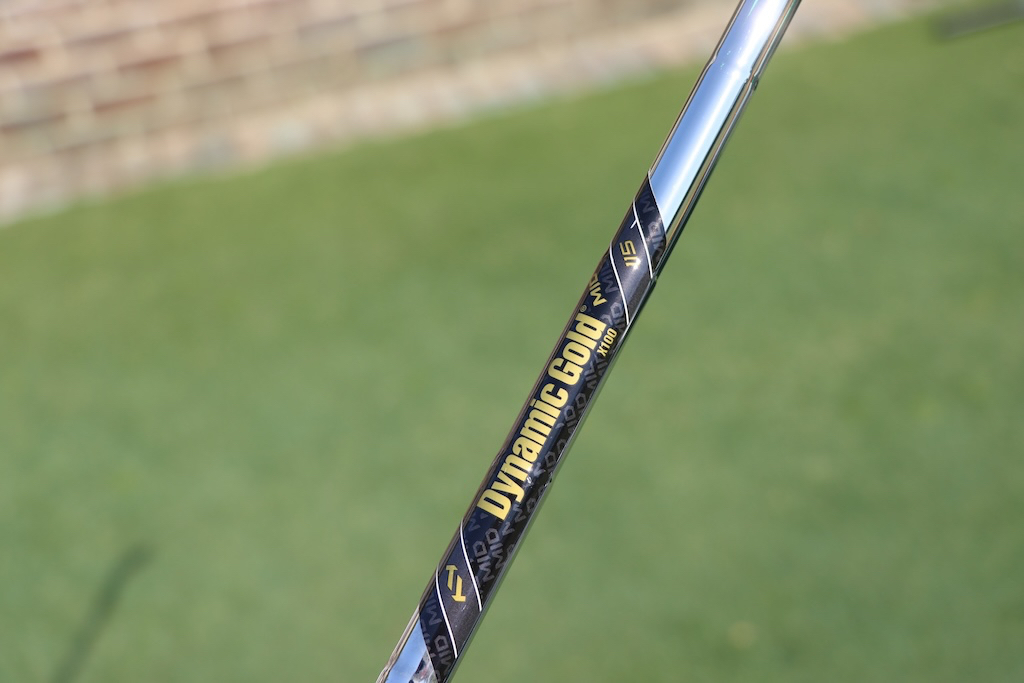
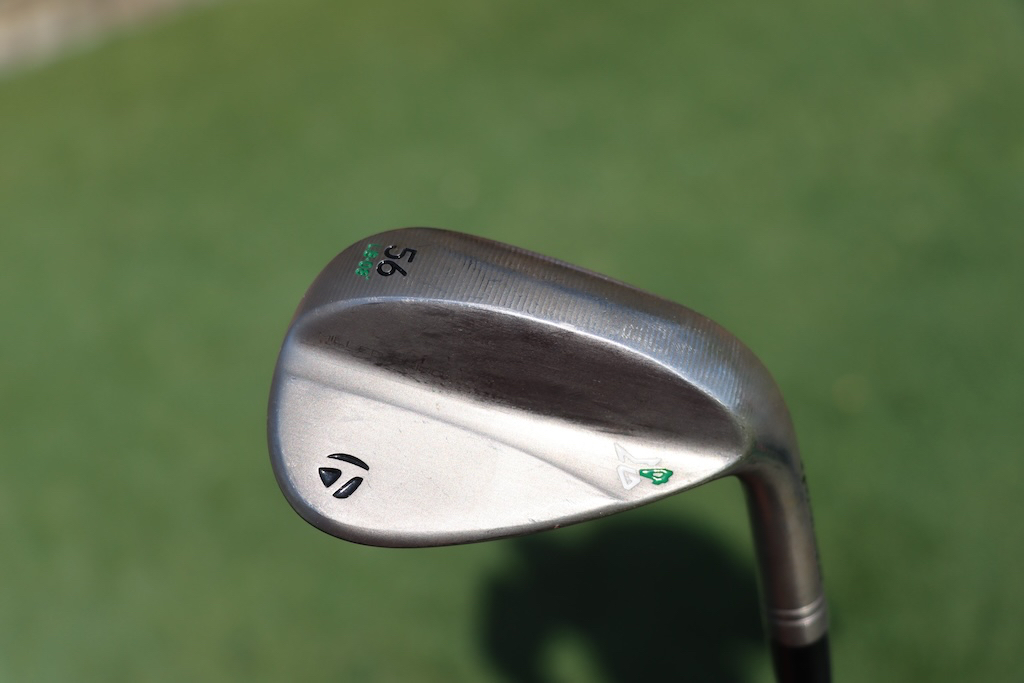
Wedges: TaylorMade MG4 (50-SB09, 56-LB08), TaylorMade MG4 TW (60-TW11)
Shafts: True Temper Dynamic Gold Tour Issue S400
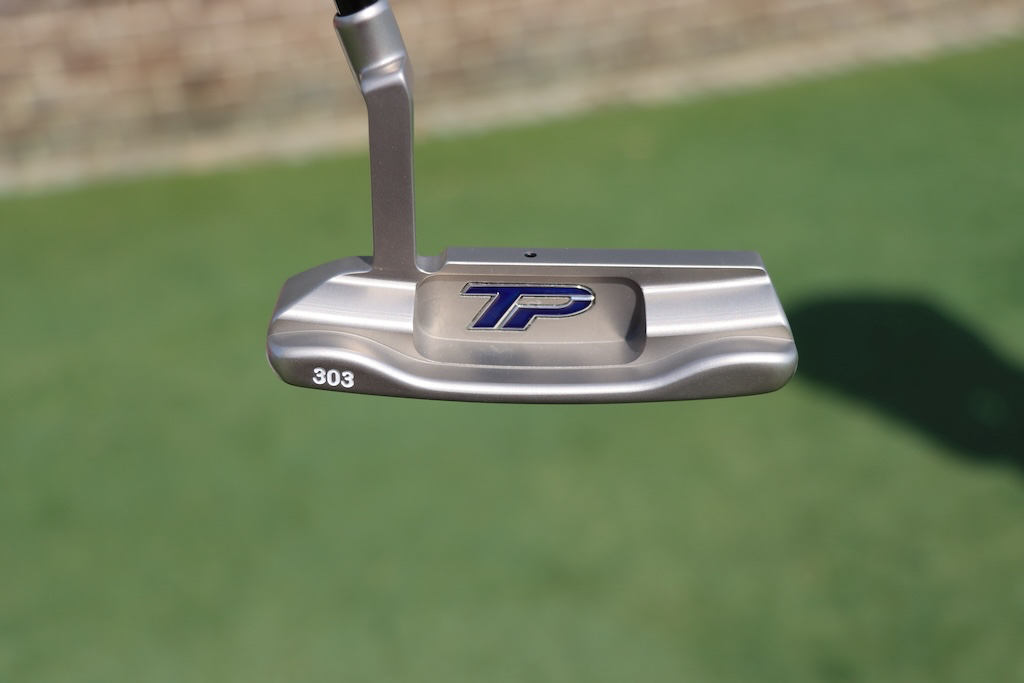
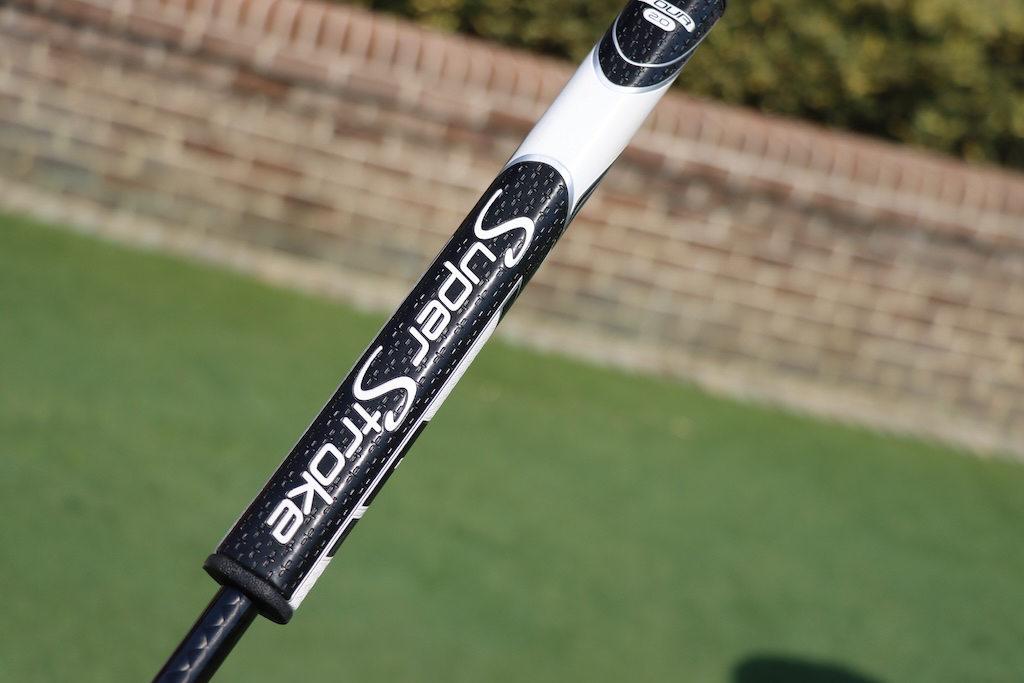
Putter: TaylorMade TP Soto
Grip: SuperStroke Zenergy Tour 2.0
Grips: Golf Pride Z-Grip Cord
Ball: TaylorMade TP5x
- LIKE4
- LEGIT0
- WOW1
- LOL0
- IDHT0
- FLOP0
- OB0
- SHANK1


Dave Portnoy places monstrous outright bet for the 2024 Masters

John Daly stuns fans into silence with brutal opening tee shot on PGA Tour Champions

Things got heated at the Houston Open between Tony Finau and Alejandro Tosti. Here’s why

Tiger Woods arrives at 2024 Masters equipped with a putter that may surprise you

Scottie Scheffler WITB 2024 (March)

Photos from the 2024 Arnold Palmer Invitational

Report: Tiger Woods has ‘eliminated sex’ in preparation for the 2024 Masters

Two star names reportedly blanked Jon Rahm all week at the Masters

Joaquin Niemann names 3 PGA Tour events he’d love to play each year ‘in a perfect world’

Spotted: Bettinardi irons at the Arnold Palmer Invitational

Collin Morikawa WITB 2024 (April)
Collin Morikawa what’s in the bag accurate as of the RBC Heritage. More photos from the event here. Driver: TaylorMade...


WITB Time Machine: Jordan Spieth’s winning WITB, 2022 RBC Heritage
At the 2022 RBC Heritage Jordan Spieth defeated Patrick Cantlay on the first playoff hole after nearly holing his greenside...


Jason Day WITB 2024 (April)
Jason Day what’s in the bag accurate as of the RBC Heritage. Driver: Ping G430 LST (9 degrees @10) Shaft: TPT...

Ludvig Åberg WITB 2024 (April)
Ludvig Åberg what’s in the bag accurate as of the RBC Heritage. Driver: Titleist TSR2 (9 degrees, D4 SureFit setting)...
-
 19th Hole1 week ago
Dave Portnoy places monstrous outright bet for the 2024 Masters
-
 19th Hole2 weeks ago
Things got heated at the Houston Open between Tony Finau and Alejandro Tosti. Here’s why
-
 19th Hole1 week ago
Tiger Woods arrives at 2024 Masters equipped with a putter that may surprise you
-
 19th Hole2 weeks ago
Report: Tiger Woods has ‘eliminated sex’ in preparation for the 2024 Masters
-
 19th Hole3 days ago
Two star names reportedly blanked Jon Rahm all week at the Masters
-

 19th Hole3 days ago
Neal Shipley presser ends in awkward fashion after reporter claims Tiger handed him note on 8th fairway
-
 19th Hole2 weeks ago
Addiction, spinal fusion, and scam artists – Everything Anthony Kim revealed in candid interview with David Feherty
-

 19th Hole2 weeks ago
Anthony Kim says doctors told him that he ‘may not have much time left’ ahead of LIV return
Jake
Sep 24, 2021 at 12:12 am
Outstanding write up on the experience. Wondering if you looked into or if anyone has any insight on Celebrity Greens or Southwest Greens and how their quality and pricing is vs what you installed?
Johnny Newbern
Sep 28, 2021 at 3:58 pm
Sorry Jake. I don’t know much about either company. They weren’t on my list.
AZgolf
Oct 2, 2021 at 8:32 pm
I used Southwest greens in my yard years ago. I’m in Phoenix, but they were fantastic, green rolls great and could not be happier.
Rootaford
Sep 16, 2021 at 9:21 pm
What do you do if your dog pee’s on the turf? I’ve heard some nightmare scenarios where dogs pee on the turf and it ends up really stinking up the area.
Barf the Mawg
Sep 16, 2021 at 10:39 pm
Or better yet, when I come over and get 17 beers deep and yak on it.
Johnny Newbern
Sep 17, 2021 at 9:06 am
Hahaha half man, half dog. You’re your own best friend.
We try to keep the dog off of the green for potty time and direct him to the real grass. But if it happens, I was told to just spray it down with a hose as soon as you can.
Adam Hermsdorfer
Sep 15, 2021 at 9:37 am
Solid article. Been thinking about a backyard putting green myself. Nice to hear about the process and the throughness. We’re down the street in Central TX, will definitely lookup Ideal turf.
gticlay
Sep 13, 2021 at 2:46 pm
Looks amazing. I’d love something like that. Another option would be to buy a “portable” (I mean moveable, not like it’s sooo easy to move) one like a large 8’x18′ Birdieball putting green in the extra thick option. Less than half the price, but 1″ hole drop for the ball and gets rave reviews. Plus if you move, it can move with you.
I used a 15 foot putting carpet in our downstairs all winter, with a knockoff of the puttout ramp, and it was tremendous for my putting stroke. Even though you have the holes, you might want to get one of the puttouts to use on your practice green.
Richard M Scott
Sep 10, 2021 at 2:29 pm
Just wondering what your final cost was?
Johnny Newbern
Sep 10, 2021 at 2:46 pm
The green ended up costing $2,600 based on the turf I chose. I also had to pay a bit more on top of that to a tree removal company for the initial landscaping work to clear the space.
Matt Miller
Sep 10, 2021 at 10:55 am
Johnny, great article. Curious what part of FW are you in. I live near TCU and I’m itching to pull the trigger. Thanks for the Ideal Turf recommendation. My cousin lives in Dallas and had one put in a couple months ago. He was not happy with his contractor but they eventually made it right. Good luck.
Johnny Newbern
Sep 10, 2021 at 12:22 pm
Hey Matt-
Thanks for the note! We are in SW Fort Worth not far from Mira Vista. I think you’ll have a good experience with Ideal Turf.
Joe
Sep 9, 2021 at 6:18 pm
Nicely written! I know just where I’ll put mine one day!!!
Richard Douglas
Sep 9, 2021 at 2:00 pm
Thank you so much. We’re closing on a new house in a couple of weeks and I intend to install a putting green. This article lets one know what to consider when doing it.
Johnny Newbern
Sep 9, 2021 at 4:56 pm
Happy to help, Richard! Good luck with the new home and green!