Instruction
5 simple drills for common golf swing flaws
I believe that teachers learn more from students than students learn from teachers, since they have a different perspective on how everything feels during the golf swing. And feel is arguably the most important part of building a golf swing that works.
With that in mind, I wanted to offer a few simple drills that students of mine have used for years to fix their issues. Funny enough, most of these drills came from student feedback on what they feel, and my response to those feelings.
To ALL my students, I say thank you for helping me to become a better teacher.
Hanging Back? Close your right eye
Hanging back, or failing to properly shift your weight, is an easy habit to fall into if you’re not careful.
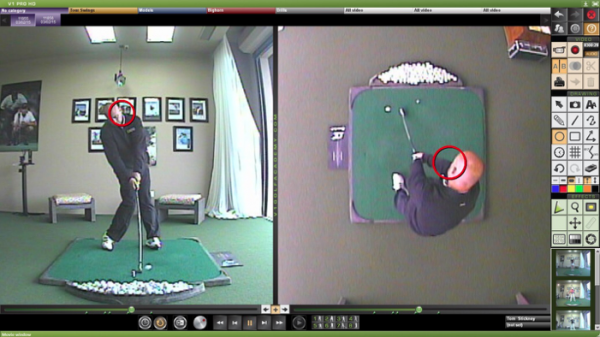
One of my students, Jack Li, gave me a great thought. He said he closed his right eye and hit a few balls to get a better feeling of staying more “on top” of the ball through impact.
Why does this work? Because if you fall back, you will lose sight of the ball on the downswing. This simple drill helps you feel how to stay more stacked through impact thus fixing your faulty pivot.
Restricted Hip Turn on Backswing? Pull your right foot back
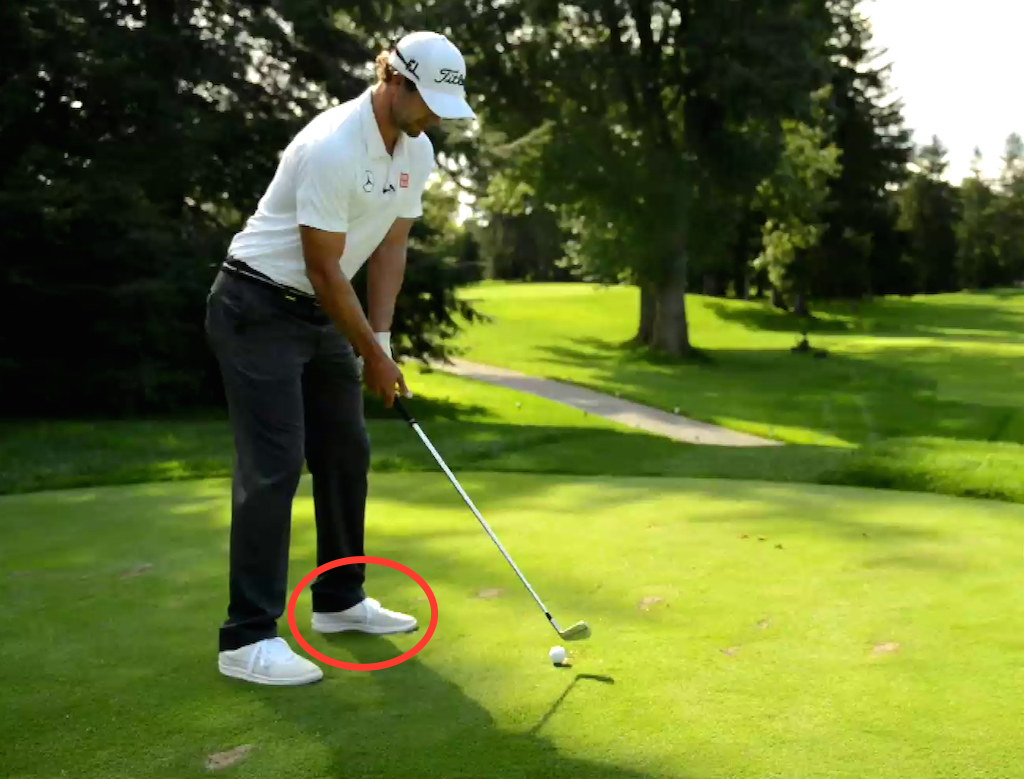
Whenever you pull your rear foot back at address and leave everything else square, it will encourage a freer hip-turn on the backswing. This helps you to turn a touch more on the way back.
Some people say that this “isn’t correct” and won’t do it on the course as they feel that they should align squarely to the target, but if you’re older or have trouble turning into your rear foot on the backswing, this position works wonders. You will get “into” your rear foot more than ever on the backswing — just make sure you move back through the ball or you will hit the ball fat.
Turning hips too much during the backswing? Pull your left foot back
The opposite reaction occurs when you pull your left foot back. This drill will restrict hip motion on the backswing and increase hip motion on the forward swing.
I use this drill for my over-flexible juniors and ladies who tend to spin themselves into the ground on the backswing. This gives them a feeling of tightness on the backswing and one that will help them to spring back through the ball more than ever before.
Can’t clear your hips? Turn left foot outward
This drill is awesome for the players who cannot seem to “clear” their hips on the downswing, and the ones who feel too little leg action through the impact zone.
This left foot position helps to restrict hip motion on the backswing and zips the hips through on the forward swing naturally. This position at address is a MUST for the older golfers who are losing distance due to an arms-only downswing.
Try this and I guarantee you will have a better feeling of how to move more efficiently on the downswing!
Too much hip slide on the forward swing? Turn left foot inward
This drill WILL stop you from sliding your hips on the way through the ball, but BE CAREFUL!
By turning the left foot inward, you will place some stress on your left knee if you hit full speed shots, so PLEASE only hit quarter-speed shots with this drill or you might hurt yourself.
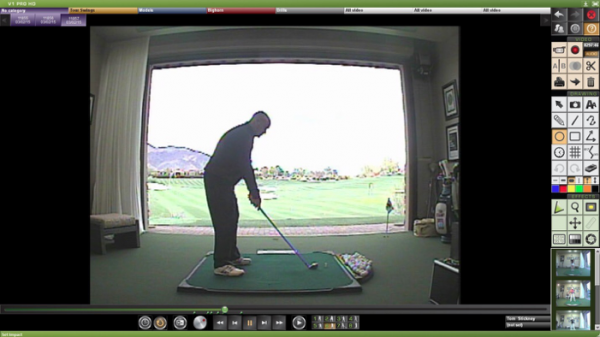
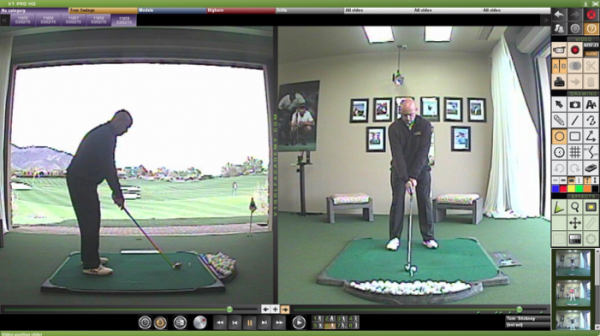
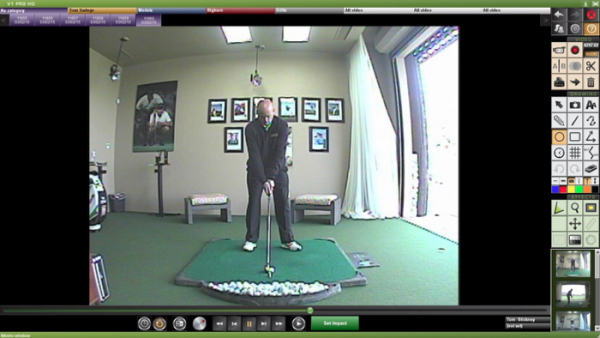
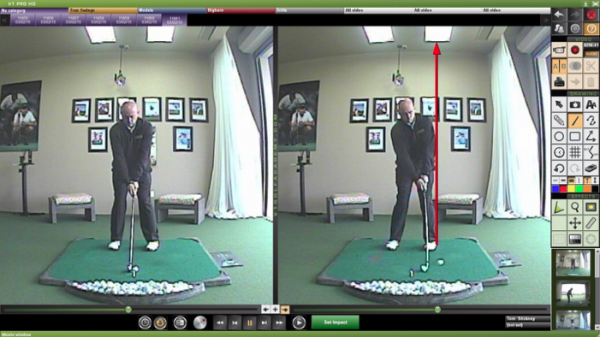
In the photo above, you can see I have turned in my left foot at address and on the impact photo on the right frame you’ll notice that I have not slid too far forward. This is due to the left foot’s position. It will restrict downswing hip slide.
For those of you who tend to get “soft in the legs” on the downswing, I suggest you give this drill a whirl. It just might help.
Remember that fixing things in your swing is all about knowing the feels, and using drills in the correct way to help accelerate the learning process.
- LIKE214
- LEGIT41
- WOW8
- LOL5
- IDHT3
- FLOP11
- OB7
- SHANK28
Instruction
Clement: Laid-off or perfect fade? Across-the-line or perfect draw?

Some call the image on the left laid off, but if you are hitting a fade, this could be a perfect backswing for it! Same for across the line for a draw! Stop racking your brain with perceived mistakes and simply match backswing to shot shape!
- LIKE0
- LEGIT0
- WOW0
- LOL0
- IDHT0
- FLOP0
- OB0
- SHANK0
Instruction
The Wedge Guy: The easiest-to-learn golf basic
My golf learning began with this simple fact – if you don’t have a fundamentally sound hold on the golf club, it is practically impossible for your body to execute a fundamentally sound golf swing. I’m still a big believer that the golf swing is much easier to execute if you begin with the proper hold on the club.
As you might imagine, I come into contact with hundreds of golfers of all skill levels. And it is very rare to see a good player with a bad hold on the golf club. There are some exceptions, for sure, but they are very few and very far between, and they typically have beat so many balls with their poor grip that they’ve found a way to work around it.
The reality of biophysics is that the body moves only in certain ways – and the particulars of the way you hold the golf club can totally prevent a sound swing motion that allows the club to release properly through the impact zone. The wonderful thing is that anyone can learn how to put a fundamentally sound hold on the golf club, and you can practice it anywhere your hands are not otherwise engaged, like watching TV or just sitting and relaxing.
Whether you prefer an overlap, interlock or full-finger (not baseball!) grip on the club, the same fundamentals apply. Here are the major grip faults I see most often, in the order of the frequency:
Mis-aligned hands
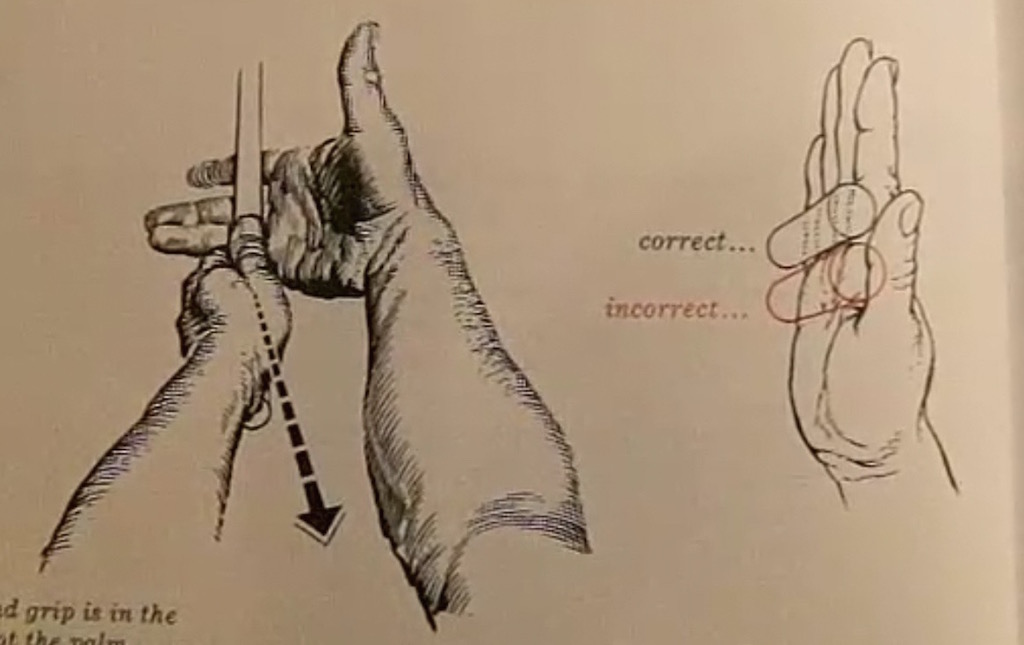
By this I mean that the palms of the two hands are not parallel to each other. Too many golfers have a weak left hand and strong right, or vice versa. The easiest way to learn how to hold the club with your palms aligned properly is to grip a plain wooden ruler or yardstick. It forces the hands to align properly and shows you how that feels. If you grip and re-grip a yardstick several times, then grip a club, you’ll see that the learning curve is almost immediate.
The position of the grip in the upper/left hand
I also observe many golfers who have the butt of the grip too far into the heel pad of the upper hand (the left hand for right-handed players). It’s amazing how much easier it is to release the club through the ball if even 1/4-1/2″ of the butt is beyond the left heel pad. Try this yourself to see what I mean. Swing the club freely with just your left hand and notice the difference in its release from when you hold it at the end of the grip, versus gripping down even a half inch.
To help you really understand how this works, go to the range and hit shots with your five-iron gripped down a full inch to make the club the same length as your seven-iron. You will probably see an amazing shot shape difference, and likely not see as much distance loss as you would expect.
Too much lower (right) hand on the club
It seems like almost all golfers of 8-10 handicap or higher have the club too far into the palm of the lower hand, because that feels “good” if you are trying to control the path of the clubhead to the ball. But the golf swing is not an effort to hit at the ball – it is a swing of the club. The proper hold on the club has the grip underneath the pad at the base of the fingers. This will likely feel “weak” to you — like you cannot control the club like that. EXACTLY. You should not be trying to control the club with your lower/master hand.
Gripping too tightly
Nearly all golfers hold the club too tightly, which tenses up the forearms and prevents a proper release of the club through impact. In order for the club to move back and through properly, you must feel that the club is controlled by the last three fingers of the upper hand, and the middle two fingers of the lower hand. If you engage your thumbs and forefingers in “holding” the club, the result will almost always be a grip that is too tight. Try this for yourself. Hold the club in your upper hand only, and squeeze firmly with just the last three fingers, with the forefinger and thumb off the club entirely. You have good control, but your forearms are not tense. Then begin to squeeze down with your thumb and forefinger and observe the tensing of the entire forearm. This is the way we are made, so the key to preventing tenseness in the arms is to hold the club very lightly with the “pinchers” — the thumbs and forefingers.
So, those are what I believe are the four fundamentals of a good grip. Anyone can learn them in their home or office very quickly. There is no easier way to improve your ball striking consistency and add distance than giving more attention to the way you hold the golf club.
More from the Wedge Guy
- The Wedge Guy: Golf mastery begins with your wedge game
- The Wedge Guy: Why golf is 20 times harder than brain surgery
- The Wedge Guy: Musings on the golf ball rollback
- LIKE86
- LEGIT13
- WOW6
- LOL1
- IDHT0
- FLOP4
- OB1
- SHANK8
Instruction
Clement: Stop ripping off your swing with this drill!

Not the dreaded headcover under the armpit drill! As if your body is defective and can’t function by itself! Have you seen how incredible the human machine is with all the incredible feats of agility all kinds of athletes are accomplishing? You think your body is so defective (the good Lord is laughing his head off at you) that it needs a headcover tucked under the armpit so you can swing like T-Rex?
- LIKE0
- LEGIT2
- WOW2
- LOL0
- IDHT0
- FLOP0
- OB0
- SHANK2
-

 19th Hole2 weeks ago
Dave Portnoy places monstrous outright bet for the 2024 Masters
-
 19th Hole3 days ago
Justin Thomas on the equipment choice of Scottie Scheffler that he thinks is ‘weird’
-
 19th Hole2 weeks ago
Tiger Woods arrives at 2024 Masters equipped with a putter that may surprise you
-

 19th Hole2 days ago
‘Absolutely crazy’ – Major champ lays into Patrick Cantlay over his decision on final hole of RBC Heritage
-
 19th Hole3 weeks ago
Report: Tiger Woods has ‘eliminated sex’ in preparation for the 2024 Masters
-
 19th Hole1 week ago
Two star names reportedly blanked Jon Rahm all week at the Masters
-
 19th Hole1 week ago
Report: LIV Golf identifies latest star name they hope to sign to breakaway tour
-

 19th Hole1 week ago
Neal Shipley presser ends in awkward fashion after reporter claims Tiger handed him note on 8th fairway











Pingback: Watch How To Build A Diy Furniture. Detailed Diy Furniture Plans And Instructions. - News and Updates
MBhimji
Mar 11, 2015 at 5:35 pm
An excellent article, 68 years old I am starting to go for some lessons and out on the Range, hopefully will break the elusive 97 that I am stuck on – bets rounds, thank you
Charlie
Mar 11, 2015 at 12:47 pm
I’m 68 and not that flexible anymore. If I turn pull my back foot back, putting me in a closed alignment, it restricts my turn to the front, hurting my lumbar spine area, and I can’t live with that. If I open my alignment by pulling my front foot back or turning the front toe more toward the target, it restricts my already-too-short backswing, wrecking my timing and hurting my lumbar spine area – and I can’t live with that either. So I do what I do, alignment fairly square with both toes angled out a bit. Even with that the golf swing still hurts me – so I take another Hydrocodone & Ibuprofen and go on with what I can do.
Jamie
Mar 10, 2015 at 4:40 pm
Nevermind me in general, I’m all confused.
Tom Stickney
Mar 10, 2015 at 3:25 pm
Tip 1…close the rt eye. If you hang back your head will rotate targetward on the way through and you will lose sight of the golf ball
nodoubles22
Mar 10, 2015 at 2:49 pm
For number 1, a right handed golfer should close the right eye. You want it to be so you would lose sight of the ball if you hang back and pull up and out of the shot. If you leave the right eye open, you can do this and still see the ball. If you close the right eye, your left eye can only continue to have the ball in its field of view if you stay in better position on top of the ball.
Jamie
Mar 10, 2015 at 2:39 pm
Regarding #1, a right handed golfer should close their left eye. It really helps you stay on top of the ball. By closing your right eye, I’d think it would make you more likely to keep your head back (hang back).
TR1PTIK
Mar 10, 2015 at 2:55 pm
Actually, a right handed golfer WOULD close their right eye. If you hang back with only the left eye open, you will lose sight of the ball.
Jamie
Mar 10, 2015 at 4:27 pm
Actually, Tom just corrected the article to say right eye.
antonio
Mar 10, 2015 at 2:25 pm
Great tips, thanks. Just confussed about number 1. Should you close right or left eye (for a right handed player)?
Lordmokoloko
Mar 10, 2015 at 2:19 pm
… Nice post and tips btw
Jake Anderson
Mar 10, 2015 at 2:18 pm
very good tips! nothing fancy, but spot on!
Lordmokoloko
Mar 10, 2015 at 2:18 pm
What are Adam’s shoes on the first photo?